{metacanonical:http://theprojectjunkie.com/guns-firearms-accessories/custom-made-kydex-holster.html}
Custom Made Kydex Holster


Here's and easy-to-make custom holster for concealment or inner-waistband (IWB) carry. This process can be used on real guns as well as most Airsoft guns, toy guns and other types of fake guns (As long as they can handle the heated Kydex). You can also use this process to create holsters for outer-waistband (OWB) carry just by modifying the belt clip. If anything, you'll learn a cool way to work with Kydex and how to thermal form it without any explensive tools.
The Holster cost around $10 to $15 dollars in materials, and your first one will take you around 2 hours to make.
Holster Materials
12" x 12" square of .093" standard Kydes Sheet
2- No. 6 flat-head screws (hex, Phillips, etc- doesn't matter)
2- No. 6 T-nuts (make sure the threads match the screws' thread)
2- No. 6 finish washers
1- 1/2" rubber stopper
3/16" balsa wood- Spacers for the gun. In other words I used it on parts of the gun I didn't want to touch the inside of the holster.
1/2" wide Blue Painter's Tape
Tools for Making the Holster and Working / Shaping the Kydex
You can use just about anything you want to shape the holster but here is what I used in this product.
Oven- I used a conventional convection oven.
Heatgun- The whole project can be done with a heatgun but it takes longer.
Gloves- I prefer cloth gloves but anything that will protect your hands from the heated Kydex will work (eg. a sock, heat mitten, etc.).
Drill- Plus drill bits that work with the T-nut and Screws (drill bit sizes don't have to be exact so I didn't post them)
RotoZip or Dremel- This is by far the fastest way I've found to shape my holsters, though it is real messy.
Sanding Block- I used 320 grit sand paper.
Note: I didn't use it in this project but I've used Fiskars 8" Titanium Nitride Soft-gripped snips with great results. If you don't have a Dremel or RotoZip this is a great alternative.
Vacuum with hose- For Thermal forming. I used a regular old upright with hose attachment- Shopvac or similar should work fine.
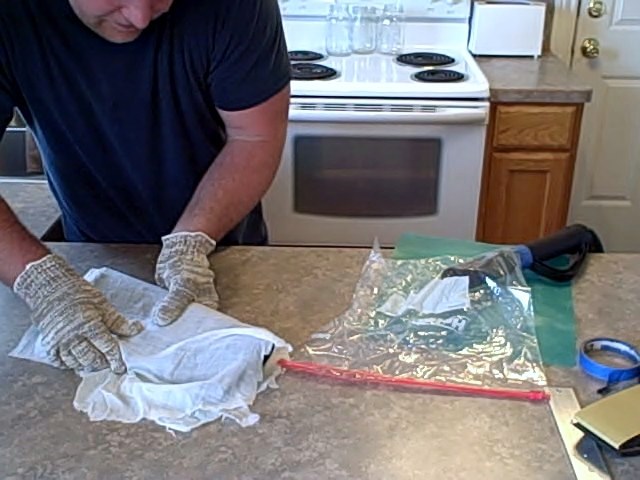
Jumbo Zipper Bag- This will be your vacuum bag for forming the Kydex around your gun. If you can find a jumbo freezer safe bag use it. The Regular ones tend to melt more easily when in direct contact with the heated Kydex.
Rag- I used an old sheet but any rag should work. It serves two purposes, it acts as a breather in the vacuum-bag and also protects the bag from melting.
Chapter 2 further below
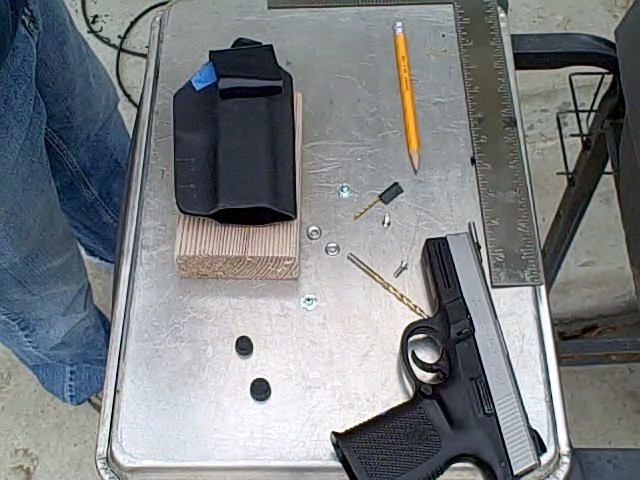
Getting the Gun Ready for Thermal-Forming
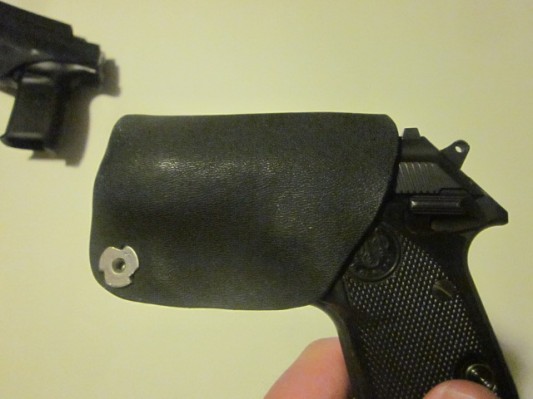
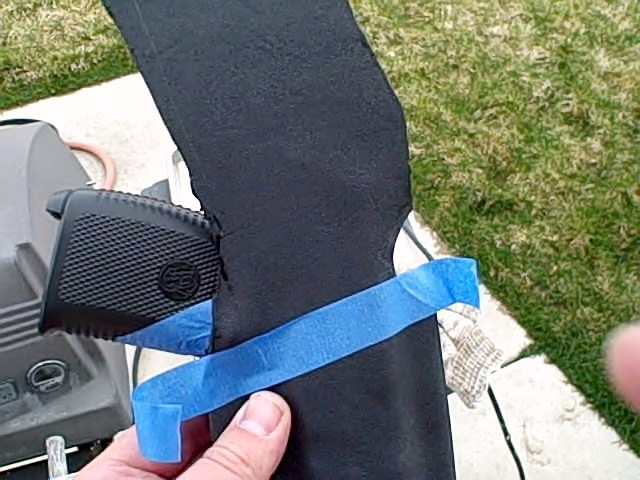
This step is critical because it keeps anything that you don't want to catch on the holster from touching it (like the front site). It also creates the tension points on your trigger-guard.
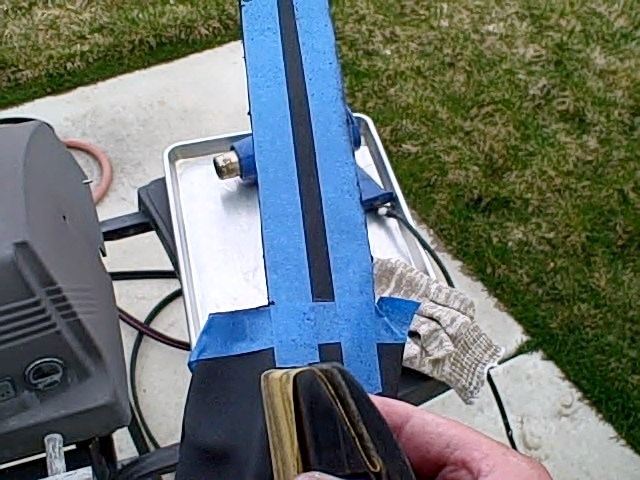
Start by cutting the balsa wood to fit the areas that you want to protect and for the tension points in-front of the trigger guard. Secure the wood with some blue tape. Make it as tight as you can but don't get too anal with it.
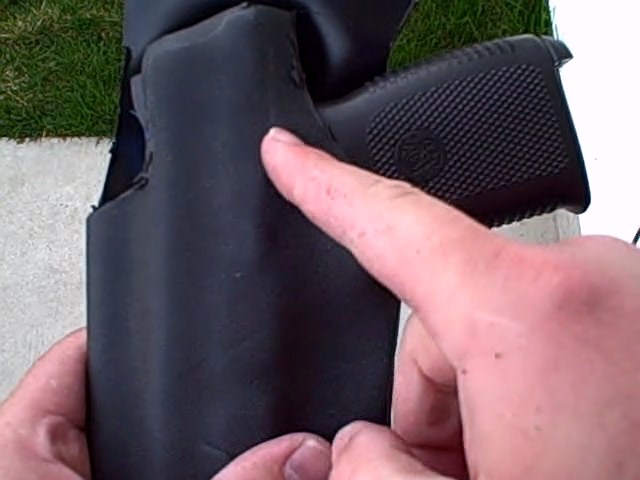
In the image below you can see how the front sight as clearance from the holster so it doesn't catch when drawing and holstering.
Thermal-Forming the Kydex
Cut a hole in the corner of you Zipper Bag and put the vacuum hose through the hole so that it is inside the bag. Secure the hose to the bag with tape. Open the bag so that it is ready to place the heated Kydex into it. Take a look at the zipper bag in the picture below and how it is setup.

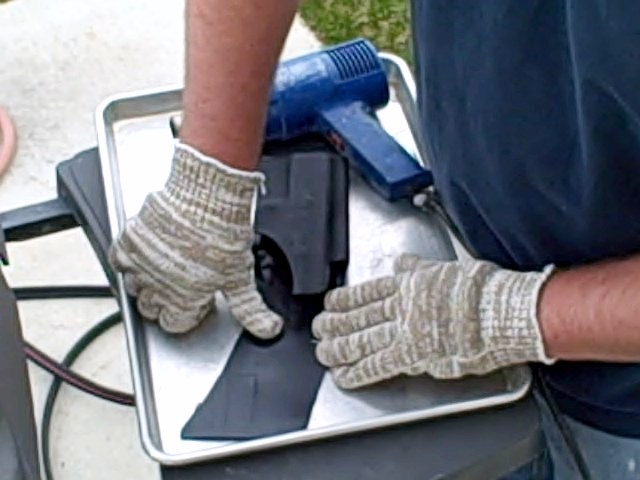
Heat the Kydex in the oven- Kydex can be Thermal-formed between 350 and 400 degrees Fahrenheit. I just split the different and went with 375 degrees. 3 minutes in the oven seemed to work good. I also used the flipside of a cookie sheet to hold the Kydex on the oven rack.
Take the Kydex out of the oven after 3 min or when flimsy and malleable. If you are using a heatgun be careful not to over heat the Kydex.
Wrap the Kydex around the gun with the textured side out.
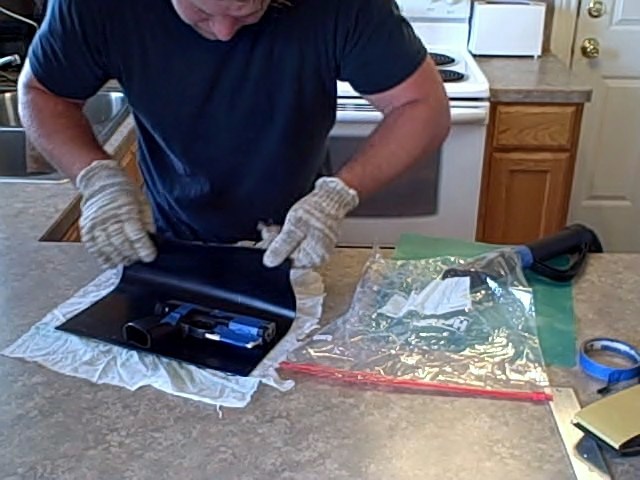
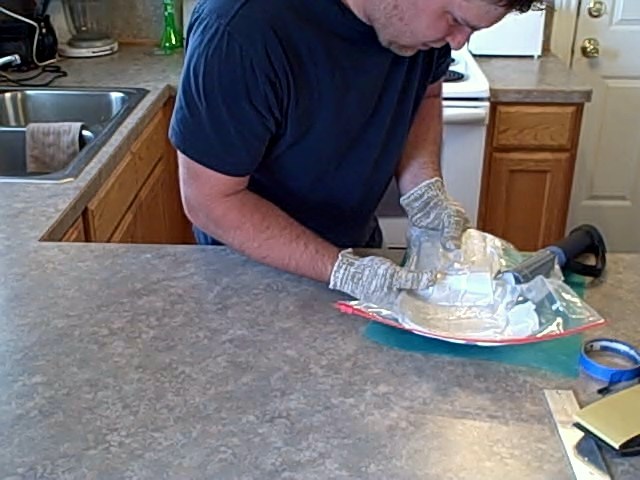
Wrap the Kydex with a rag and place it in the bag. Zip the bag and turn on the vacuum.
Note: any rag should work as long as it covers all of the heated Kydex. If the Kydex touches the bag directly the bag could melt and you'll need to start over. The rag also doubles as a breather so that the vacuum can pull all of the air out of the bag and you get a better thermal-formed Holster.
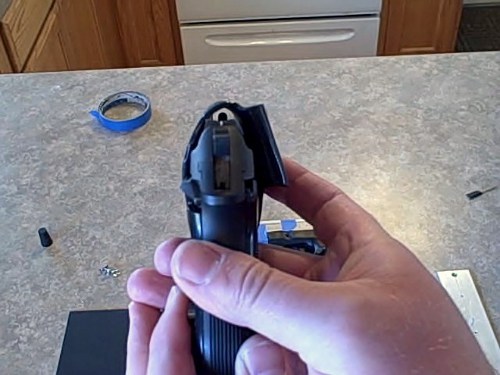
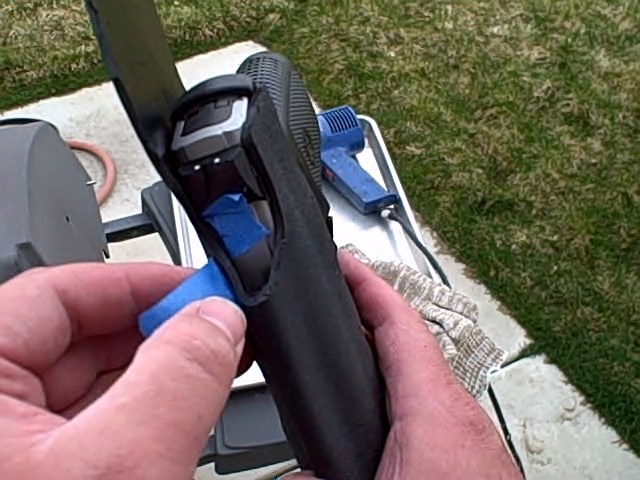
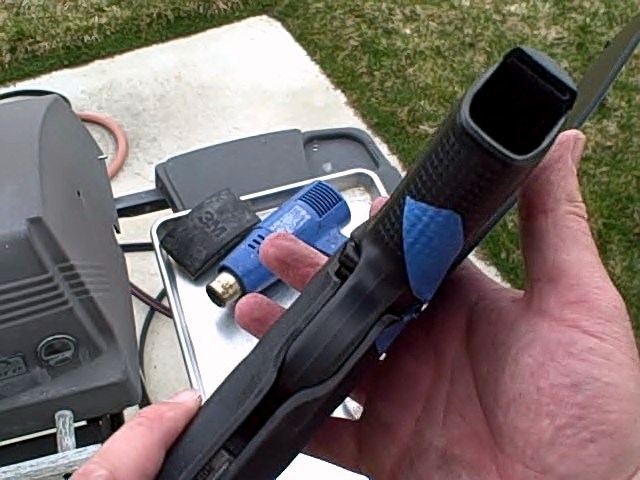
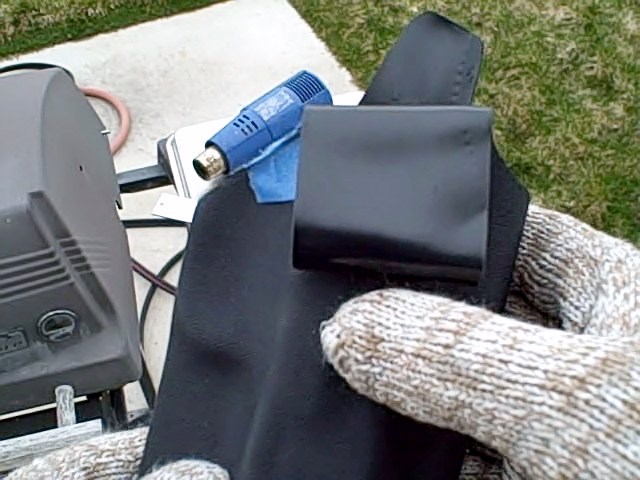
It helps to pull the Kydex tightly around the top of the gun and then pinch the tension point in front of the trigger guard.
Note: My left hand in the picture below you can see me pinching the tension point in front of the the trigger guard.
Let the Kydex cool and you'll be ready for the next step.
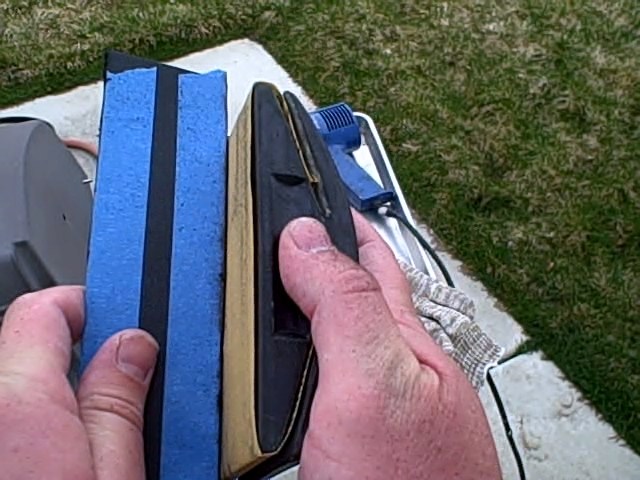
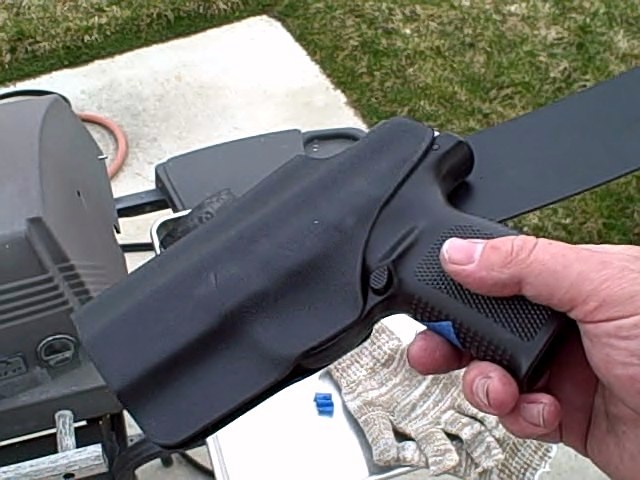
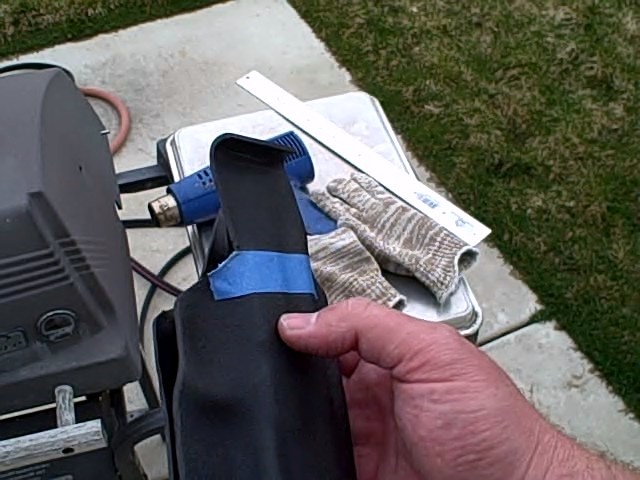
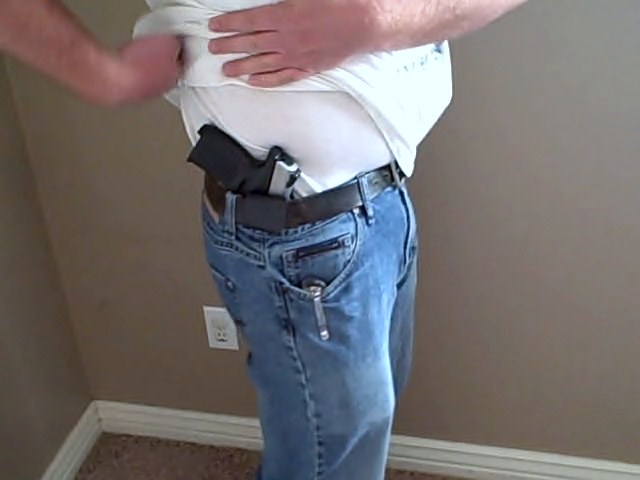
Find the Cant or Angle of Your Gun in Relation to Your Waistband
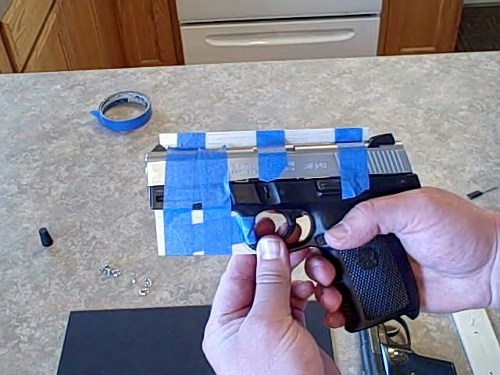
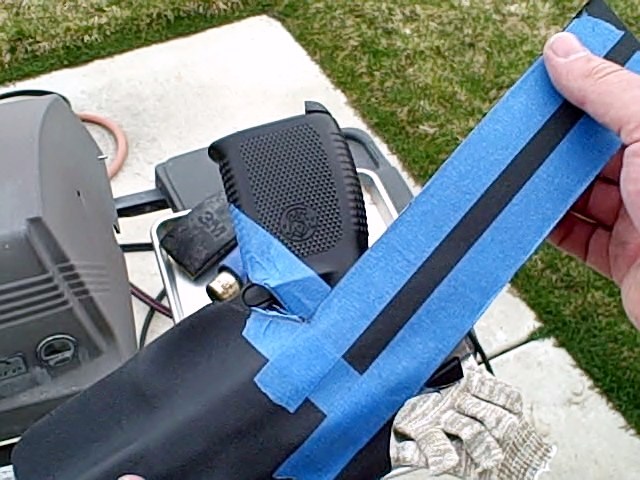
Put the Gun into your waistband and find the angle that works best for you. Follow your waistline on the gun with a piece of tape.
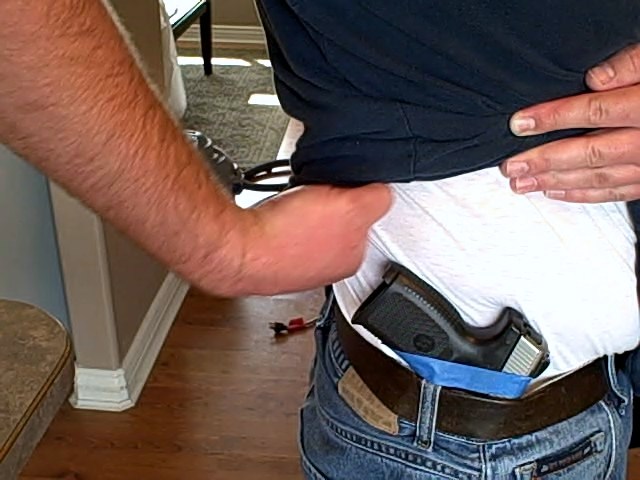
Note: To find the best cant make sure the gun is comfortable to walk, sit, and bend side to side with.
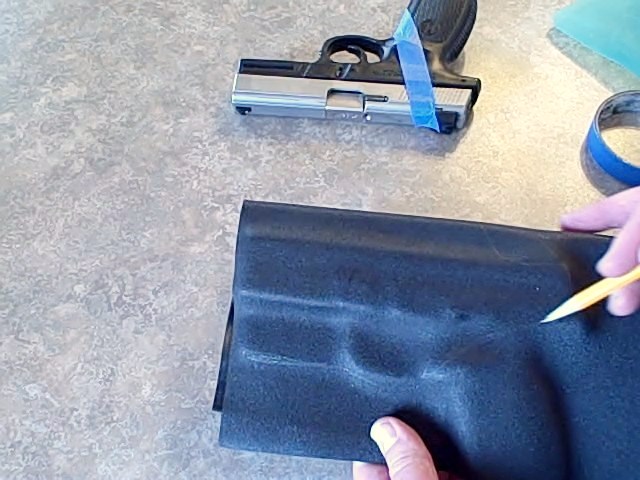
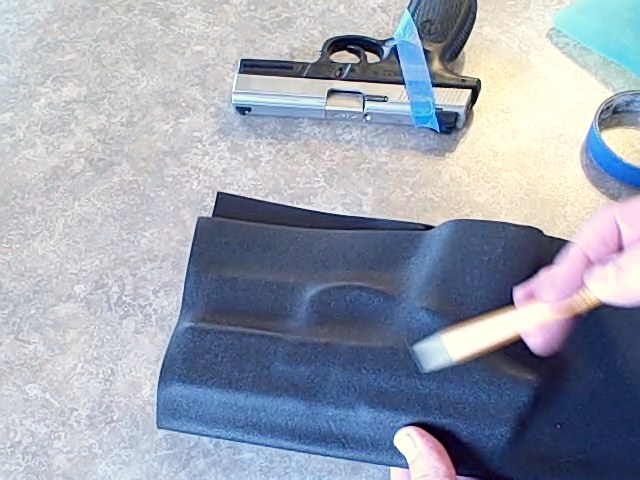
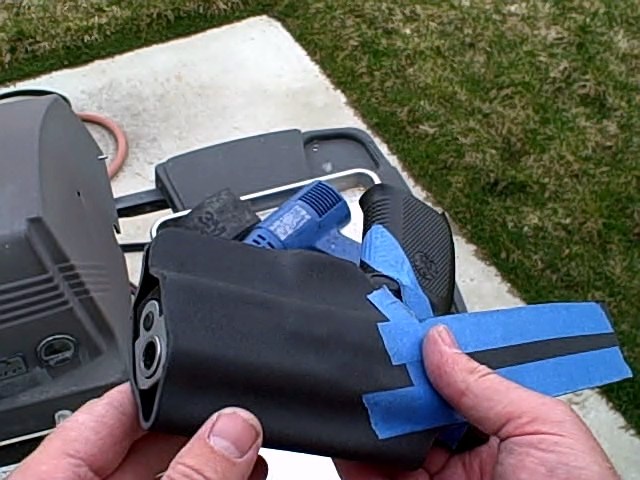
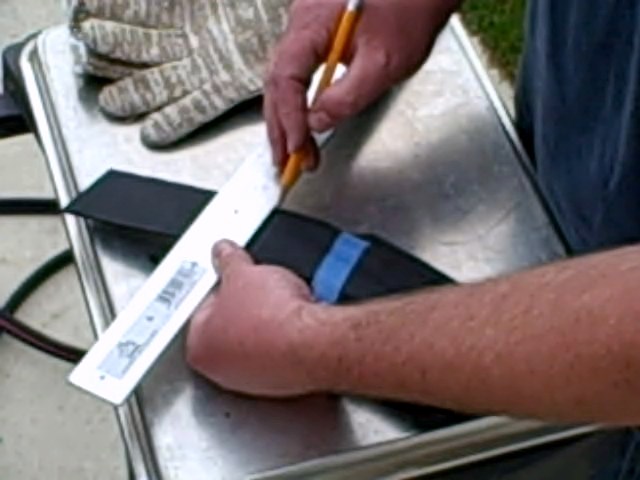
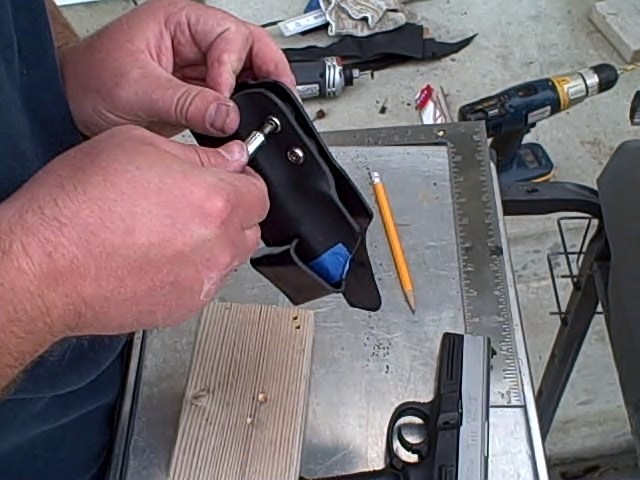
Trimming out the Holster
Use a pencil to trace out the areas you want to trim or cut away. The pencil lines in the pictures below may be hard to see but hopefully you'll get the idea.
Make sure you leave a strip of Kydex for the belt clip. Also make sure you put the belt clip on the correct side of the holster.
Note: It is the side of the gun with the tape.
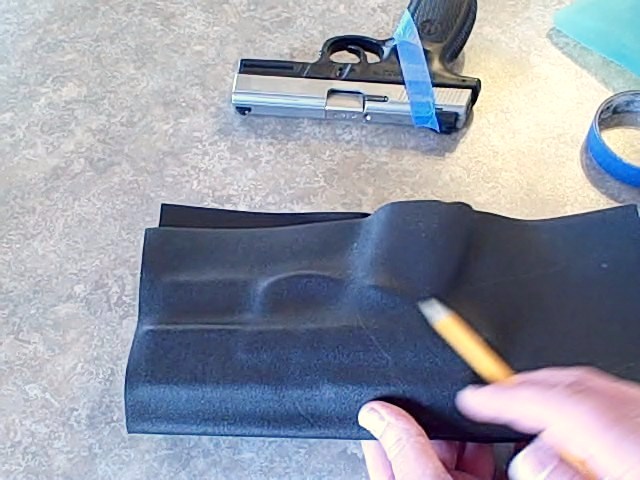
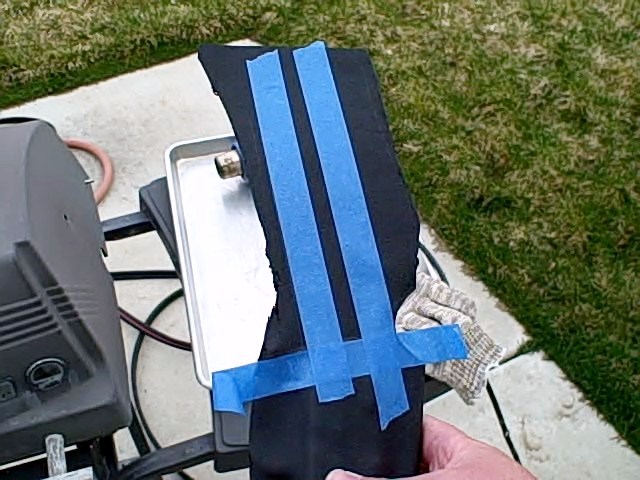
For the rough cut just mark the cant line as close to the same angle as the one on the gun. I used a blurry pencil picture on purpose so you could see that I'm matching up the cant line as close as I can eyeballing it. We'll get the actual line later in the process.
Now draw two lines perpendicular to the cant line. I like my belt clips to be around 2" wide, however, for the rough cut I'll make it about 3" wide.
Note: I am drawing the belt clip line to about where the cant line and the bottom of the slide rail meets up; and then making it 3" wide. However, you can put your belt clip where-ever you like. Just realize that it may change how the gun is positioned while on your hip. In other words if you were looking down on your gun in the holster inside your waistband the guns grip may be swinging further out or further into your side depending on where your belt clip is positioned.- I hope that made sense.
Trimming out the Holster
Rough Cutting the Holster
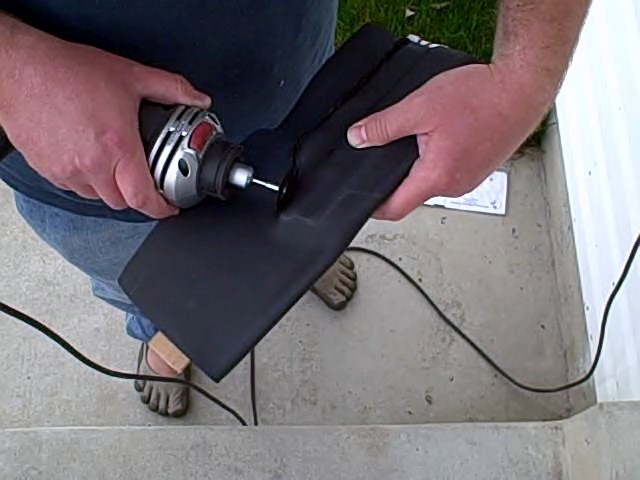
Now is the time to use your RotoZip, Demel, Fiskars, or whatever to cut out your holster. I sandwiched some cardboard in-between the Kydex halves so that I didn't cut into the side of the holster opposite of the one I was working on.
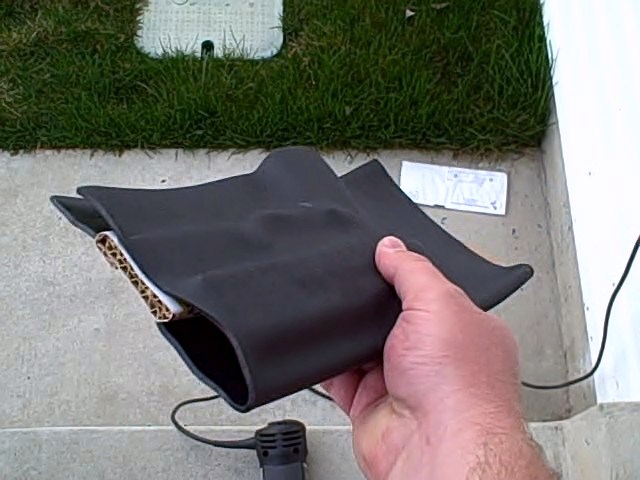
While rough cutting it is better to not cut enough away than too much. Just don't cross your pencil line in the wrong direction. 
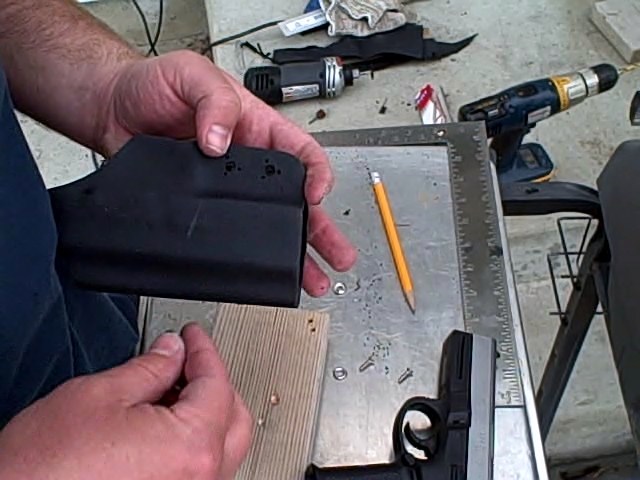
Here is a picture of the rough cut finish.
Trimming the holster
I changed from the cutoff wheel to the small drum sander.
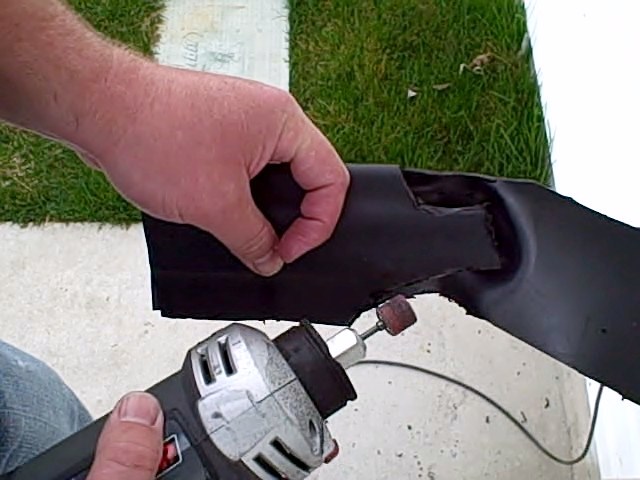
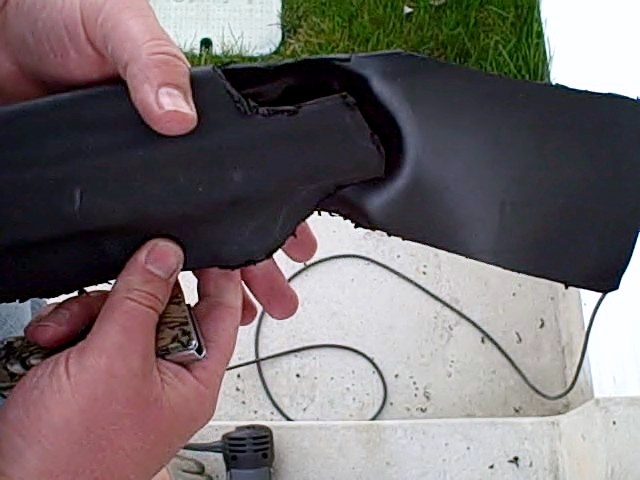
The gun may still catch on the the Kydex that bent around the gun during thermal forming (note the pencil lines). You can also see In the picture below that I am pointing to areas of the holster that still need trimmed up. I will use the drum/spindle sander on the RotoZip for the next stage of trimming.
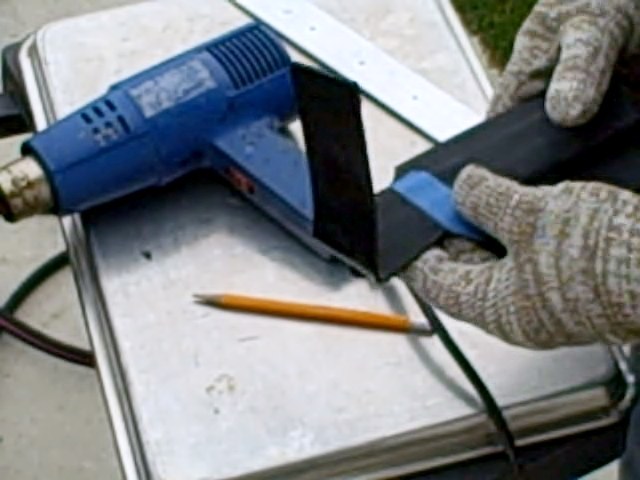
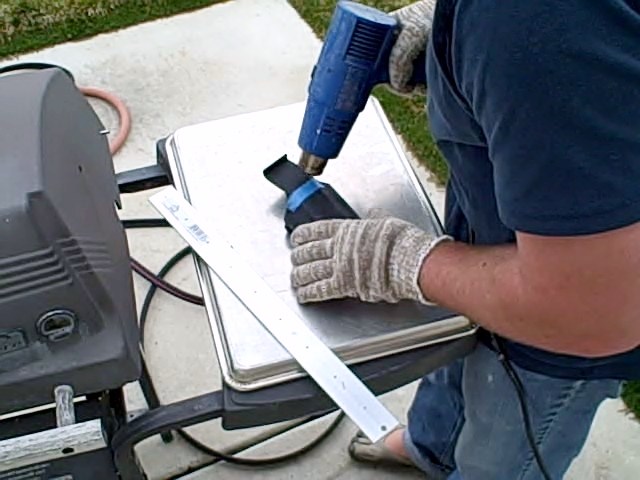
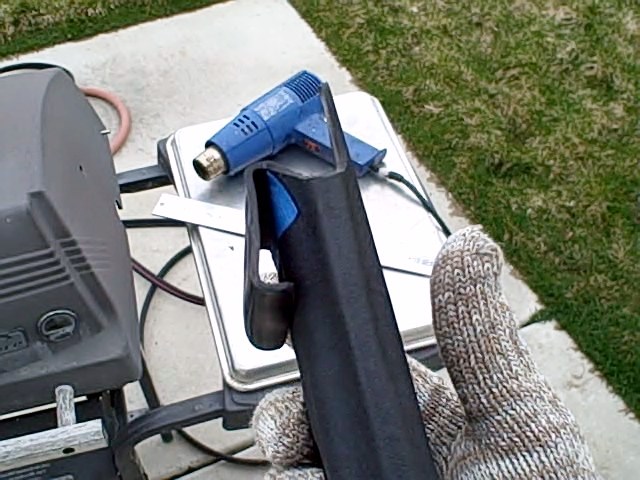
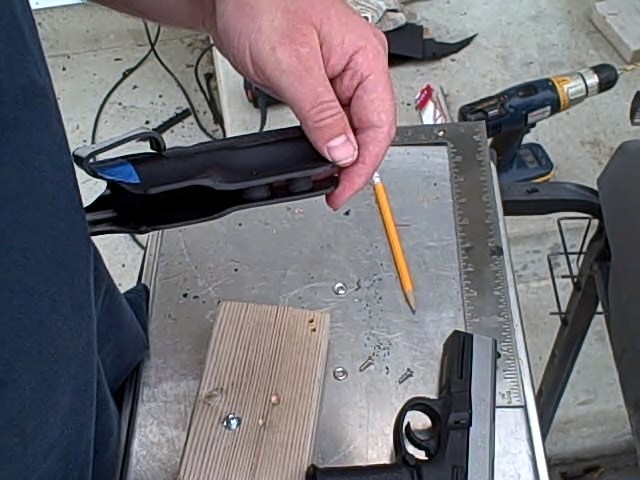
Flattening the Belt Clip
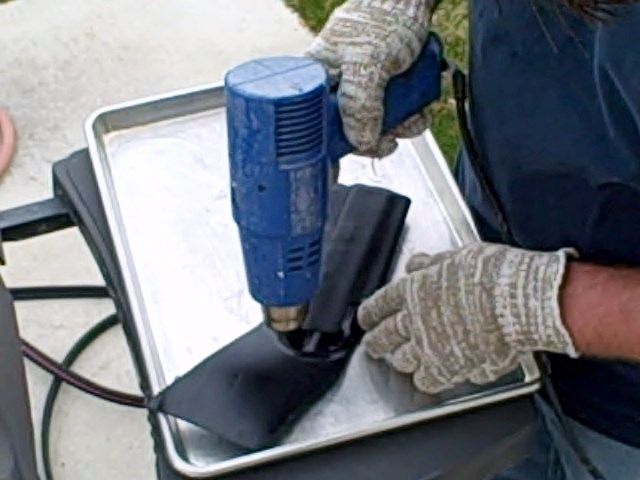
Useing the heatgun I heat up the belt clip area so that I can flatten it.
Shaping and Trimming the Belt Clip
The first thing that we need to do is match the cant line from our gun to the holster.
Now we need to find the lines or edges of the belt clip (in other words the belt clip's width). I think an adequate size is between 1.5" to 2". However, you can make it whatever size you want. I didn't use a ruler here, I just went with what I felt looked good. I like to make my belt clip lines as perpendicular to the cant line as I can.
Now follow the tape lines and cut out the excess Kydex.
I used the sanding block to clean up the belt clip edges.
Here is a picture of a trial fit. Notice how the gun's and holster's cant lines match up.
Final Trimming and Holster Cleanup
Now that the holster is cleaned up and looking good, it's time to finish the belt clip.
Finishing the Belt Clip
Start by drawing a bend radius line above and parallel to the cant line. I like about a 1/4" bend radius but you can make that whatever size you like. Basically the bend radius should be determined by the thickness (not the width) of you belt. You'll notice that I am using a 1.5" wide piece of aluminum for the bends; the only reason I am using aluminum is because I have some laying around and it just happens to be the same size as my belt width. You can use whatever you like to make your bends.

I regularly use a belt that is 1.5" wide so I am making the belt clip accommodate that width. You should accommodate the clip size appropriate to your needs. Measure up from your bend radius line to whatever belt width you've chosen- Draw a reference line at this point. Now from your reference point make another bend radius line, between 1/8" to 3/16" is a good radius for this bend.
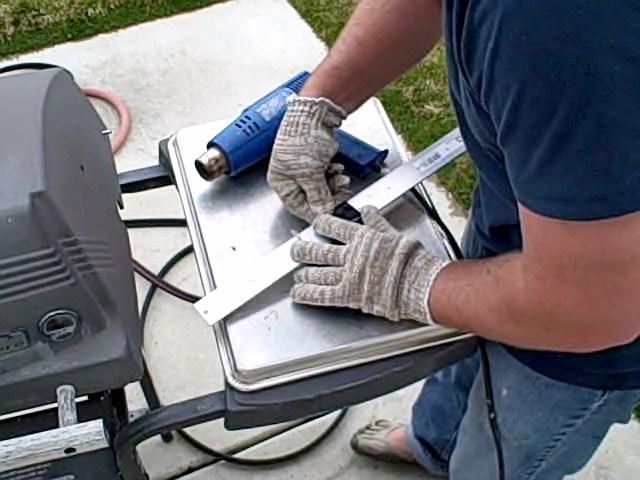
Now heat the second bending radius line with the heatgun and use a straight edge (in my case the aluminum) to bent the top of the Kydex to a 90 degree angle.
OK, this is tricky to explain in writing so reference the pictures. The part we just bent up will be the part that hooks under your belt when the holster is used; So it needs to be trimmed down. Again this depends on how thick your belt is but I made mine about 3/8" long. Hopefully the picture below will explain it better.
Now heat the belt clip at the cant line and fold the belt clip over your straight-edge. Be careful not to heat up the hook we just made.
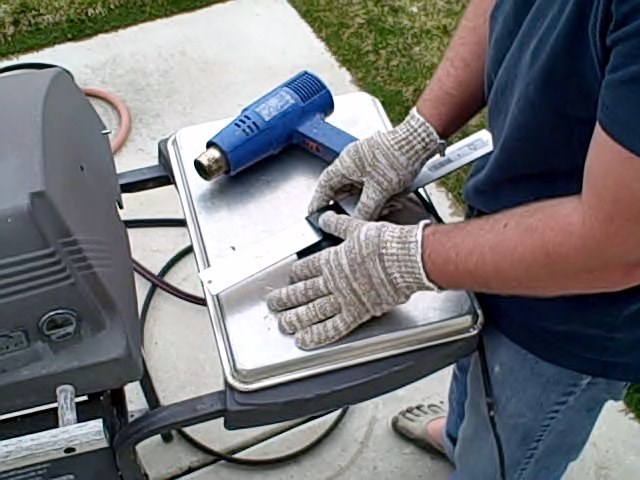
Now your belt clip should look similar to this. Maybe a bit nicer- but then again, it's covered 99% of the time.
Now you're almost done!
Adding the Hardware to the Holster
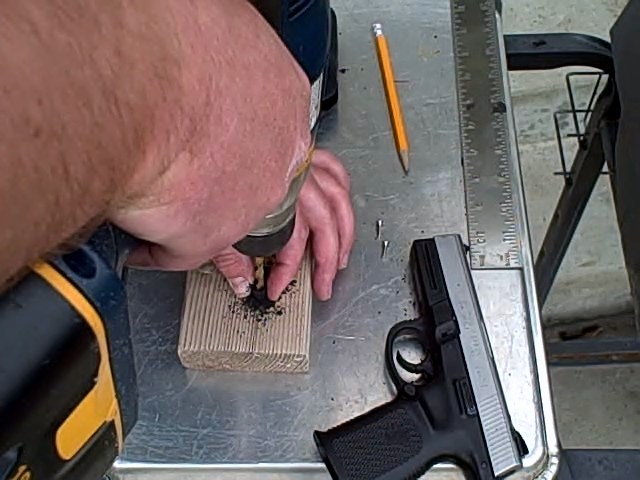
Since I used 3/16" balsa wood for the tension points I am going to cut my 1/2" rubber stopper in about 1/4" lengths. I am using two tension points here but you may need only one if you're making a holster for a small gun (Note: that my Tomcat's holster only has 1 tension point) or you may wish to add more tension points if your gun is bigger.

Now drill holes in the centers of your freshly cut spacers with the same diameter drill bit you will be using to drill the holes for your T-nuts in the holster. Be careful here you may hurt yourself- I should have worn gloves or better yet used a pair of pliers to hold the spacer.
Mark the holster where you want to put the tension screws. I like to put the rubber spacers on the holster to get a good alignment- Like spacing the spacers far enough apart that they don't touch each other or the trigger guard. Remember that as the compression on these spacers increase they will get bigger in diameter as they get flatter- so leave plenty of room between them. In the picture below I am marking the "X" and "Y" axis on the edge of the spacer.
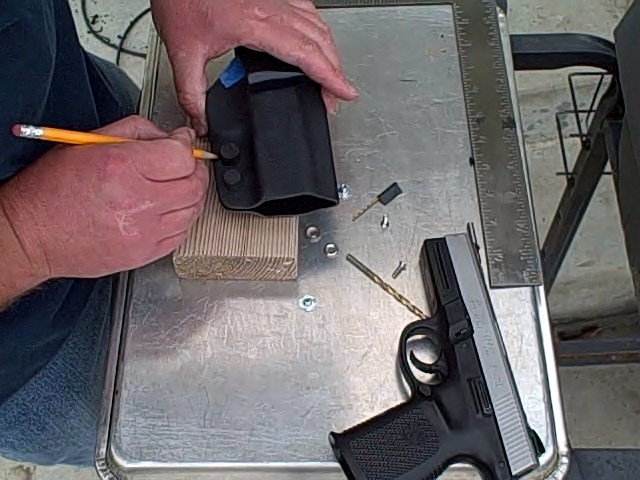
Now I just draw lines to intersect the two axis and the cross centers become my drilling points.
Use the drill bit sized for the No. 6 screw first. Drill through both sides of the Kydex making the holes as lined up as you can (in other words, drill straight). Then take your bigger drill bit, the one sized for the T-nuts, and on only one of the sides of the holster, ream out the holes you just made. So one side's holes should be sized for the No. 6 screw and the other side sized for the T-nut. The side for what doesn't matter, you could even miss-match them if you wish.
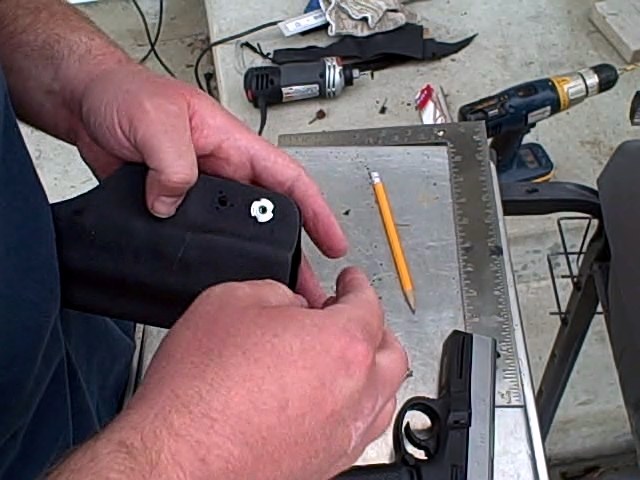
Now mark and drill holes for the the T-Nut prongs. I used a 1/32" drill bit which worked well. You can see the three holes surrounding each T-nut hole in the picture below.
Add your spacers aligning the holes.
Add your T-nuts to the holes with the prongs pressed into the surrounding holes.
Finis up by adding your finish washers and screws.
Note: If your T-nuts are a little long, restricting the amount of tension you desire, you can sand or grind them down making them shorter. I've had to do it on a couple of holsters with good results.
Remove the tape if you haven't already because that's it you're done. Now all you have to do is test it out and set the tension to whatever you like.
I hope you enjoyed this tutorial. If you have any comments or quesions leave them below.
{stalker}