{metacanonical:http://theprojectjunkie.com/bicycles-bike-components/carbon-fiber-z-frame-bike.html}
Carbon Fiber Z Frame Bike


High Res Photos
There are videos further along in the tutorial- Watch those if you don't like to read
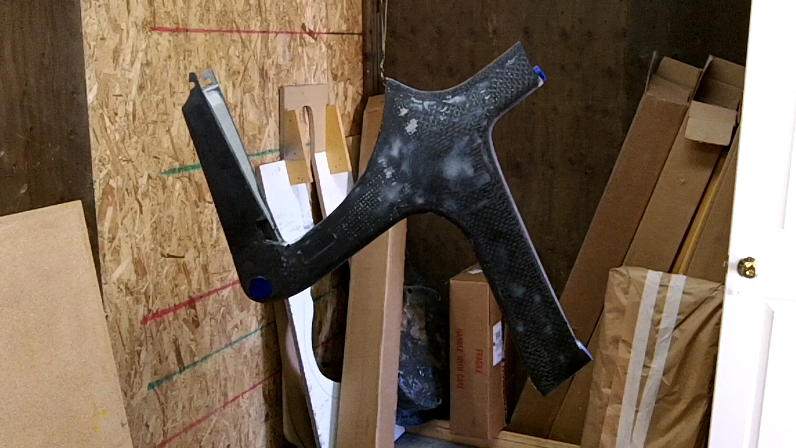
The Z Frame Concept
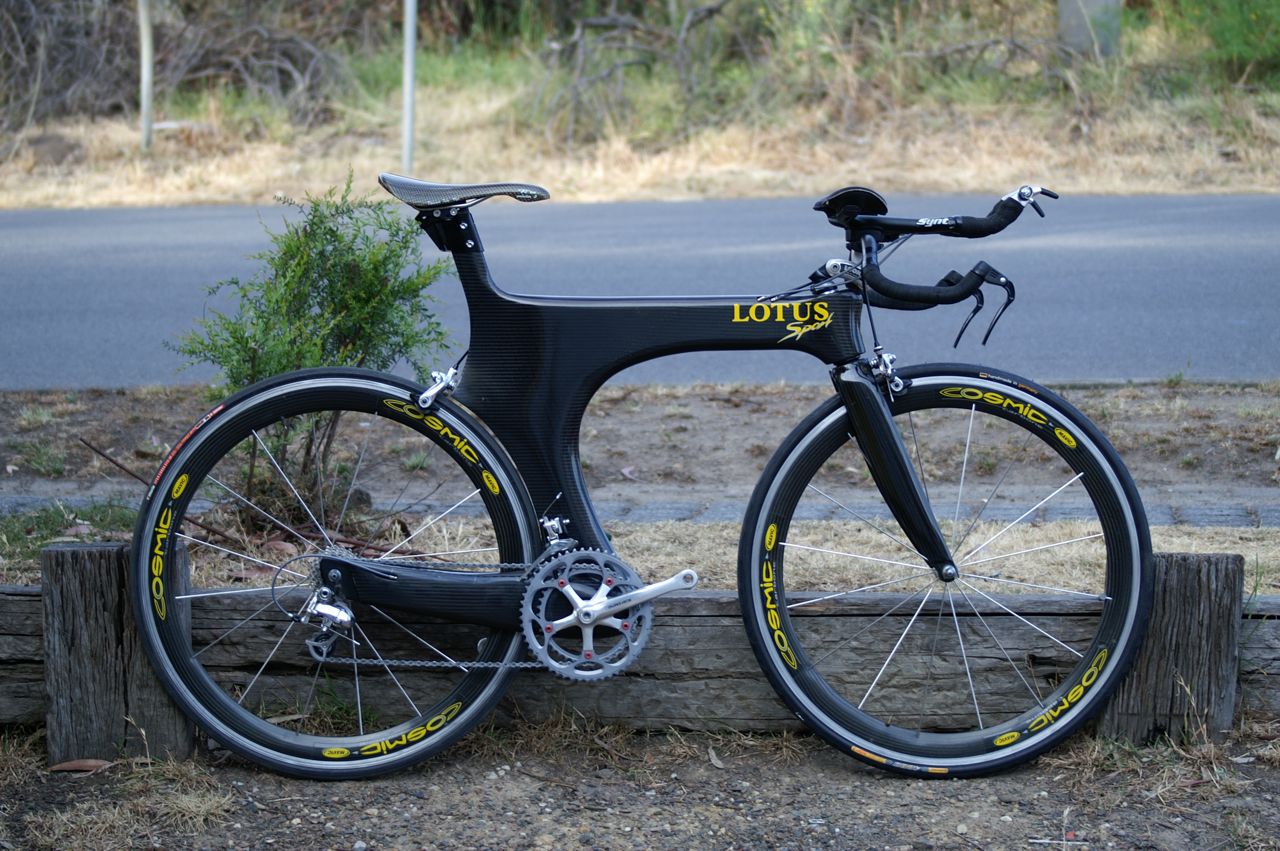
The truth is that I did not come up with this concept on my own. I found the Lotus Sport 110 Bike while doing some searches and fell in love with the design. The Lotus Sport won a leg or two of the Tour De France before the UCI came out with its bike standards; which pretty much killed the bike. Anyway there are still a few around, here and there, but that doesn't matter because I decided to build one with my own "flare." I decided to label this design the Z Frame because it looks like a "Z" (when looking at it from the left side). Here is a photo of the Lotus Sport 110- Click on the photo to go to the forum where I got this picture, or if you want more information.
The Design Challenge
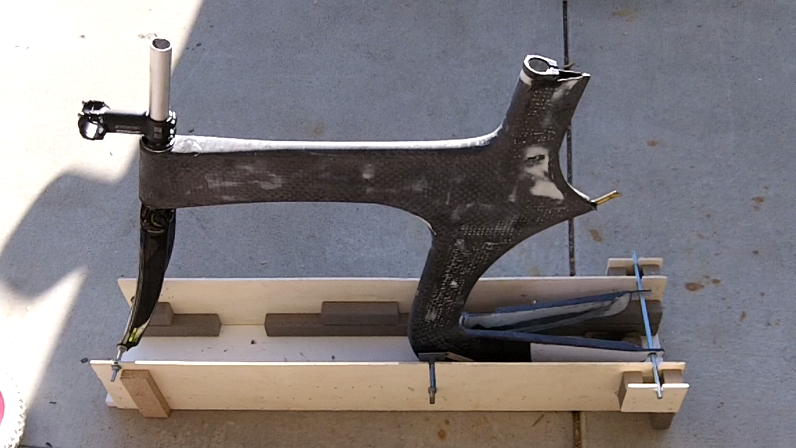
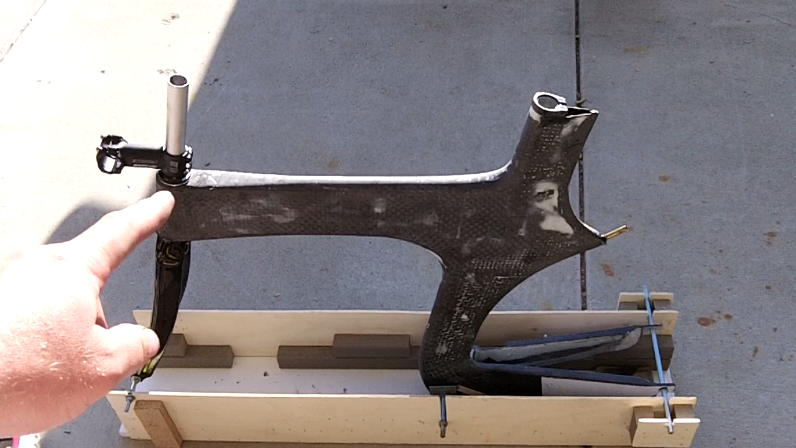
The Z Frame Design
The design definitely has its challenges. There is no down tube and no seat stays. Why is this such a challenge? Well, it's not so much the down tube as it is the seat stays. If you make the top tube wide/tall enough there is plenty of structural integrity without having to add a lot of carbon fiber which adds weight. However, without seat stays it becomes difficult to make the chain stays stiff enough to carry the load created by pedaling and hitting bumps. With a normal rear triangle the seat stays transfer a lot of the stress and load applied to the rear wheel to other parts of the frame (mainly back into the seat post). Seat stays also help to control the torsional flex of the seat tube- Imagine the seat tube twisting just above the bottom bracket, essentially turning the back wheel, as you pedal- Actually you don't have to imagine it, that is exactly what is happening. Also this point of the seat tube, just above the bottom bracket, is prone to a lot of shear forces which can lead to failure if you're not careful in "beefing" it up- As you can see there is a lot going on in this area so take great care to make it strong enough. Note: I added a lot of carbon fiber to this area and still have more flex than I want.
Frame Creation
There are lots of different construction options here so I'll just go over some of the options I considered and why I chose the process I did.
- Wrapped Foam Core- Wrapping a foam core is great for those making one bike but I wanted to make several bikes that were the exact same and having to shape a foam core for each one becomes impractical.
- Clamshell & Bladder- I really would have liked to do a clamshell and bladder on this bike but I've never done the process and the learning curve seamed too high a price for such a large project. Note: I created my molds with the option of clamshelling them later if I ever get up the nerve to try it on a bike.
- Joined Split Halves- I opted for creating a female mold for the right side of the bike frame and another female mold for the left side of the bike. Once the layups were complete and trimmed I could just put the two halves together and join the seems together with carbon fiber. Note: So far this option seems to be working out just fine.
Choosing the Hardware
Most of you know that I started out building a foam core wrapped bike. That bike is still going strong so I decided to use the same types of hardware components. Here is a link to that tutorial if you haven't already seen it. Homemade Carbon Fiber Bike Project
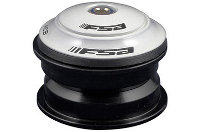
Headset
FSA Orbit Z- Internal headset. The headtube needs to have an inner diameter (I.D.) of 45mm and an outer diameter (O.D.) of at least 50mm. I like using this type of headset because the cups have flanges on them that rest on the rims of the head-tube.
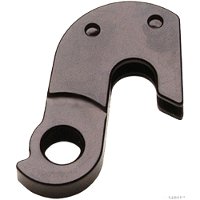
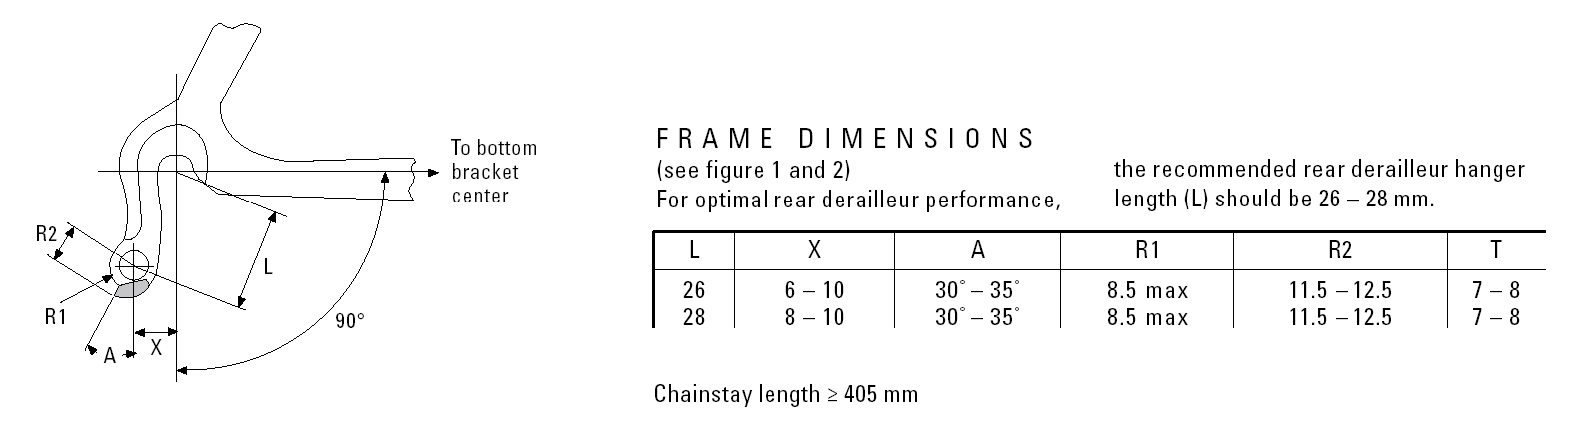
Rear Derailleur Hanger
Cannondale A240/EBO
The thickness of the rear dropout needs to be 4.7mm for this hanger to work. Remember to account for the extra space of this hanger's inside flange- Failure to do so will result in a shorter space for the axle than is required; Plus your tire will be offset to the left a bit.
Bottom Braket Shell
From Nova Cycle
7005 Aluminum BB Shell Threaded Eng 1.37 x 24 TPI
69mm Wide x 41mm Diameter. This bottom braket shell excepts all standard road bike bottom brakets- Just remember that there is a left and right side to this shell. I'll explain more later on.
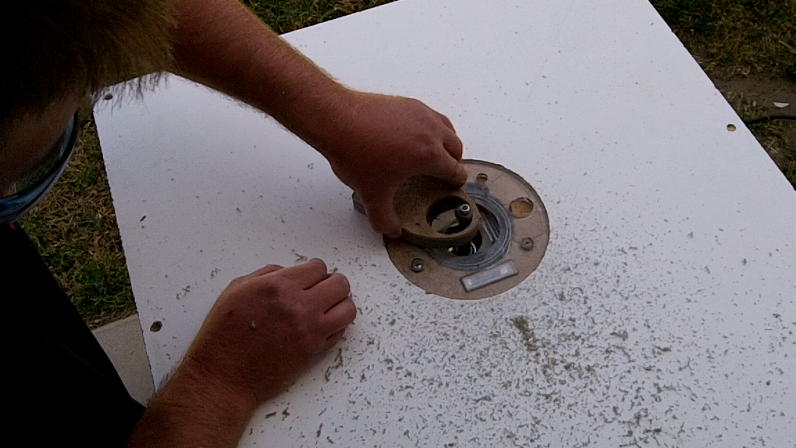
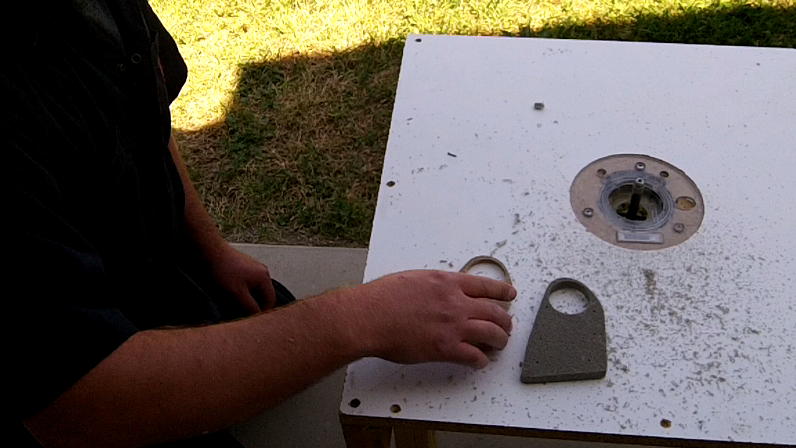
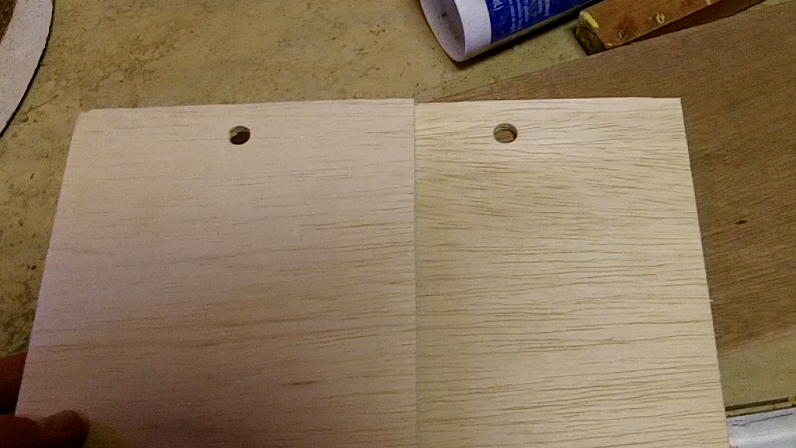
Seat Post Shim
I decided that I wanted to be able to adjust my seat height without too much complication. On the last bike I did a seat clamp that was less then ideal and a real pain to adjust. I thought about making a seat post tube out of carbon fiber that would fit down into the seat tube but I believe I found a better option. I bought a 31.8mm to 27.1mm seat post shim That I glued in to the seat tube. The only real modifications I had to make to the shim was cutting off the flange at the top. Now a 31.8mm to 27.1mm seat clamp would work with a standard 27.1mm seat post. The $10 cost of the shim was worth not having to do all the extra work of having to make one.
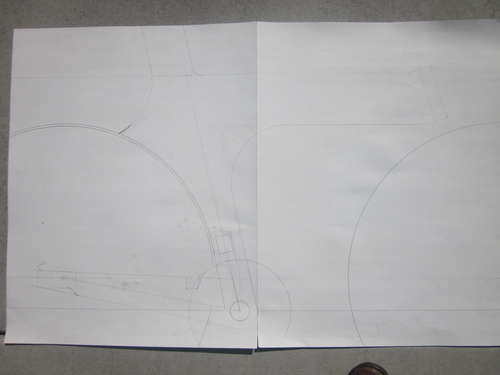
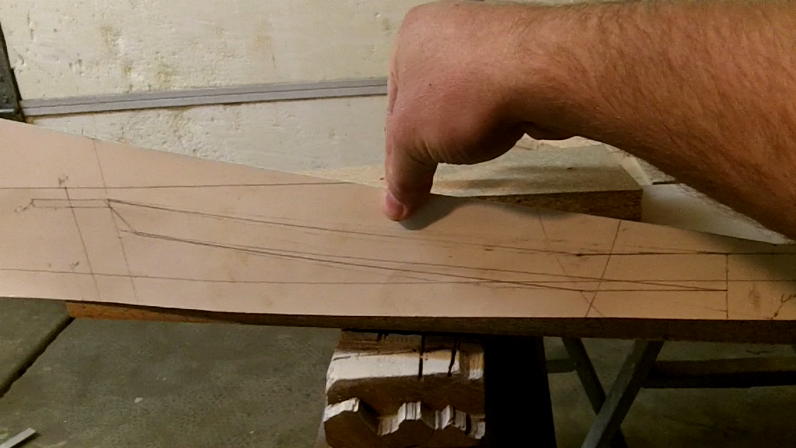
Drawing the Plans and Making the Master Template
I designed this bike for my wife and myself; we are about the same height and both ride 54cm frames. I figure that the major companies have done the research on frame geometry so I decided not to reinvent the wheel too much. I decided to use a combination of what I believe to be the best TT bikes in the business the Trek Speed Concept and Ceepo's Viper. Basically, I just used the Speed concepts back-end and the Vipers front-end with some other minor variations.
It's really not that hard to design your own road or tt frame. Here are a couple of things that will help you.
1. Find the size of the bike you like and draw out it's geometry
2. Draw your wheels-A 700c wheel's diameter is 622mm from fim to rim, but make sure you account for the tire's added size.
3. Draw your tubes out from the geometry lines.
4. The size of your head-tube's diameter will be determined by the size of the headset you are going to use.
5. The size of your bottom bracket Shell hole will be determined by the diameter of your bottome bracket- My BB shell's diam is 41mm.
6. The space for the rear wheel's axle or the space between the rear dropouts is 130mm- make sure you account for the rear derailleur hanger if it is a sandwich style you are using.
7. Make sure the seat tube will accommodate the seat post shim or seat post.
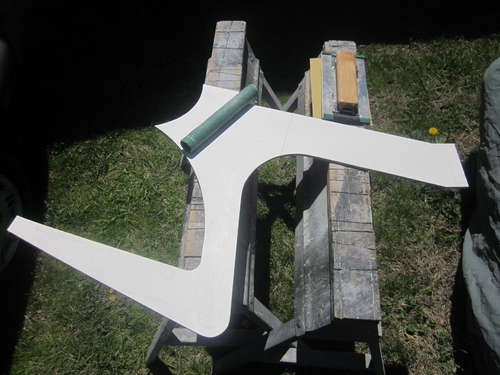
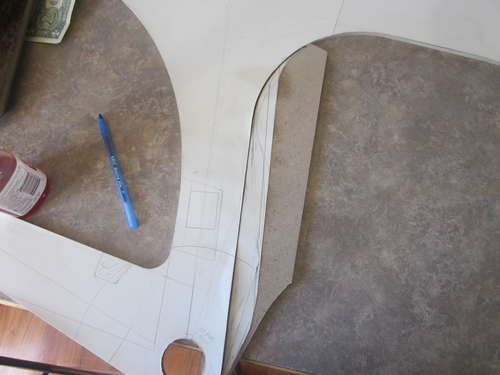
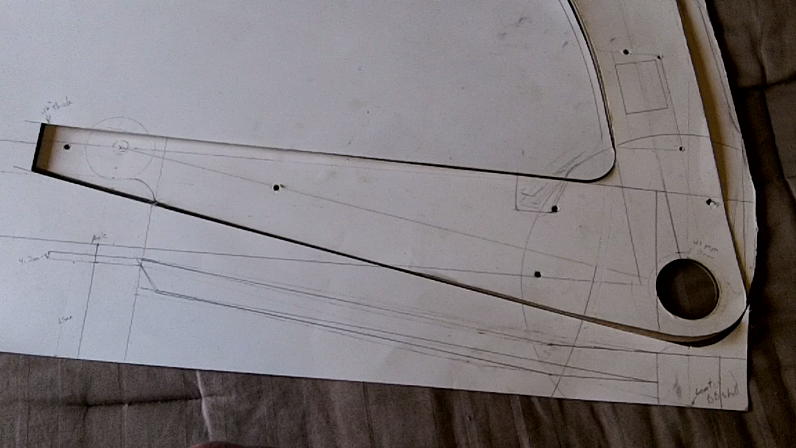
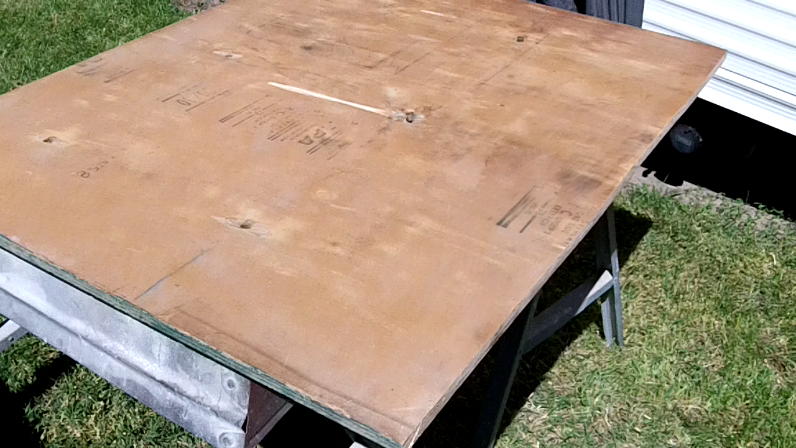
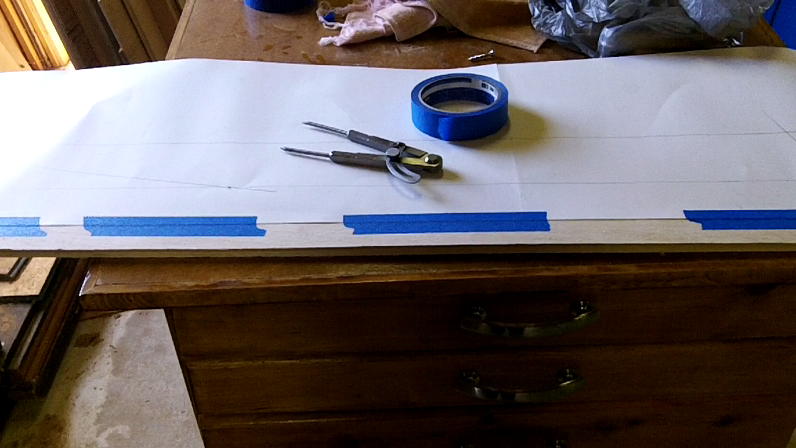
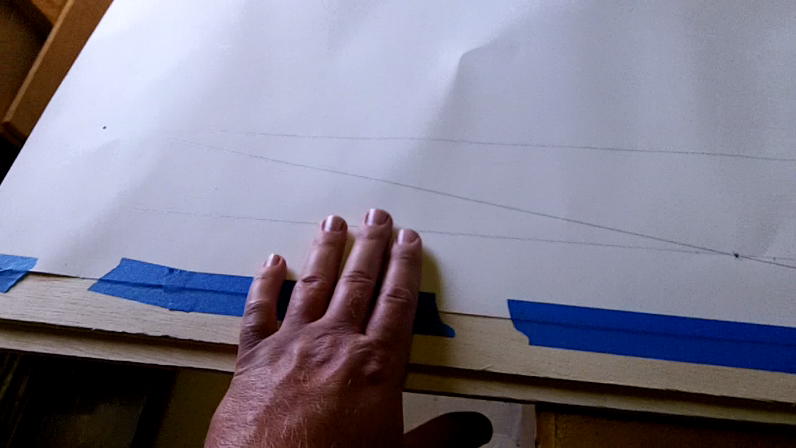
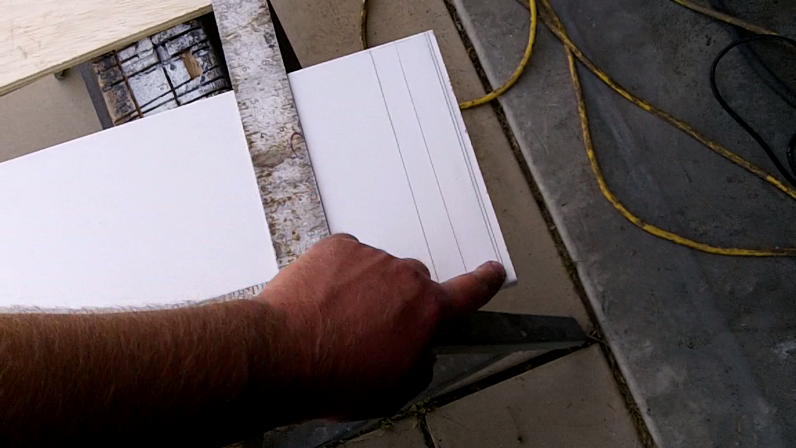
I like using poster board to draw out my plans on. I would draw the plans in AutoCad or something similar if I wanted to take the time to relearn it (I learned it back in HS but have forgotten)- Drawing the plans out life-size is more satisfying to me anyway. Sorry the picture below is hard to make out but hopefully you get the idea.
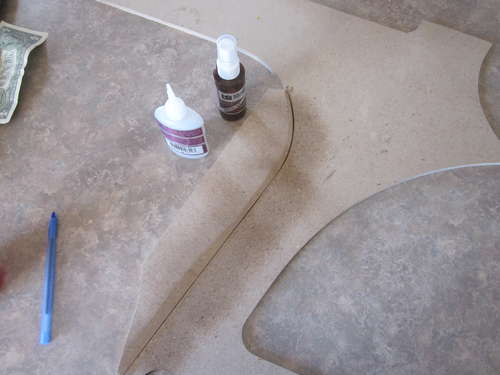
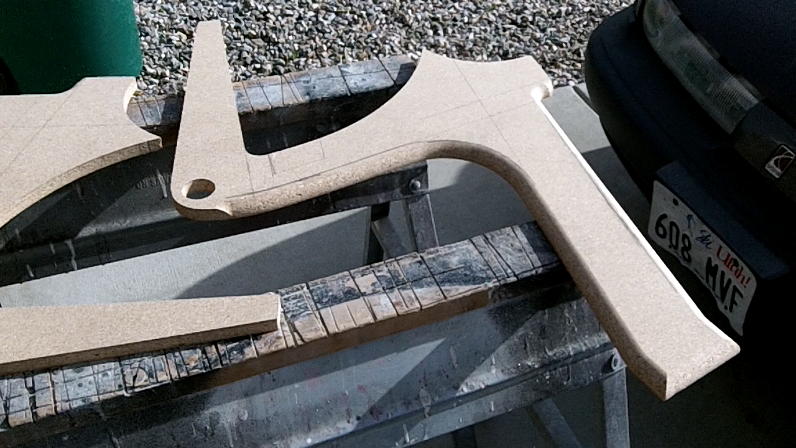
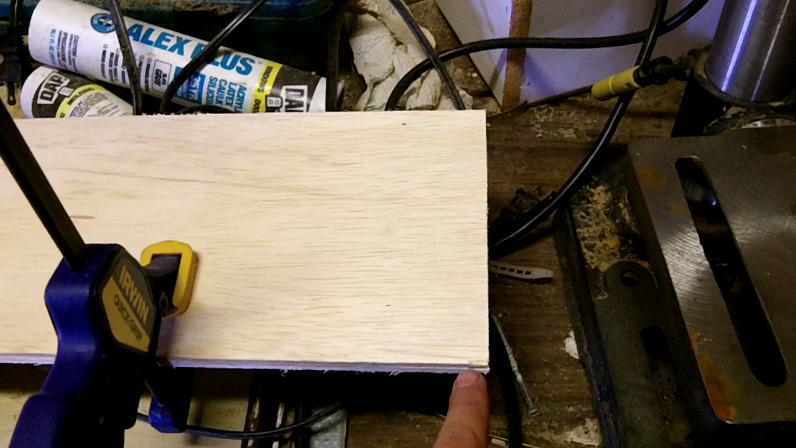
Once the plans are drawn, I cut them out and glue them to some 1/4 MDF, hardboard, or handy-board. I like using 3M's Super 77 Spray to glue with.
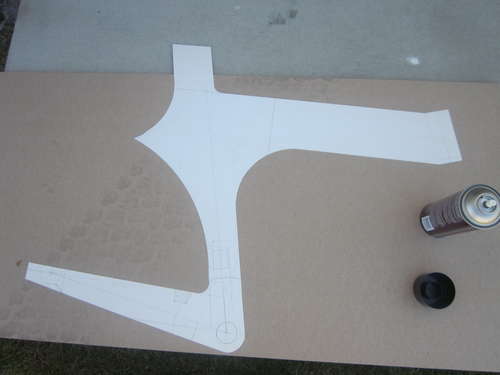
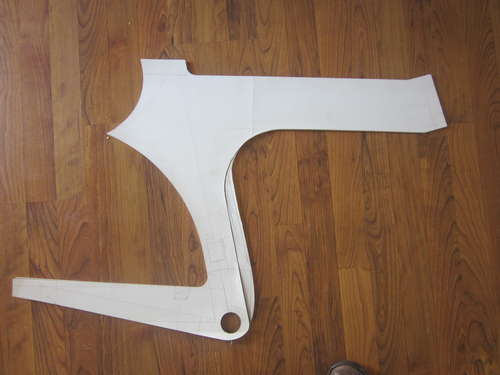
Now that the plans are cut out and glued, I just use a jigsaw to rough-cut the template out. In other words, I'm careful to stay outside the lines and not cut into the template. I'll leave about a 1/16" of excess hardboard to sand away after the rough-cut.

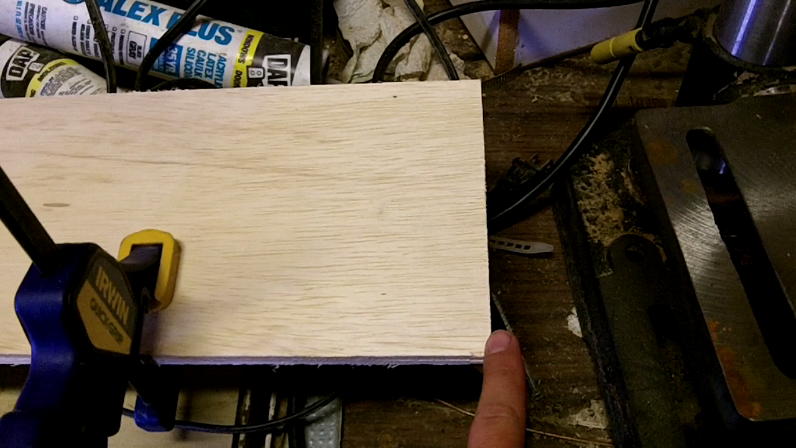
Now I use sanding blocks and tubes to shape and cut away the excess hardboard. You can use 50 or 60 grit on this part with good results.
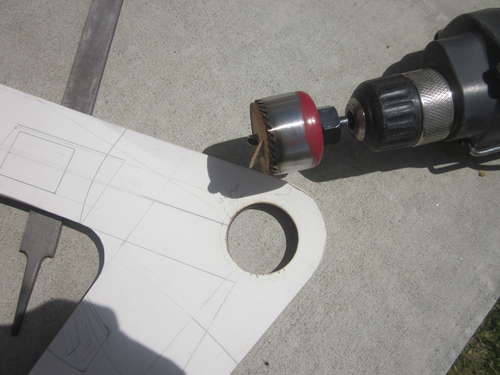
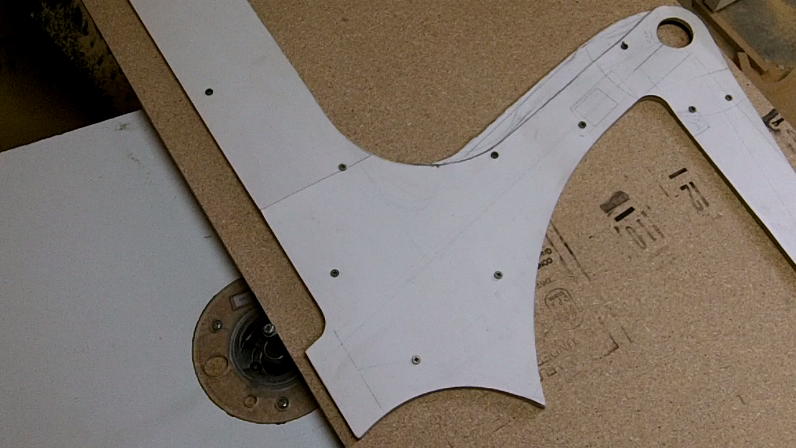
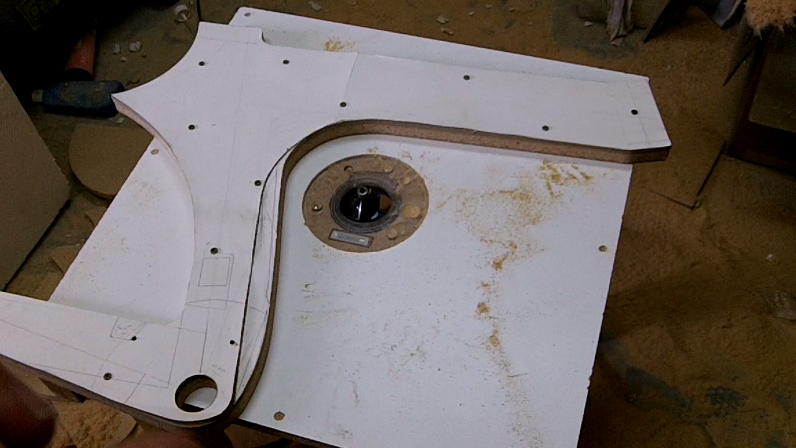
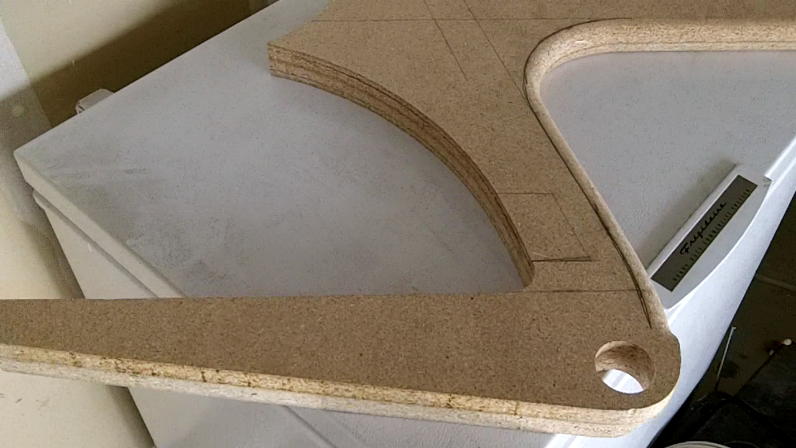
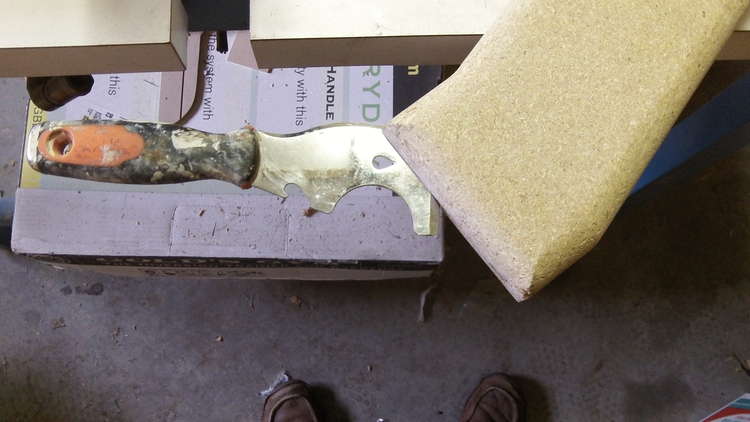
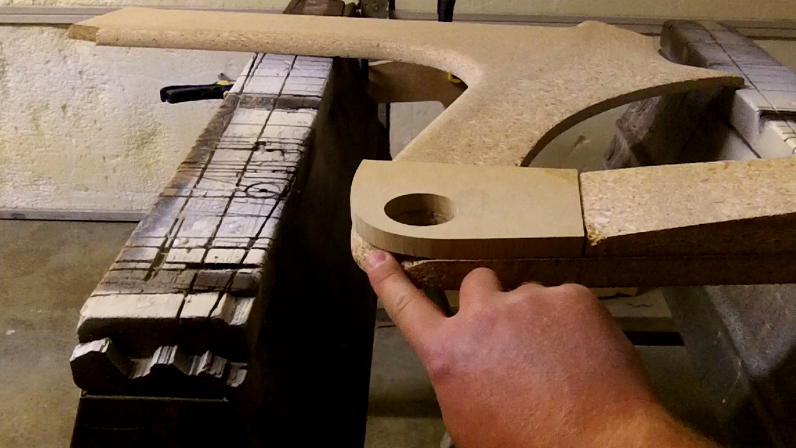
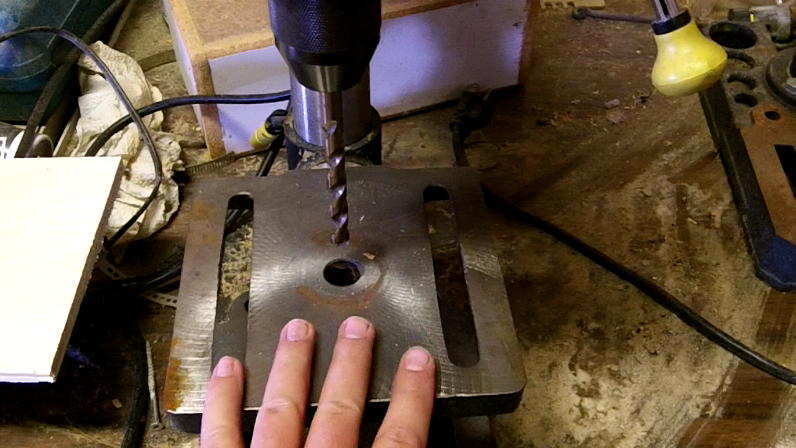
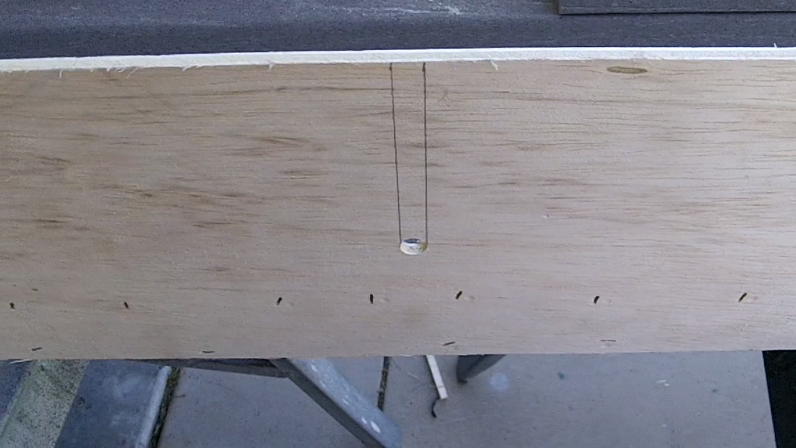
In order to cut out a bottom bracket shell hole with the appropriate diameter I filed down a hole saw to just over 41mm diameter. A grinding stone would have worked better. I pretty much ruined my file.
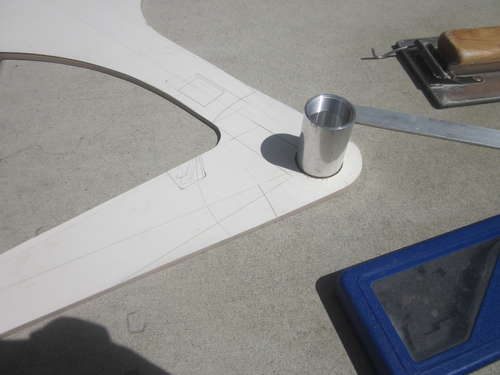
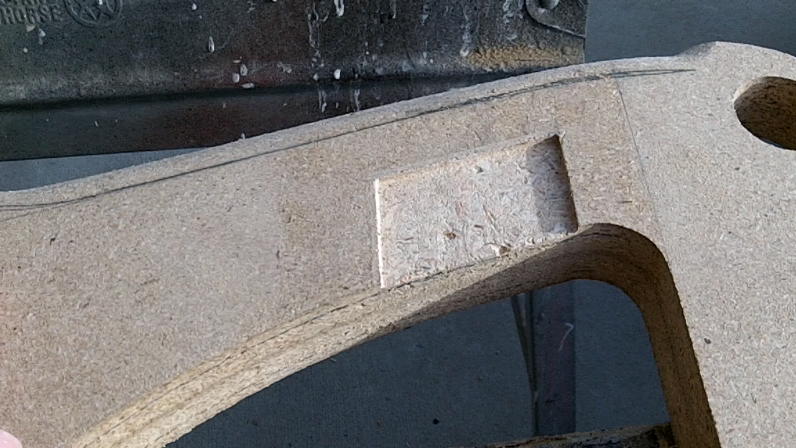
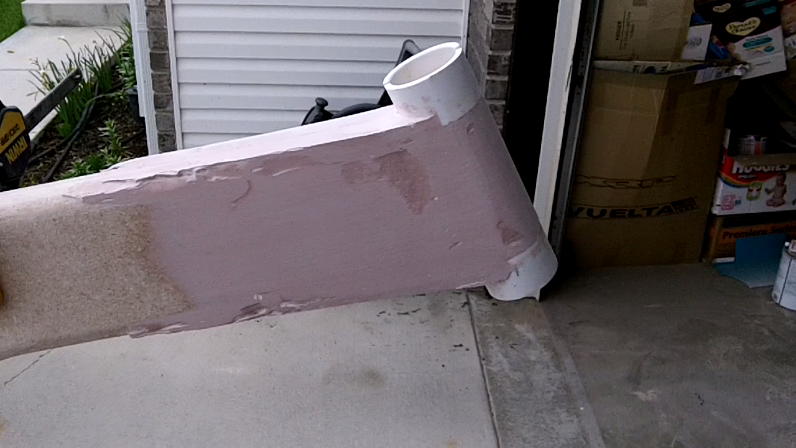
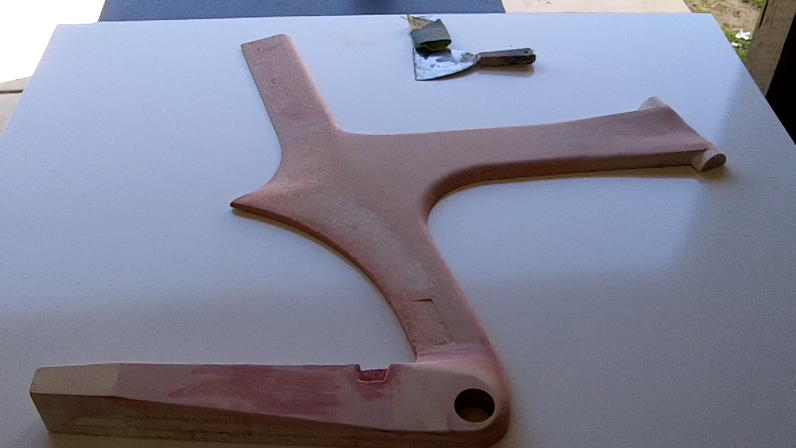
After finishing the template I just couldn't get over how thin the seat tube was just above the bottom bracket. I decided to add over and inch to it to make it stronger and less prone to breaking and flexing. I probably should have made this even bigger.

I just used Super Glue and accelerator to glue the new piece to the existing template.
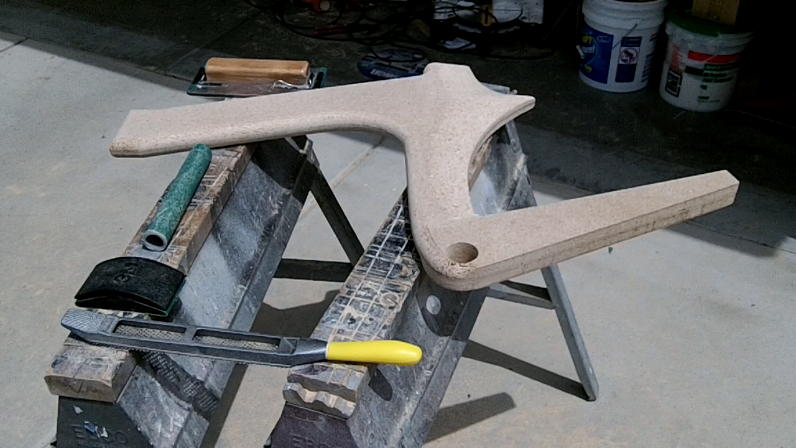
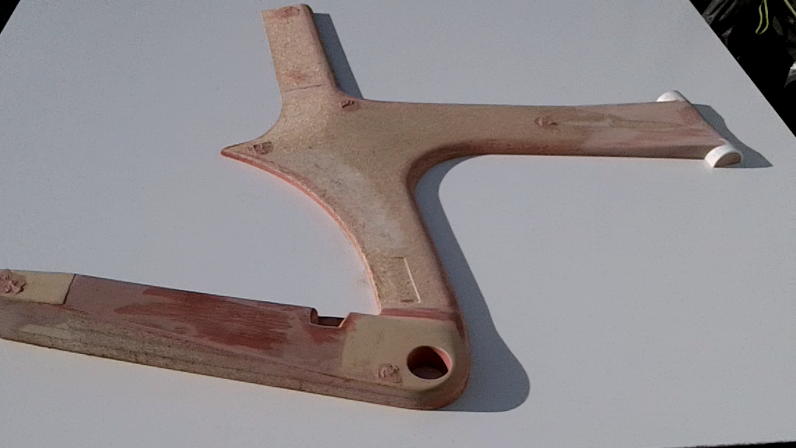
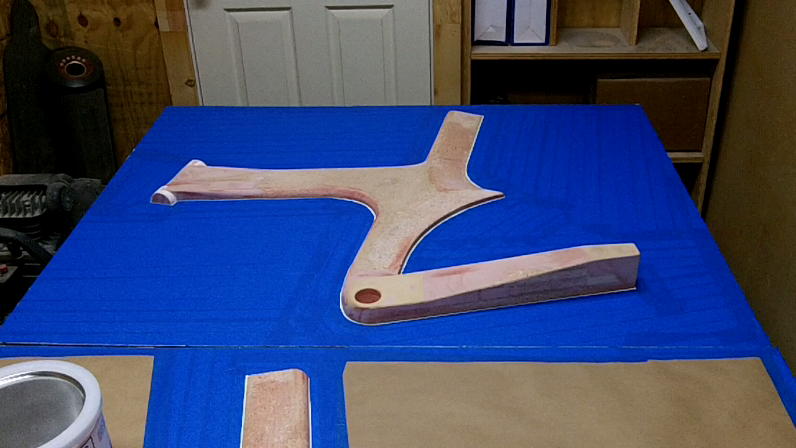
So, I just repeated the process of cutting out like outlined above and finally the template is done.
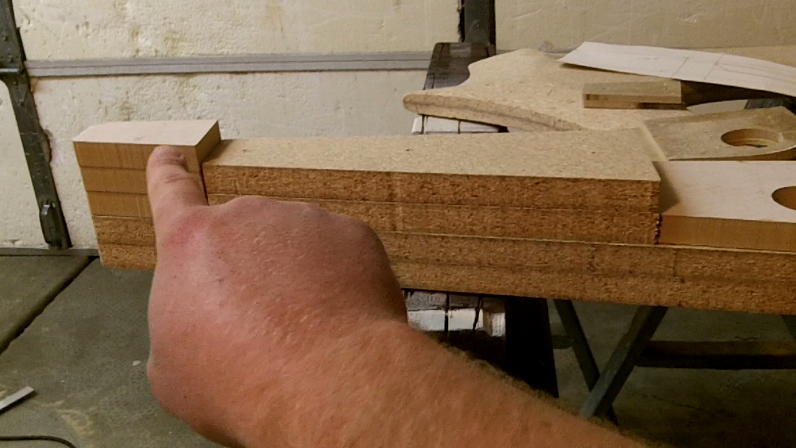
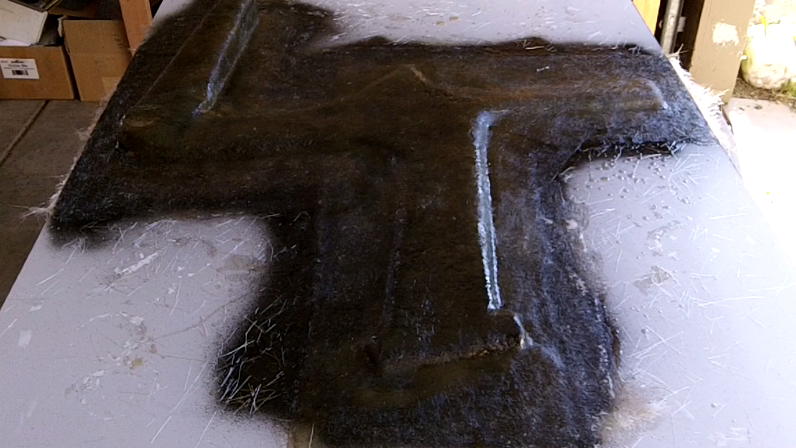
Creating the Z Frame Plug
Cutting out the plug
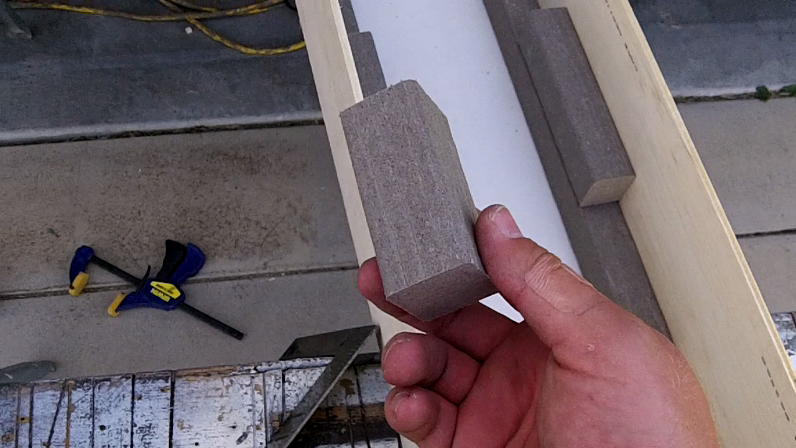
I decided to use 2 pieces of 3/4" particle board for the plug. The two halves would create the 1.5" width of the frame which would be ideal. I think MDF works best for making plugs because it is easy to sand and there's not as much filling prior to priming, but I had the regular particle board laying around and didn't want to spend the extra money on MDF. You can pretty much use whatever you want for the plug. Most companies use polyurethane foam but it's just a bit too soft for my liking.
I started by screwing the template to the 3/4" particle board and then use a flush cutting router bit to match the template.
Once the flush trimming was done, I switched over to a 3/4" round-over router bit and trimmed the top and bottom of the top tube and all of the leading edges of the frame. Note that when you use the round-over bit make sure you flip over one of the plug sides- This will create the mirrored effect for the two halves- It may sound silly, but I've screwed up in the past by cutting out two of the same sides instead of two different sides- It's really annoying to have to go back and fix a stupid mistake like that.
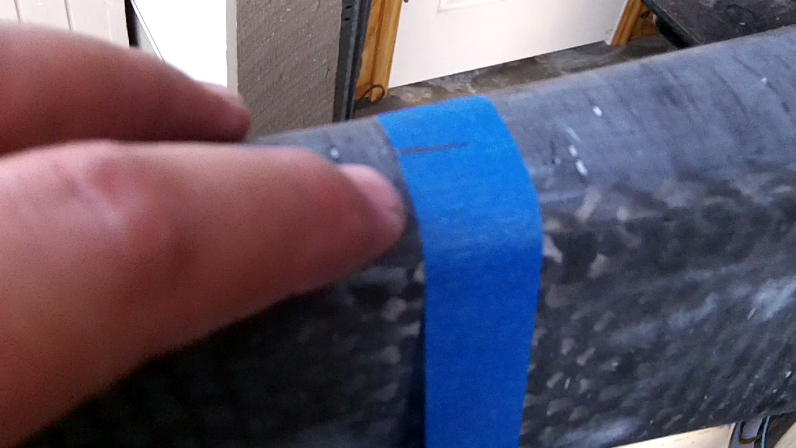
Here are both sides prior to gluing the two halves together. I've drawn some sanding reference lines to help me sand better. I use 3M's Super 77 spray to join the two halves together. I use this glue because I will need to separate the two halves later on and this glue holds well and also releases well when I want it to.
Here's a look at the two halves glued together with the sanding reference lines.
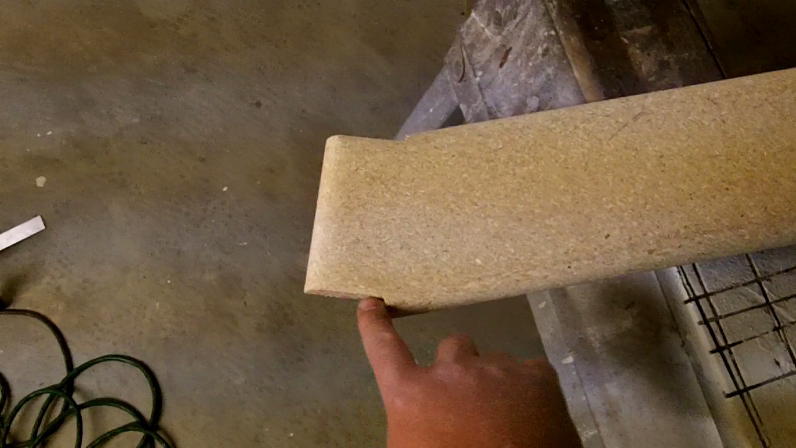
This picture just gives you a better idea of what the round-over bit did for the plug.
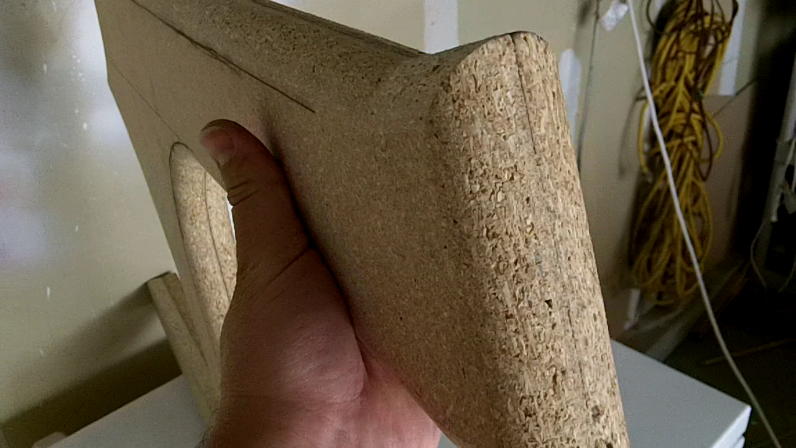
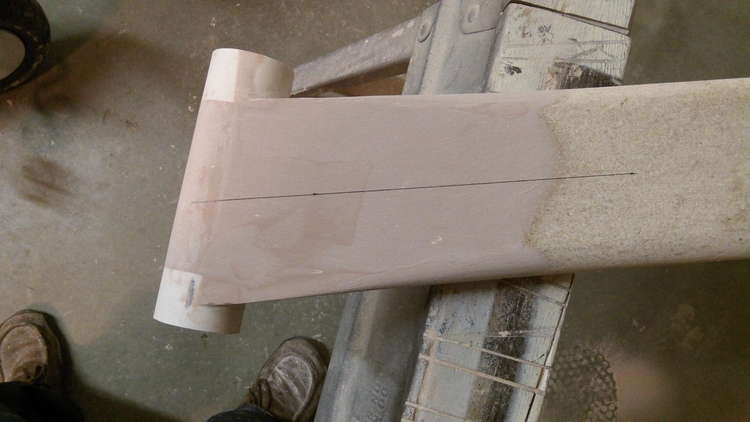
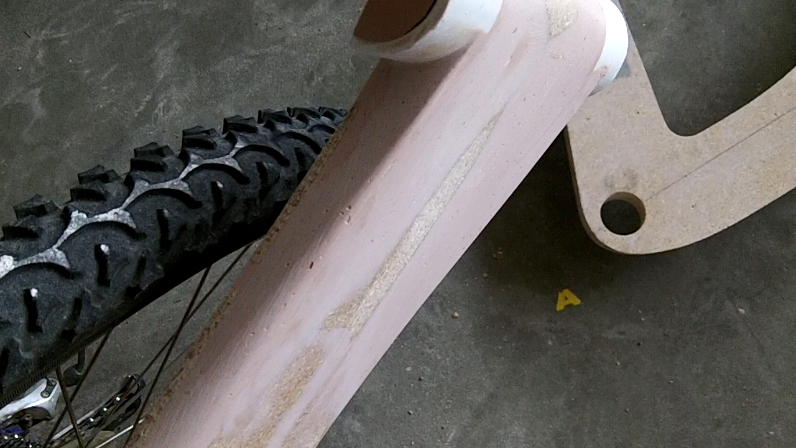
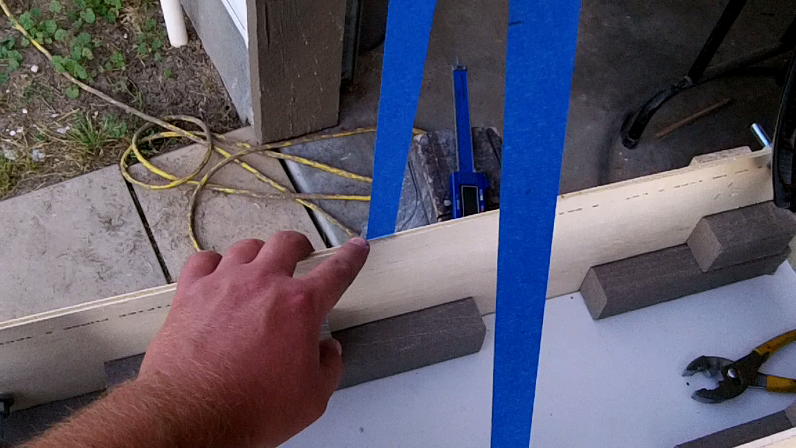
The following picture shows the sanding reference lines for the trailing edge of the seat post. You'll notice that there is a 1/4" that will be removed from each side. When I say removed, I actually mean that its going to be tappered from 1.5" down to 1". This is because the wheels I will be using are about 1" wide and this will create a good airflow transition from the seat tube to rear tire.
I was worried that the front derailleur would not work with the 1.5" tube so I decided to create a recess for it. I cut the recess so that the derailleurs boss would sit at .625" from the center of the tube. Basically I just cut out about an 1/8" from the tube. You can see in the picture below that I created a template which was fastened to the seat tube with Super 77. I then used a a hand-held trimming router with a guide attachment to make the cut. I've used this setup on several projects with great results. This is a Ridged router but any router that allows you to use guides and has depth and speed control will work.
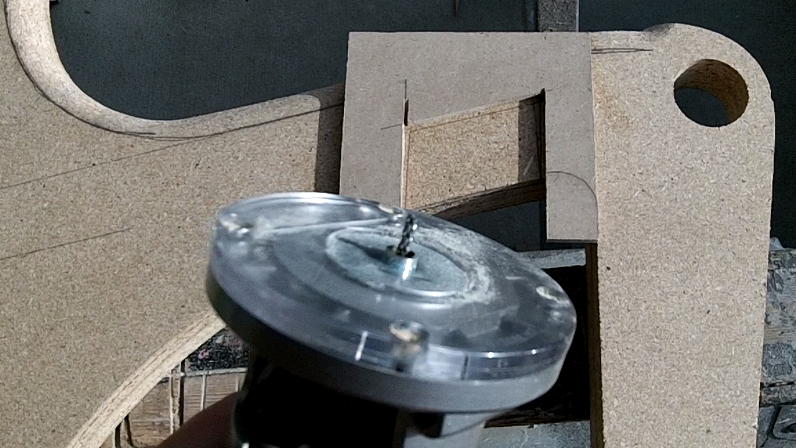
Here is what the recess looks like after the cut.
I used a number of tools to sand the trailing edge of this plug down. I started with a belt sander and then when I started getting close to my sanding reference lines I switched over to hand sanding tools. The finest grit sandpaper I use on this part of the build is 60 grit.
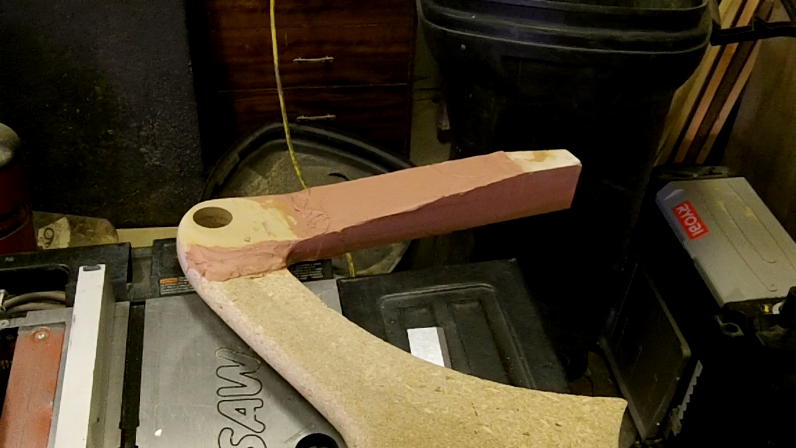
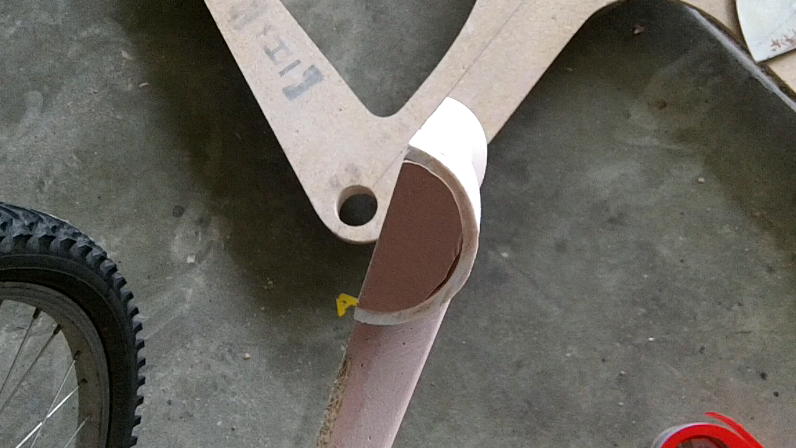
Here you can see how the seat post will be shaped with a controlled diffusion. I will later add an extension to the seat post/tube but the shape or profile will remain the same. Also note the rear brake mount surface just above and left of my hand.
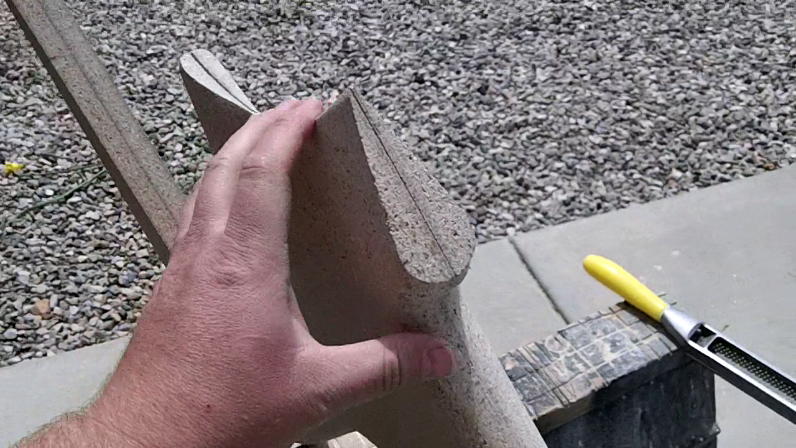
Once all of the preliminary sanding is done it is time to separate the two halves. I used a utility knife to get the separation started and then moved over to a paint scraper. I worked slowly to prevent any plug damage. The Super 77 glue will release fine you just have to be patient and consistent with it.
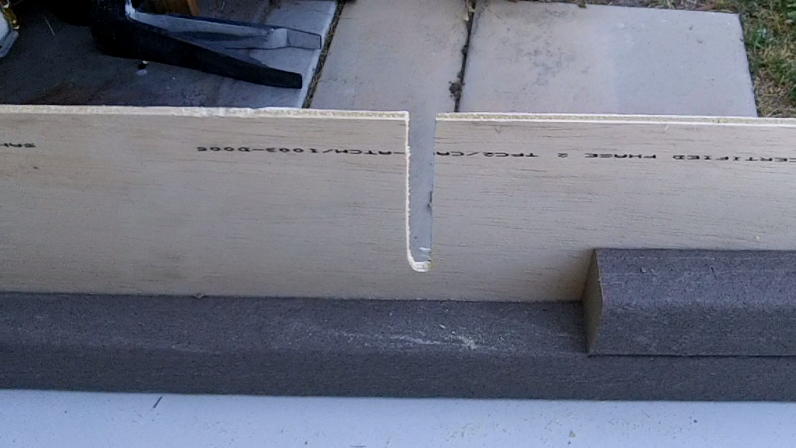
Creating the Chain Stay
I went back to the drawing board to figure out how the chain stay was going to work. This is a fairly critical area and had to consider the following to get it to work: the diameter of the inside or small chainring on the crank, the front derailleur's effect on the chain stay, the rear axle width, and the tire width at the chain stay / seat tube transition. Even after all of my planing, the cuttout on the chainstay needed to be fixed on the actual bike frame and the tire only clears the chain stay by about a 1/16." There is a lot that goes on here so pay extra attention to this part of the build.
I made templates from the master template and then cut out the two sections of the chain stay and one section of the bottom bracket area.
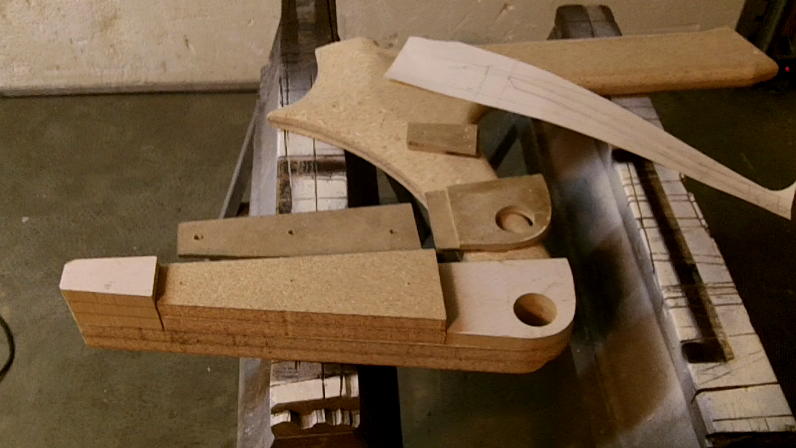
This section of the bottom bracket area needed to be planed down in order to accommodate the bottom bracket shell.
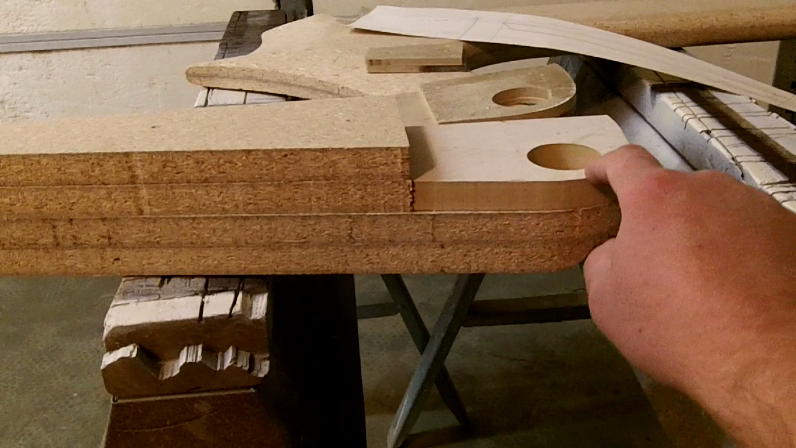
The rear dropout also needed to be planed down to achieve the correct spacing needed for the rear axle.
I don't know if the following picture will make much sense, but it's just the chain stay plans held up to the bottom of chain stays to show how the chain stays will need to be cut on an angle. I created a jig so I could cut the chain stay on an angle with a table saw. I don't know if I took a picture of it so I didn't include it; but this hopefully gives you an idea of what's going on.
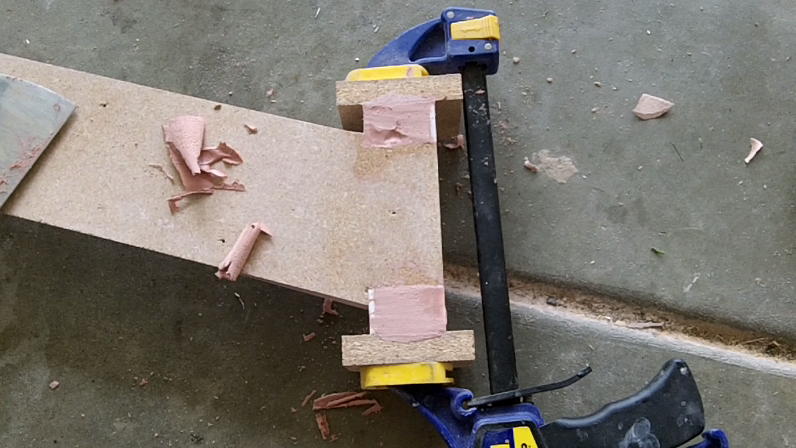
Before putting the chain stays together I cut out some notches where the head tube cups will be added. I'll show more of this later on in the tutorial.
Once the chain stays were cut and planed appropriately I used 3M's Super 90 spray adhesive to attach them to the main plug.

I just used some clamps to secure the chain stays to the plug halves while the glue setups a bit.
After fastening the bottom bracket and chain stays I needed to fill the gaps and add transition fairings. I just used good old Bondo for these areas.
Here you can see that I added Bondo to the chain stay and bottom bracket area.
Building the Head Tube
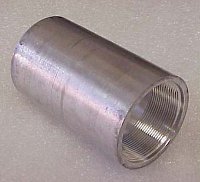
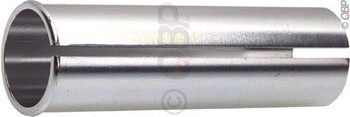
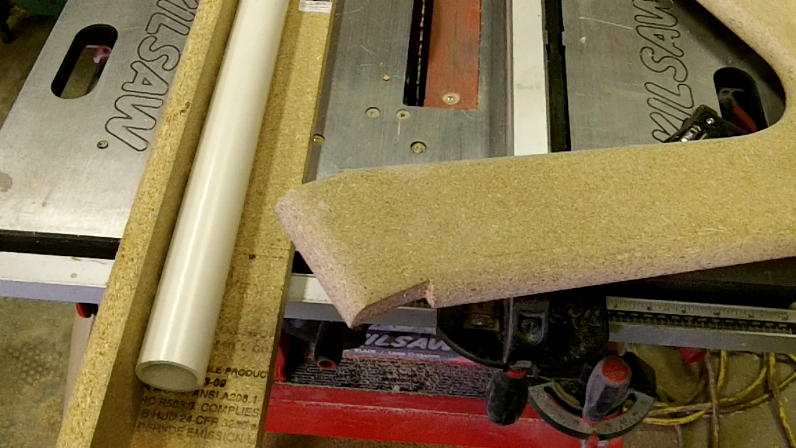
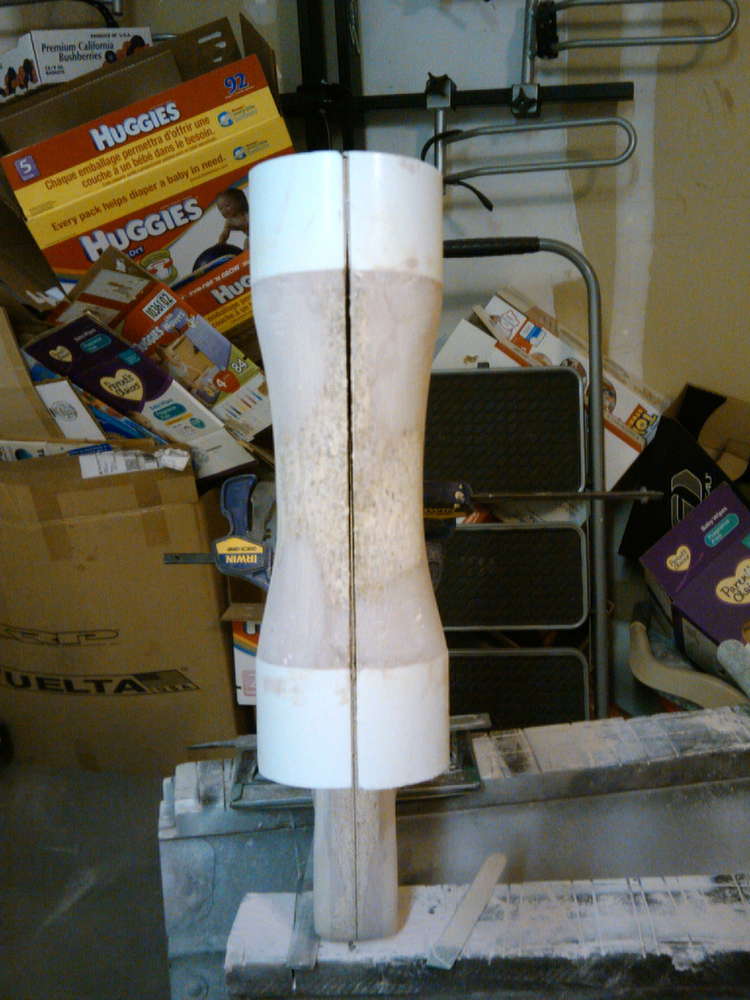
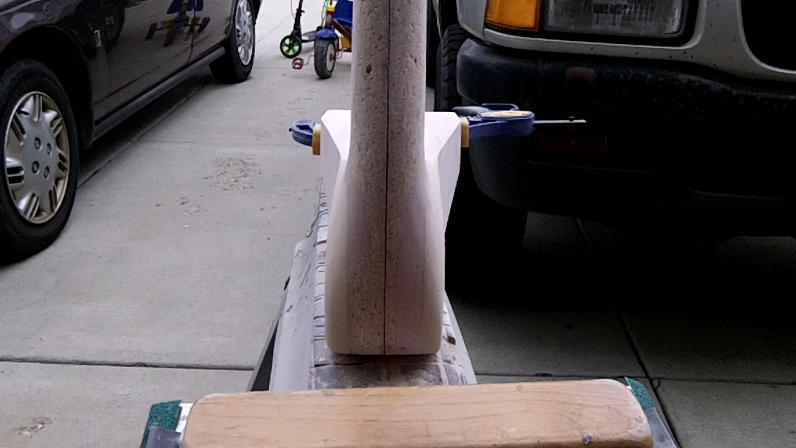
While the Bondo was setting up I created a jig that would enable me to cut a straight line down a tube. Note, this is not the actual pipe used on the project. I had to use couplings to get the 2" outer diameter that I wanted. Since the process was the same I just used these pictures.
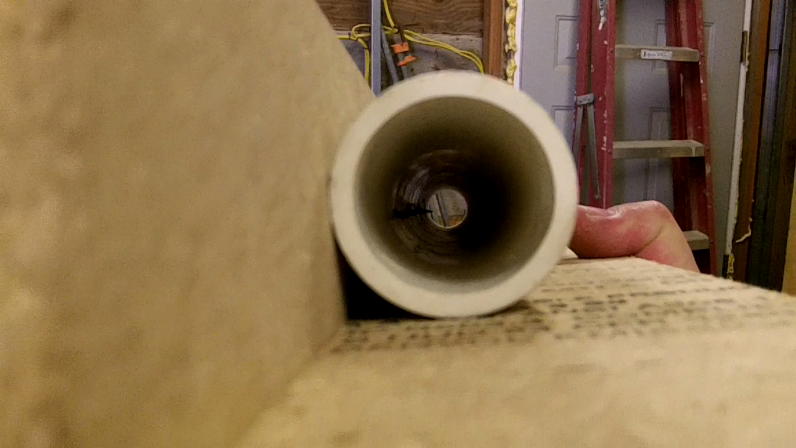
The pipe was screwed onto the jig and then cut down the tubes center line. Note that the saw blade should be positioned on the waste side of the pipe's line- that's right I'm only keeping one side of the pipe. Here's the reason why- If the cut was made with the saw blade splitting the center line of the pipe, you couldn't create a true circle/cylinder when the pipe was put back together. So if the pipe is 2" before the cut- cut the pipe so that one side is 1" from the center line to the outside edge of the pipe. Jeez, I hope that makes sense. I would have taken more pictures but I didn't think it would be that hard to explain. Here my waist side is the side with the screws.
Once the pipe was cut to size, I created a jig to fasten them to the frame. I used a piece of particle board with a straight piece of hardboard glued to it. then I clamped the jig to the frame.
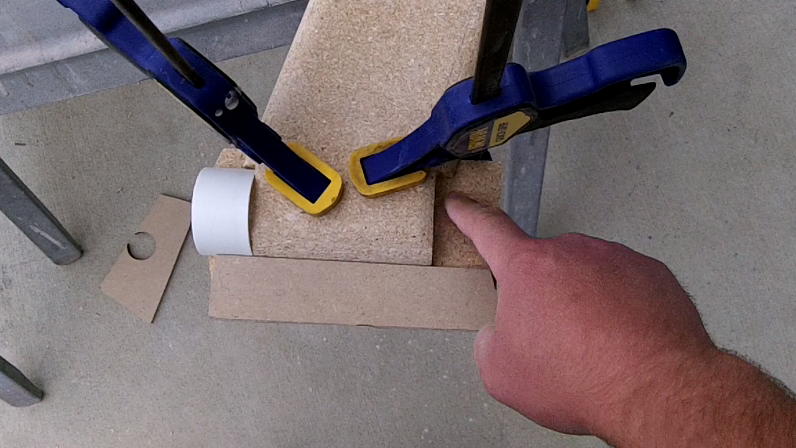
I add the pipe so that the front edge of the pipe and the front of the plug/frame line up with the jig.
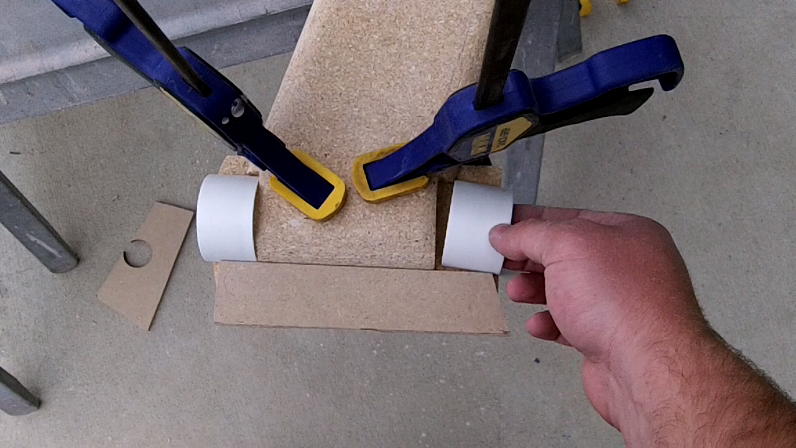
Once the pieces were lined up I just used some super glue and accelerator to tack the pipe to the plug/frame. I then used some plastic specific epoxy to fasten the rest of the pipe/tube to the plug.
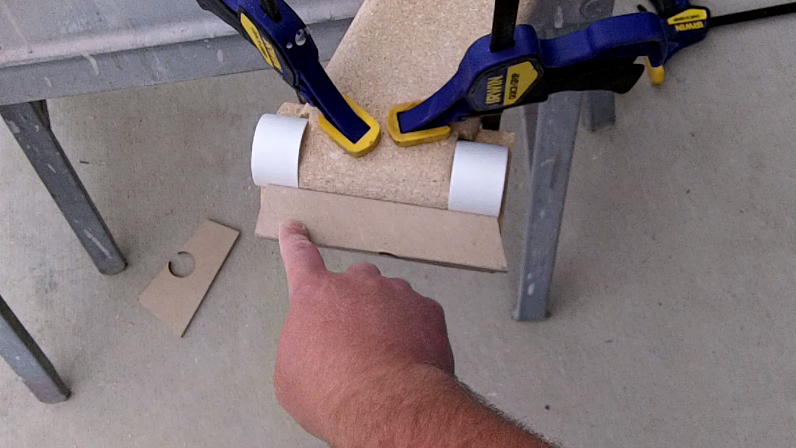
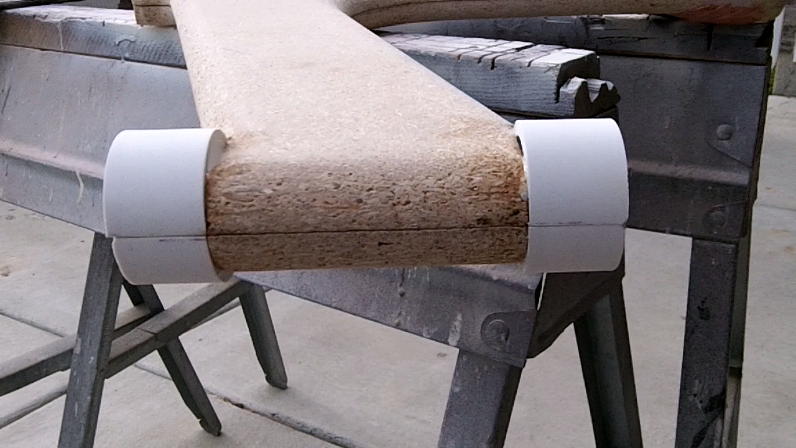
Here is a look at the future head tube with the everything lining up correctly.
Filling and Shaping the Fairings
Now that the head tube is correctly aligned, I added Bondo so I could make a nice transition from the 2" head tube cups to the 1.5" width of the top tube.
The following picture shows the sanding line which is just the center of the top-tube. I then used the rounded side of a 3M rubber sanding block to shape the head tube like an hour glass.
Here is what the headtube looked like after being shaped into the hourglass figure. The curves were so nice I had a hard time keeping my hands off them- LOL!
I used two blocks with packing tape on the Bondo side to fill in the head tube pipes. The Bondo won't stick to the tape so it comes off easy.
Here is what the head tube looks like after being filled and sanded.
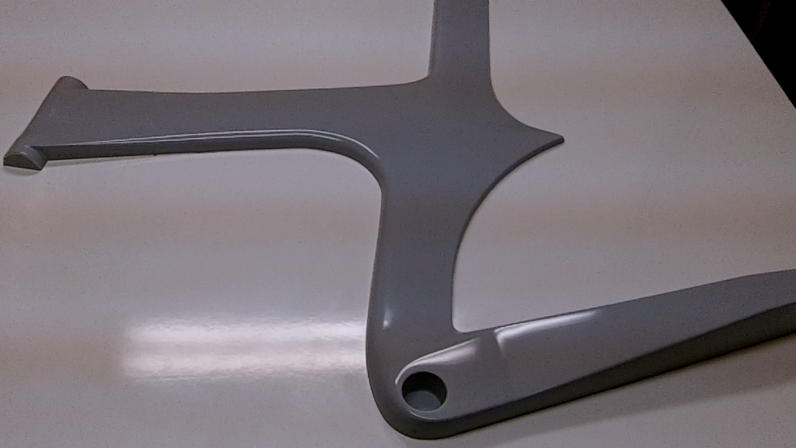
Here is a look at the bottom bracket to seat tube transition. It came out looking awesome.
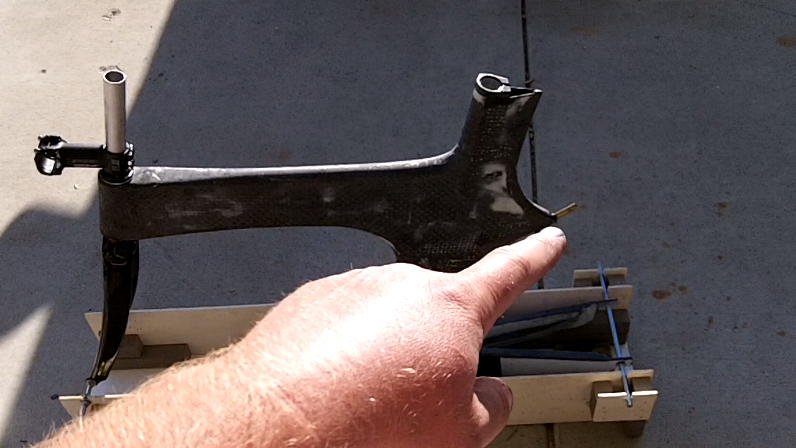
You'll notice a notch taken out the the chain stay in the picture below. If the notch was not taken out, the front derailleur would get stuck on the chain stay and not shift down to the small chainring. When I drew this up on the plans I used the profile of the derailleur's outside arm and didn't account for the inside arm. Therefore, the notch is too small and a bigger notch had to be cut out of the actual bike frame. I'll have to fix this on the female mold for future bikes.
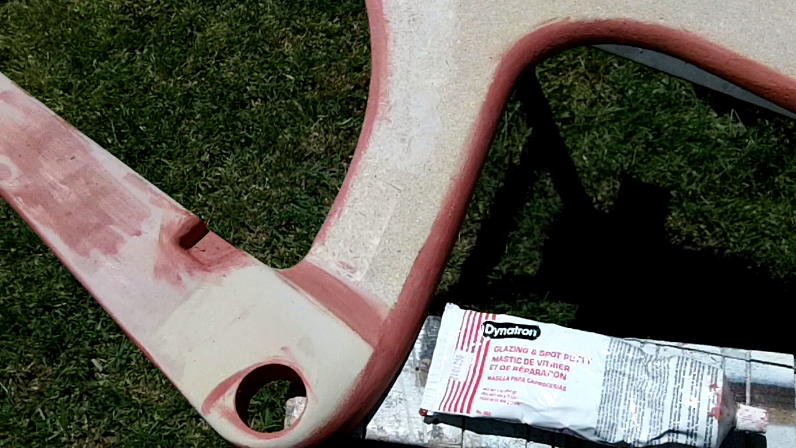
I also want you to note the red glazing putty that I am using. This stuff goes on nice but I find that Bondo and Duratec Primer have a hard time bonding to it. So don't use it on your plug. Instead use Professiona glazing putty or something like it- It's like Bondo but not as thick and easier to spread.
Finishing the Plug Mold
My dad had some old concrete forms that he wanted to get rid of so I took them. I had to clean them up but they worked out great. I've used particle board as a base in the past with poor results. The exotherm or heat from the curing polyester resin on the female molds can warp particle board. I found this out the hard way so now I use 3/4" plywood if I can. It is expensive but worth it. In this case I got lucky and got my plywood for free.
I decided I ddin't want to sand my primer on the backing so I bought some 1/8" white board and glued it to the plywood with some Super 90. It was like $10 but worth it not to have to sand so much.
In the picture below You'll notice some blobs of Bondo. This is from the counter-sunken screws that I used to help fasten the plug to the backing. I also used Super 90 glue to fasten the plug to the backing (before screwing it down).
Like I said earlier, I think it is faster to tape off the backing then having to sand it down after priming. So you can see here that I just used some blue tape and paper to mask off the backing from the oversprayed primer.
Next I used Duratec's Grey EZ Sanding Primer to fill the plug. I have to say that this stuff is awesome to work with. It goes on easy and sands like a dream. It also polishes nicely you'll see in the pictures later on.
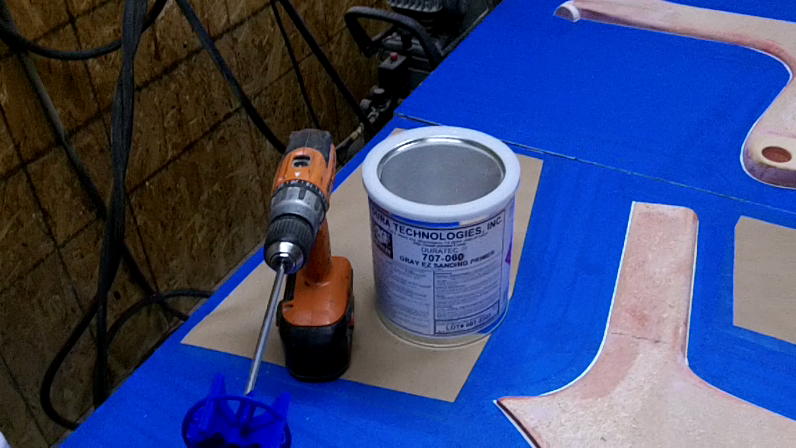
I had to spray the plug twice because I missed quite a few holes. I just filled the holes with Professional Glazing putty, sanded the plugs down with 220 grit sand paper and sprayed them again.
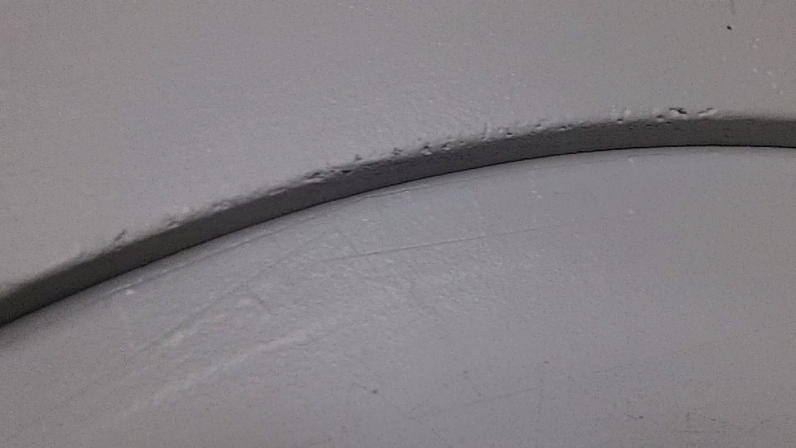
Once the plug had time to set up and dry, I leveled them with 220 grit sand paper and then worked up to a 600 grit. It is important to be careful and not sand too much away. If I started seeing any signs of wood I would stop and be careful not to sand that area anymore.
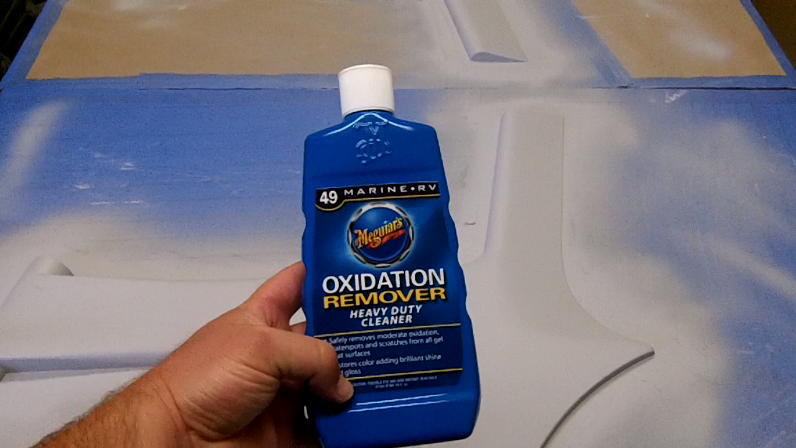
Here you can see that I am using Mequires' Oxidation remover. This stuff works great because you can get a nice polish from 600 grit sanding. The cutting agents start out rough and then become finer as you polish. This stuff is made for restoring gel coat on boats so it works great on Duratec primer.
I use a combination of tools for polishing. The main one though is the 2,500 angled polisher with a good size wool buffer. If you use too high of a speed polisher you could melt the primer. So be careful if you use a drill or something other than a polishing specific tool.
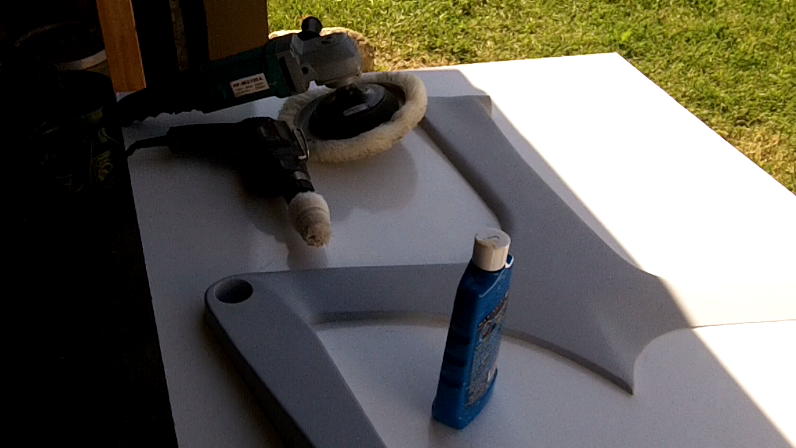
After polishing with the Maguires, I moved onto Paste Wax which I like because it can fill some of the larger scuff marks and holes if you've got them. I then move to the carnauba wax because it is easier to work with.
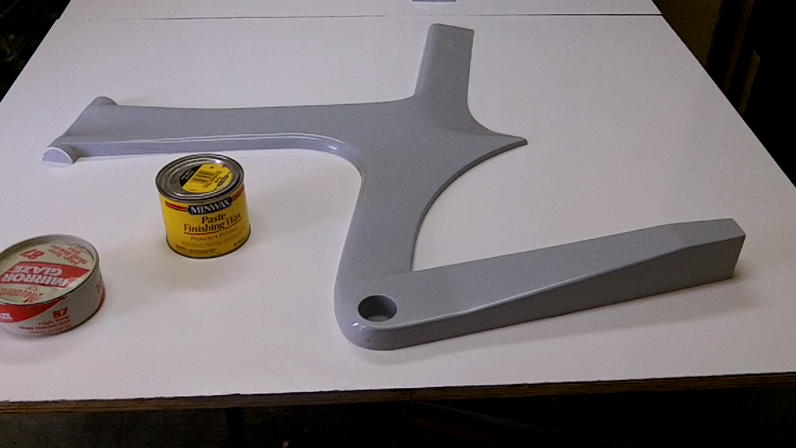
You'll want to see a nice glossy sheen when you are done. The more lustorous the better for mold release.
After polishing the plug and just before gel coating I gave it a generous coat of PVA (Polyvinyl Alcohol). PVA will help with the release of the mold.
Making the Female Molds
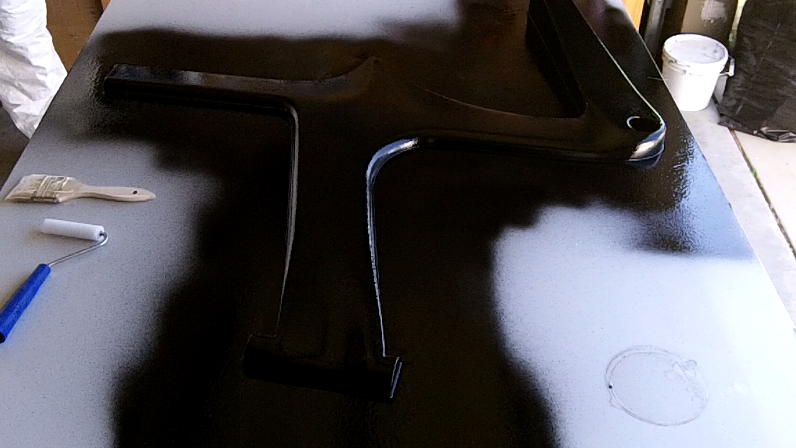
Here you can see the plug after tooling gel-coat is applied. You can brush it on or spray it on. I like to spray it. Your gel-coat will be ready for the layup when it is somewhat hard but still sticky. Performing the "squeak" test is a good idea. If you can run your finger across the gel-coat and hear it squeak without pulling up any gel-coat it is ready to go. Note: don't push on the gel-coat too hard.
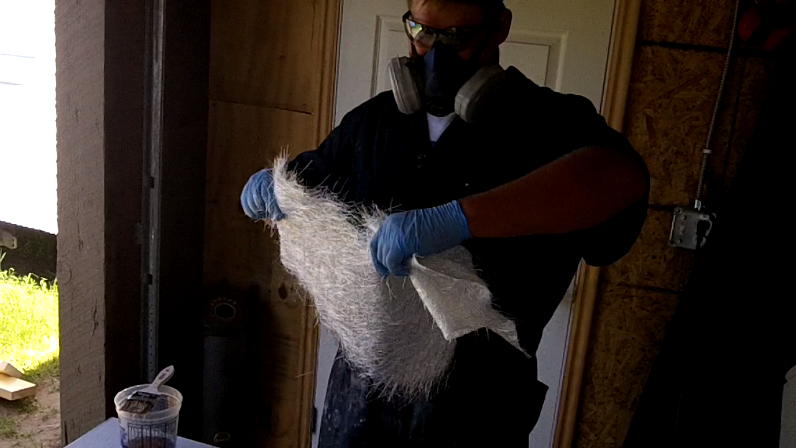
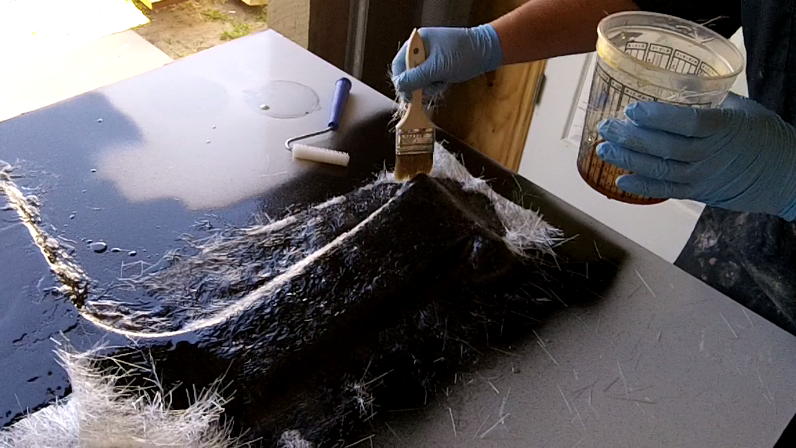
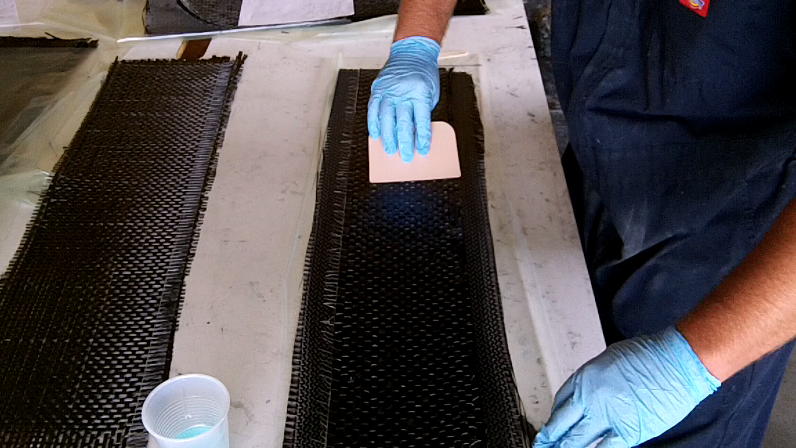
Prep your materials before starting your layup. Here I have some 2oz fiberglass chop strand mat. I like to pull it apart so that it make 1oz cloth. It is an easy way to save some money if you like using 1oz over the 2oz.

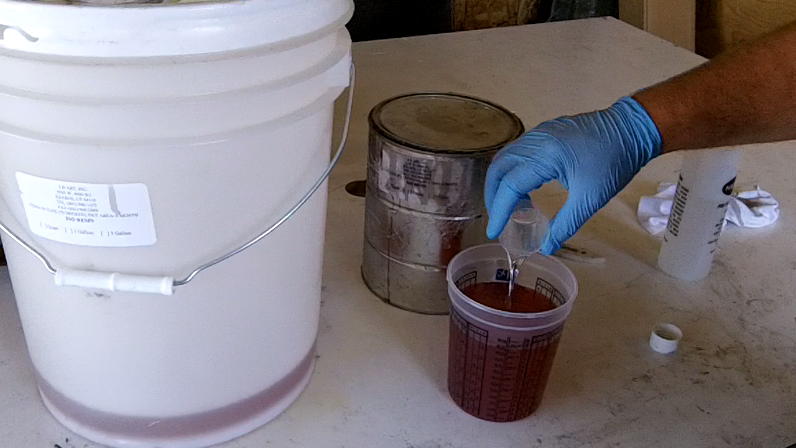
I am using Isophthalic Polyester Resin for this project. This type of resin creates a tougher mold than regular polyester resin. Here you can see me catalysing the resin with MEKP.
I like to use chopped mat soaked in resin for the sharp edges of the mold. Here you can see me filling in those edges. Sometimes the mat will lift from these sharp edges causing bubbles and separations between you gel coat and fiber glass. Then when your mold comes off the plug you have to go back and fill where the gel coat has chipped and now exposes a void. I find this method helps to eliminate that.
I prefer working with ripped mat over cut mat. It just seems to layup easier. Notice: I am using gloves, coveralls, safety glasses, and a VOC respirator- plus the shop door is open. This stuff is nasty so take the appropriate safety precautions.
The styrene in the polyester resin will break down the binder that holds the chopped mat together, so I'll just dump the resin on, wait about 5-10 seconds and then work it on the plug.
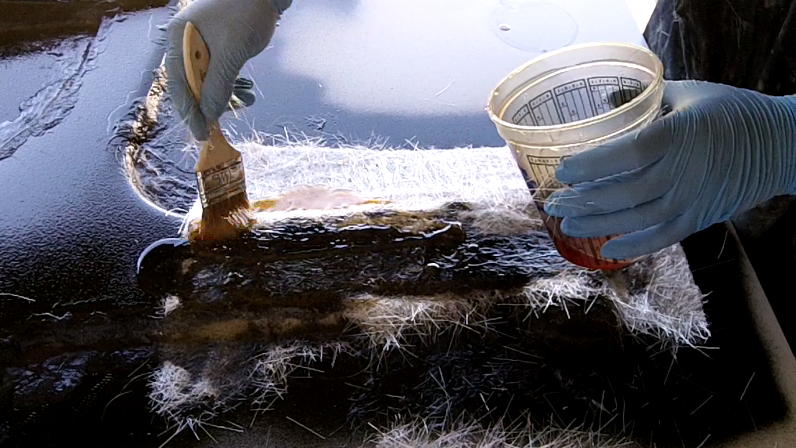
Do a single layer of fiber glass and resin then wait for the "squeak" test on that. Once the squeak test is passed finish laying up the rest of your mold. This will help prevent the gel coat from wrinkling as the polyester resin shrinks.
The picture below shows the finished layup. Note: I should have run some stiffeners along the mold (like wood or polyurethane foam). It came out more flexible than I had anticipated. I think I ended up using about 10 layers of fiberglass.
After 24 hrs I pulled the mold off the plug. It should come off pretty easily. You'll notice that some of the Duratec primer came off with the bottom bracket. I'm actually surprised it wasn't worst because that area was hard to work on the plug. Remember that was at the bottom of the bottom bracket hole on the plug.
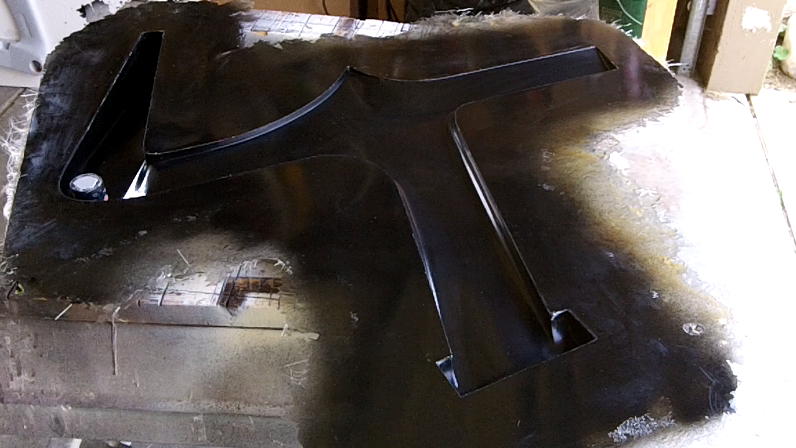
Here is the mold after a good trim, cleaning, and polish. Beautiful!
Z Frame Carbon Fiber Layup
I actually did this part before cleaning up the molds. I made some templates for the foam cores of the bottom bracket area and chain-stays.

I use some 1/2" finishing nails to hold the template to the foam. I am using 1/2" Divinycell foam for the core.
Using a flush trimming router bit I just cut out the foam to match the template.
And there it is.
I like doing prepregs when doing layups. However, there are several ways or options for doing layups and as long as you get a good wet-out you'll be good to go. I am using Resin Research's Project 2100 system with a slow hardener. I'm using there standard modulus epoxy or the 2000CE resin but their 1980 high modulus resin is probably a better choice. The epoxy I am using mixes at 2 parts resin to 1 part hardener by volume and 100 parts to 45 parts by weight. It's a little thicker than I like but is reasonably prices and has similar curing characteristics as West Systems 105 and EZ Poxy. I actually like using West Systems 105 better but it's about twice as expensive.
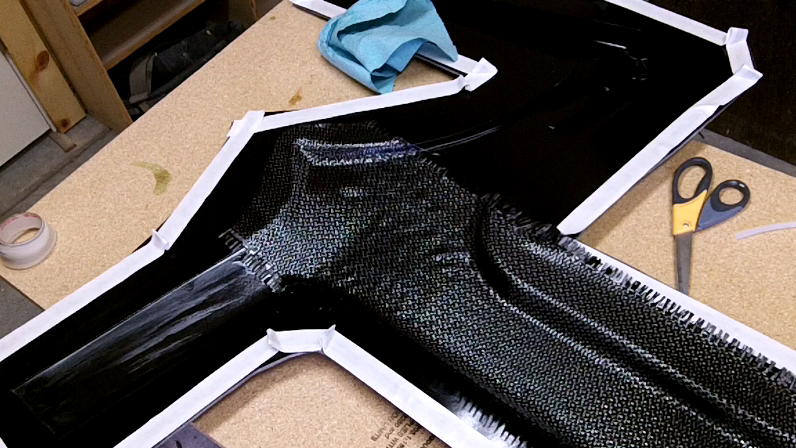
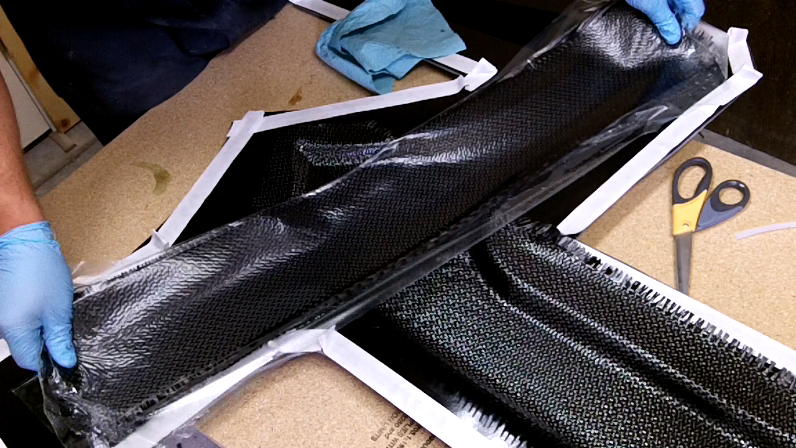
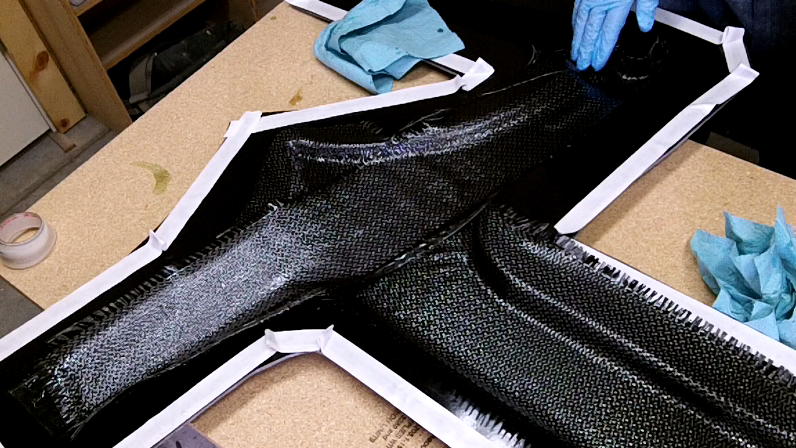
I should have shown this better but time was against me during this layup. Basically what you are looking at is the bottom bracket and chain stay foam cores wrapped in carbon fiber.

This tubing is for the rear derailleur cable housing which runs internally in the chain-stay and frame.
Once the layup was complete I used perforated plastic on top of the carbon fiber and then breather on top of that. I like using Stretchlon 200 as a bagging material because it stretches up to 500%. This allows less pleating while fastening the bag to the mold. It also eliminates having to create "rabbit ears" on complex shapes. It's a little more expensive than regular bagging but well worth the extra cost in my opinion.
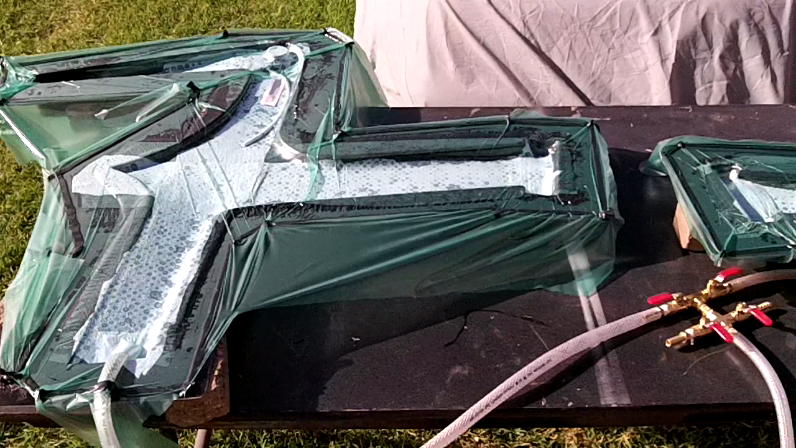
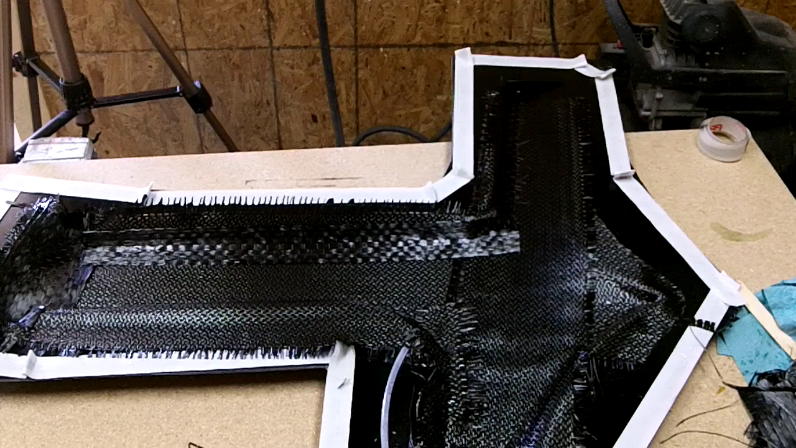
Joining the Frame
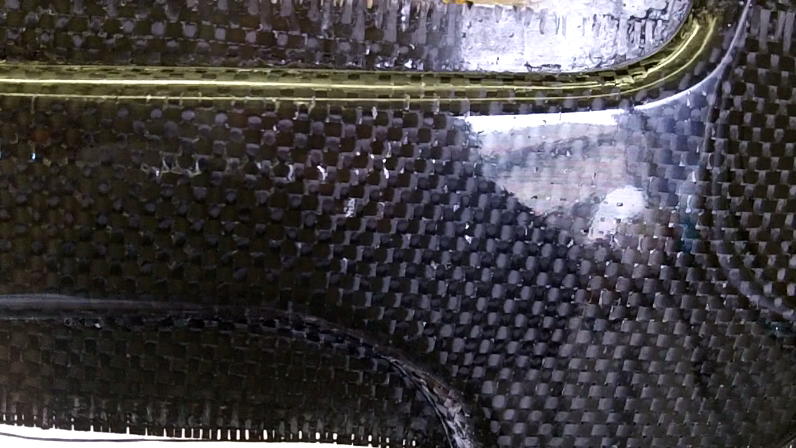
This was the first time using this type of carbon fiber cloth and it turned out horrible. The cloth had too much spacing between the weave and it caused air-pockets to form in the spaces against the mold. In the future I will use a tighter weave on the finishing or outside layer of the frame. I figure that this spacing also adds extra weight because the epoxy has to fill those spaces. I did a close inspection and though there are these air-pockets all of the carbon fibers were wetted out fine. If I would have found any dry or loose fibers in the frame I would have had to start over. In this case there's nothing a bit of filler can't correct. Thank goodness for filler!
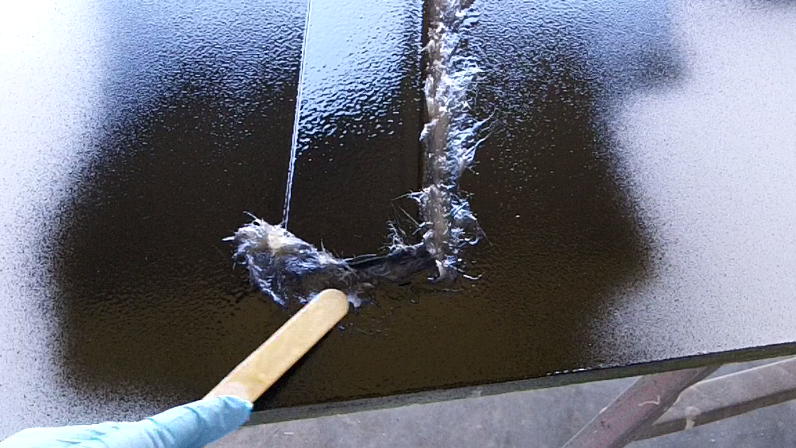
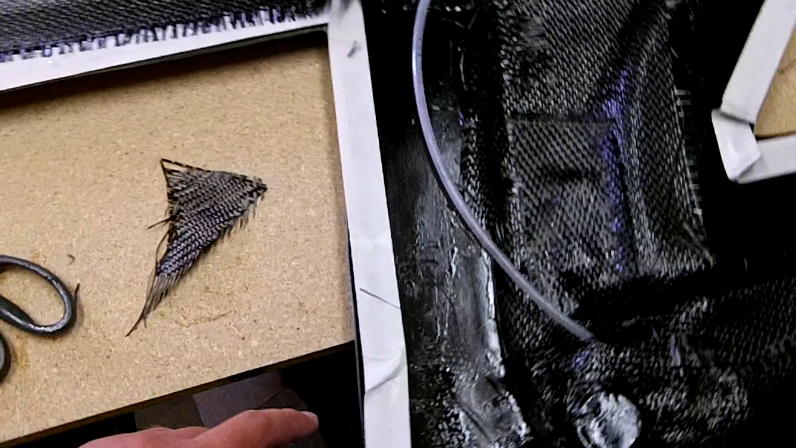
Next I had to cut the carbon fiber flange off the frame. Since the flange has different thicknesses on different parts of the frame, I use a sander and sand off the flange from the back or flat side of the frame. When it reaches the proper joining lined on the frame the flange would fall off. I don't know if that makes sense but I don't just cut the flange off because then the frames thicknesses will be off on some areas of the frame.
I also ran into another problem. I didn't overlap any carbon fiber over the flange around the bottom bracket area of the mold. Therefore, I couldn't get the frame out. I ended up using a stick (more like a board) to pop it out. It did come out but the process cracked the frame a little bit. Luckily it was a small crack and one that was easily fixed. The force was so great that I actually broke the bottom bracket hole/pillar off the mold. Luckily that too was fixable.

Here's another look at that crack.
I added a couple layers of uni and some bid carbon fiber to the crack and vacuum bagged it. Now it's stronger than before the crack.
Ok since we're talking about problems here's that embarrassing one I was telling you about earlier. When I made the template of the front derailleur (so I could position it on the plans) I only accounted for the outside arm. I don't know what I was thinking but I didn't account for the inside arm and the notch was too small. I had to cut a notch in the actual chain-stay to fix the problem but it wasn't as big of a deal as I thought it was going to be. I used a couple of layers of carbon fiber to patch it up and it was as good as new. Sorry, I couldn't find any good pictures of it after the repair.
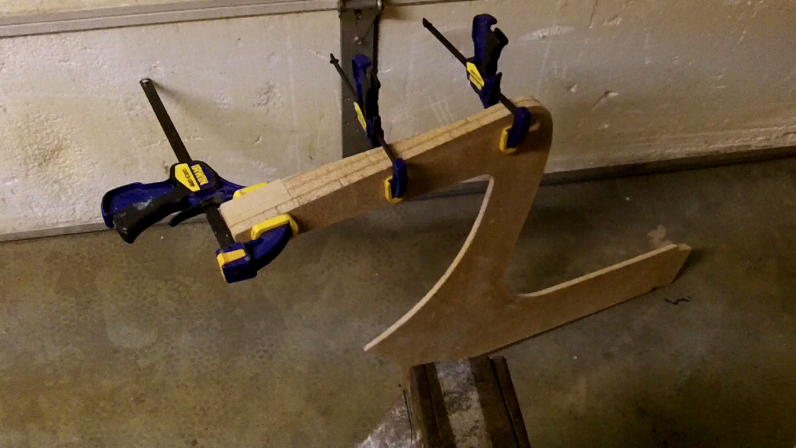
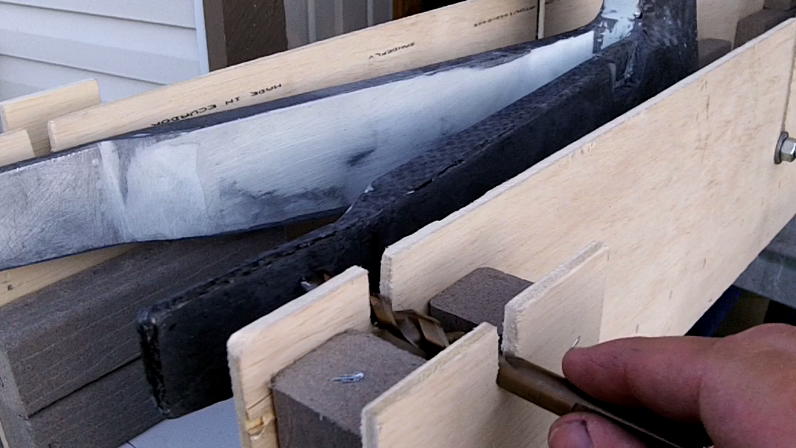
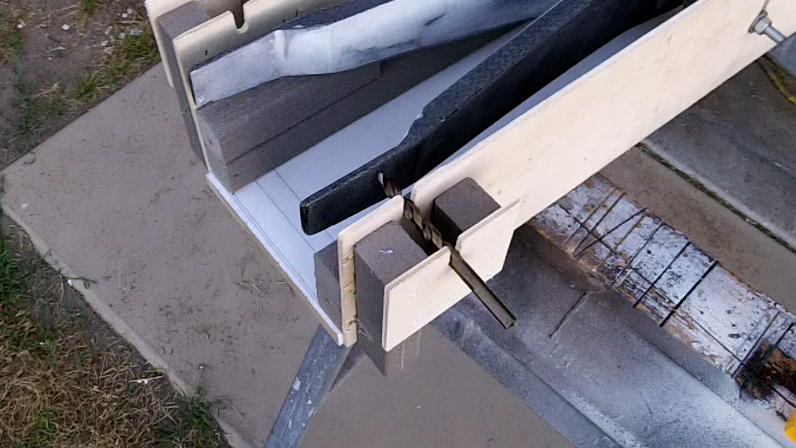
I used clamps and blocks in order to line the frame up with each-other. It came out pretty good but I believe I should have done this part in the jig and will on the next frame. Note: that there is a board separating the rear dropouts. this space has to be 130mm for the rear tire axle to fit properly. Remember that you need to acount for the rear derailleur hanger if it sandwiches the dropout like the one I'm using does. I didn't acount for this and the fix was a pain. Also note: I added, or glued, a 31.8mm to 27.1mm shim inside the seat post/tube.
Here you can see me gluing the frame halves together with epoxy and graphite powder. The combination makes a great glue.

I made some prepreg uni carbon fiber, with the fibers running perpendicular to the joining line. All this carbon fiber does is hold the two halves together. I just used blue painters tape to hold the carbon fiber tightly against the frame. One thing that I found was that once the epoxy cured, the blue tape didn't stick to it- Thank goodness too I was worried about having to sand all of that tape off.
Here is a look at the covered seem or Joining line. The top part of the tube I did first and it turned out kind of crappy. The areas I did like the headtube and trailing edge turned out much better.
Filling the Frame
Once the frame was securely joined. I hit it with some 100 grit sand paper and then filled all of the major voids with Split-Second filler. This filler is nice because it uses micro glass spheres or micro balloons which cause it to be light weight and easy to sand.
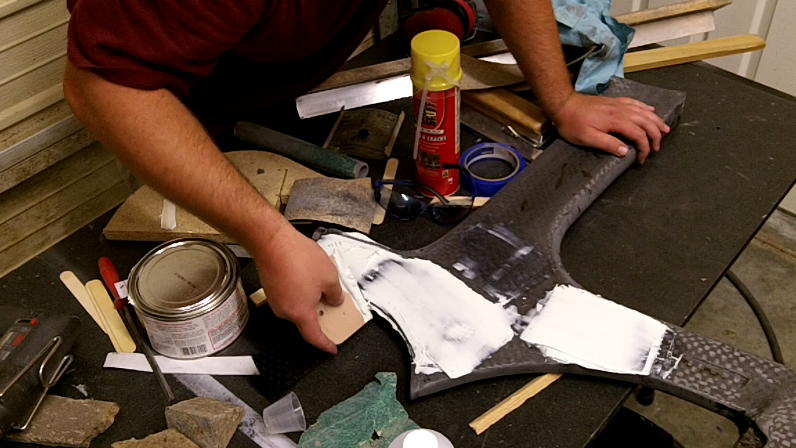
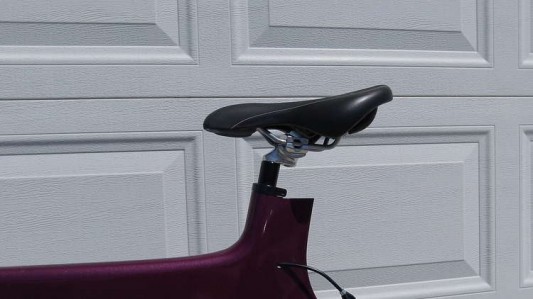
Here I waxed the seat post clamp and filled the space between the seat post/tube and the clamp. Once cured the clamp just gets popped off and the filler gets sanded flush. This creates a seamless transition from the seat post/tube to the clamp. Note: I made the post too high for my wife and had to cut it down about 2".
Here is the frame after filling.
Building the Jig
I started by drawing a template for the center of the bottom bracket and front and rear axles. I then taped the template to some 1/4" plywood with about a 1" space between the bottom edge of the board and template. This plywood will become the jig's side wall, so you'll need two of them that are the same size. Be careful to keep the bottom of the template's edge as parallel to the bottom edge of the board (jig's side wall) as you can.
Here is a picture of the rear axle and bottom bracket center.
I used a pointy object to puncture the template in order to transfer the center points to the wood. Here is an example of the puncture at the front axle center.

Here are the two side walls clamped together. It is extremely important to line up the bottom edge of the jig's side walls so they are flush with each other.
It is equally important to line up the front or back edge of the side wall so they are flush with each other. It doesn't matter which side you line up but you'll have to use this side for lining up the jig later. To make it easy, I made both the front and back flush. I lined up one side and then mitered off the other.
Here you can see the puncture or center point of the front axle. I will be drilling a 3/8" or 9.5mm hole at this point as well as the rear axles point and bottom bracket point.

This picture show the drill press that I am using. I made sure that the bit will be drilling perpendicular to the plywood or side wall.
The following two panels are need for a guide on the jig. I'll explain that more later but you'll need two of these with holes drilled in them. They don't need to be exactly the same but try to make them somewhat close. These are also 3/8" holes.
This is a piece of 7" shelving used for the base of the jig. Never trust the end being a true 90 deg cut. I used a carpenters square to draw a more correct 90 deg line. I then used a different square to verify its accuracy. This is the line that I use to align the sidewalls of the jig. Remember which side I lined up or made flush before drilling the center holes? These flushed sides of the side wall are then alligned with the line made on the jigs base. Once aligned I just used a staple gun to fasten it to the shelving. Make sure the bottom of the shelving is flush with the bottom of the jig's side wall.
I chose to use Tredex to help the sidewalls stay at 90 deg angles to the self. I used a square to make sure the wall was at 90 deg before shooting it together with the staple gun.
You don't have to cut channels from the holes but it sure helps to get the frame in and out of the jig. If you don't use them you'll have to screw and unscrew the bolts every time you want to get the frame in and out of the jig.
I used a coping saw to cut the channel and was very careful not to cut into the bottom of the hole. The bottom of the hole is the most important part. Everything will be aligned off the holes in the jig's side wall.
I cut two 2" pieces of 1/8" aluminum and drew diagonals to create center lines for the 3/8" threaded rod that is used on the jig. These plates help to keep the bottom bracket shells aligned properly when glued to the frame.
Clamping the aluminum down will help with cutting a good hole. I find when trying to hold this by hand it always moves and becomes misaligned.
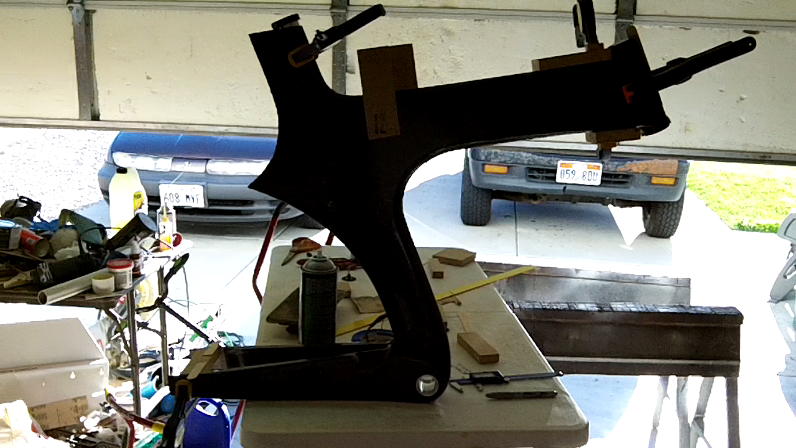
Jigging the Frame
The following few pictures show how I make the frame perpendicular to the axles and bottom bracket. First I tightly pull a piece of tap over the bike and fasten it to the jig's side walls.
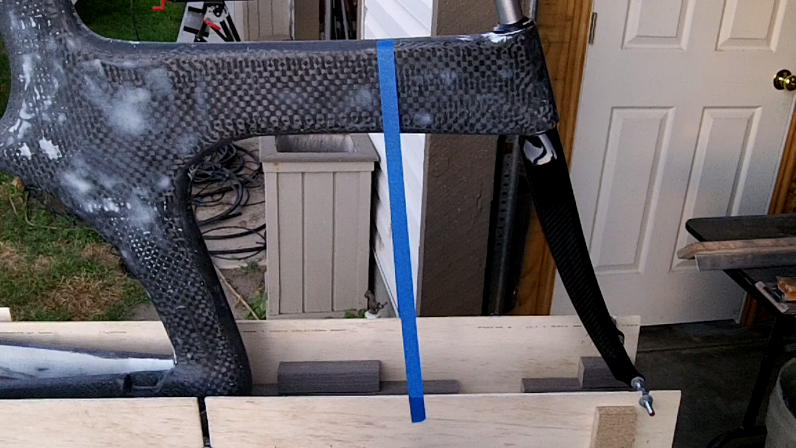
I then put a mark on the tape where the side wall meets it.

I do the same to the other side.
I then take the tape off the frame and jig to find the center between the two marks just drawn on the tape from the side wall. I also find the center of the frame and draw a mark there. Then I put the piece of tape back onto the frame, aligning the tape's center line with the frames center line- It's easiest to do this first. Then I align the tape's sidewall markings with the side wall of the jig. Now the bike is perpendicular to the axles and bottom bracket.
Remember those two alignment pieces of plywood that were made during all of the drill pressing? Here is why those were important. In order to fasten them correctly it is best to first lay the 3/8" rod into the holes in the jig's sidewall. Then align the holes on the alignment pieces so they match up with the rods and fasten with staples.
Now you can use the 3/8" drill bit to find the center of your rear dropout hole. Nifty huh.
Once you've found the center of the rear dropouts holes you can use a drill press to cut them out.
Here I used a piece of paper as a template which shows me how to cut out the dropouts. On this side of the dropout my template shows how to cut the dropout so that it works with the the derailleur hanger.
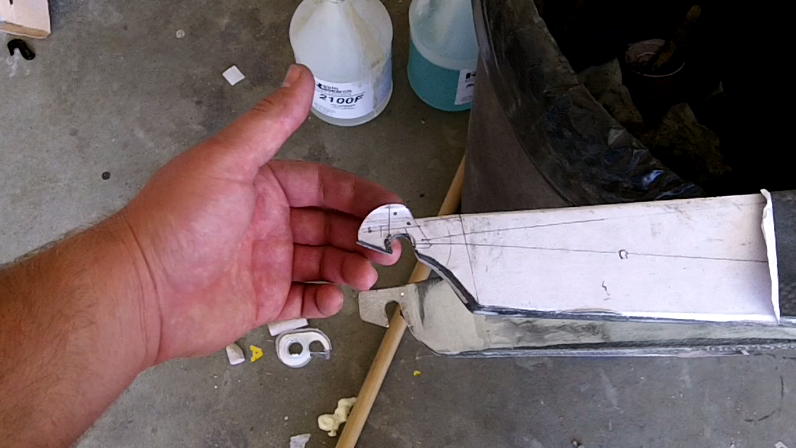
If you're not sure out to position the rear derailleur hanger here is a nice resource to have. If you want more details here is the source: Sram's Derailleur Hanger Specs.
FYI on the front axle- The 3/8" rod may not fit into the front fork dropouts. If not try a 5/16" rod. I had to use a 5/16" rod on mine.
Final Frame Jigging
So far we've gotten everything aligned and cutout where it needs it. Now it's time to glue some critical parts to the frame. This includes the bottom bracket shell and headset cups.
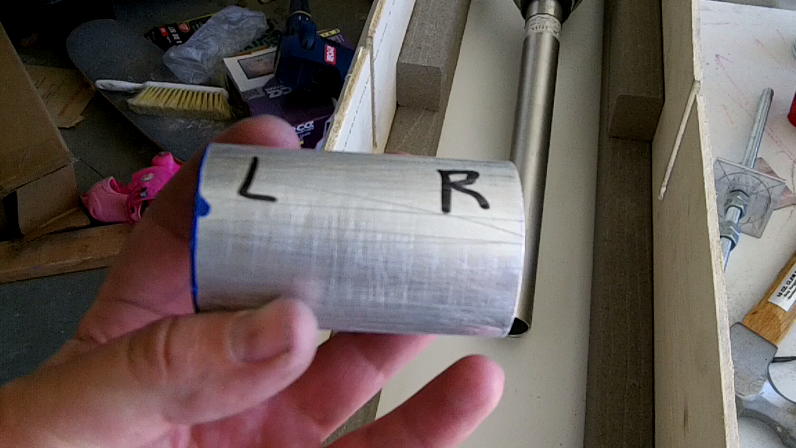
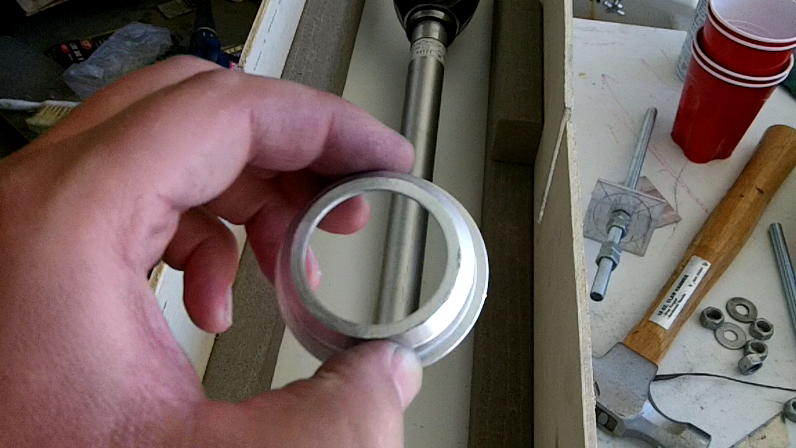
If you haven't already figured it out the bottom bracket shell has a left and right side. If you're not sure which side is which, use the bottom bracket cups to find out. Just screw them into the shell and more often than not the cups will be market with an "L" and "R" indicating the correct sides. Marking this on your bottom bracket shell will help you install the shell with out too many problems. You'll also notice in the picture below that I have sanded and scraped lines into the shell this will help keep your bottom bracket from coming loose as you pedal. If you're smart, you'll put a piece of tape on one side of shell so you can slide it through the frame without getting the epoxy/graphite slury on shell's treads. If you're smarter than me, you'll put tape both sides of the shell. LOL You'll have a better experience than I did.
I decided to glue my headset cups into the head tube. However, I also wanted the option of being able to get them out later if I needed to. I went ahead and waxed them before gluing them into the head tube. Now if I ever need to get them out, a nice whack to the bottoms of the cups ought to pop them out.
I used epoxy and graphite powder to glue the bottom bracket shell and headset cups into the frame. I then aligned the frame in the jig and let the epoxy cure.
Note: Some experts, but not all, say to add a layer of insulation between the aluminum/metal and carbon fiber to prevent Galvanic Corrosion. I didn't do that on this frame but if you feel inclined to avoid potential corrosion you can add a layer of fiber glass, or use a non conductive glue/epoxy for insulating areas were metal is bonded to carbon fiber. I've also heard that if you use titanium you don't need to worry about it corroding when bonded to carbon fiber.
I used the stem to put some pressure on the cups to keep them tight in the headtube.
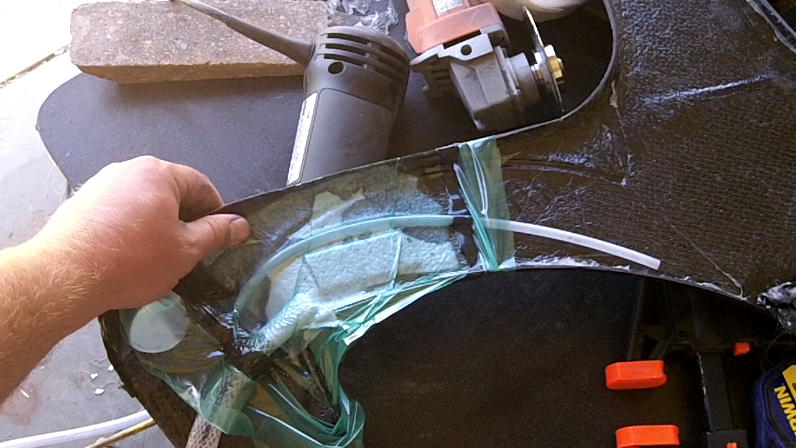
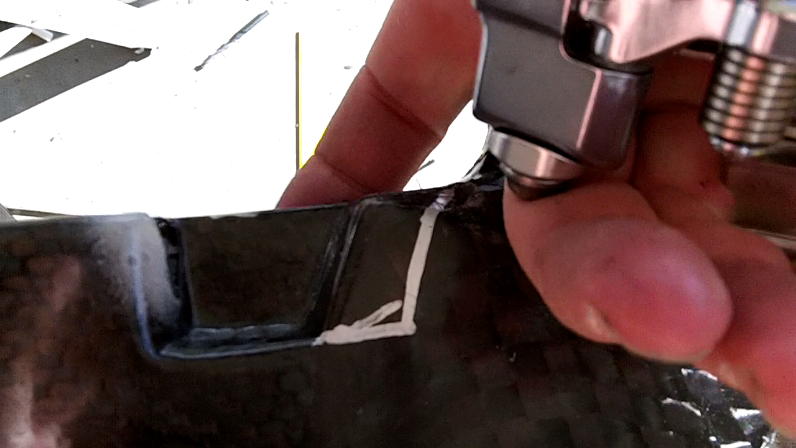
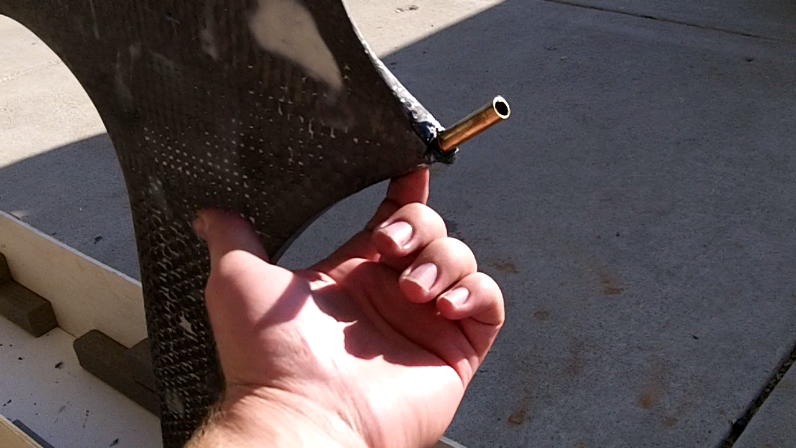
Here is something I didn't take good pictures of- It is a tube that will hold the rear brake.
Basically, all I did was drill a hole which is access under the "wheel-well." You can see my finger sticking up into the hole in picture below. I used brass tubing I found at the local hobby shop that my rear brake's bolt and nut could fit into but would stop the bolt at the bolt's flange. I wanted to use aluminum but couldn't find any the right size. Not a big deal though there is only about a 1/2" of tubing in the frame. After scuffing up the tube, I used some carbon fiber tow around it and shoved it into the hole. It worked out pretty good and once the tube was cut off and sanded down the brake went on without any problems.
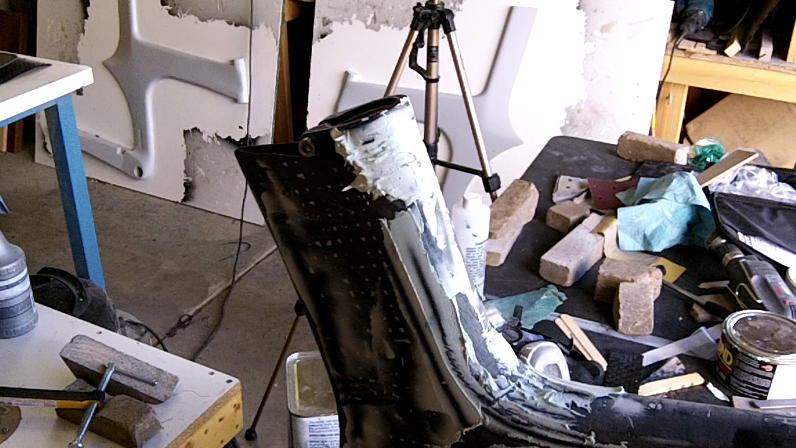
Painting the Z Frame
Paint Prep
With everything filled and sanded it was time for primer. I taped off the areas that I didn't want painted like the bottom bracket, headset cups, and seat post/shim.
I like using Duratec as a filler and primer coat because it helps cover pinholes and other problems. Plus I think I sand better than I paint.
Once primed I used a 220 grit sand paper to do the initial leveling. The Duratec is thick when it goes on so there is usually some orange peel that needs to come off. I really like 3M's Free cut sanding paper it cuts fast and doesn't clog or gum-up as fast as other sandpapers that I've used.
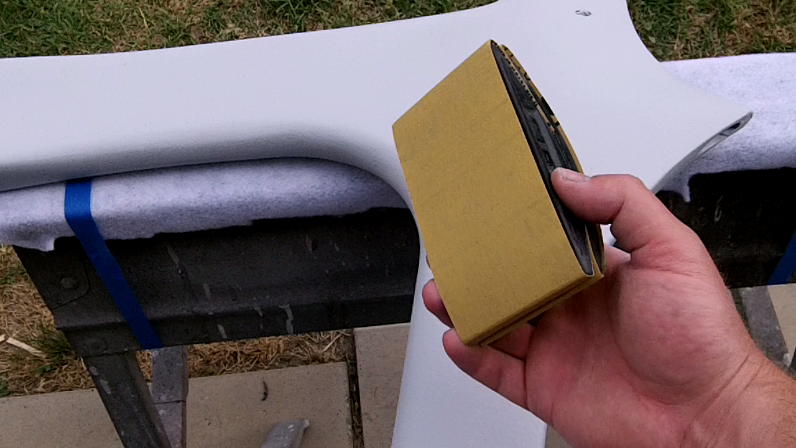
Here's a nice little trick that I do. I can almost use the same piece of sand paper for the whole frame if I blow it off often enough.
You can see that if blown off often the Duratec won't gum up your sanding paper.
Before hitting this frame with 320 grit it needs to have a final pinhole filling. I used Pro glaze as the filler and really slathered it on. Once sanded, all you'll see is a tiny pinhole. I sanded the Pro Glaze with 220 grit and then hit the whole frame with 320 grit.

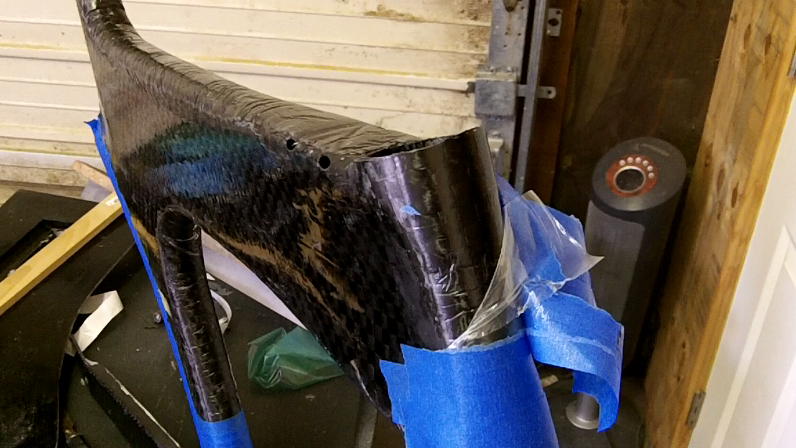
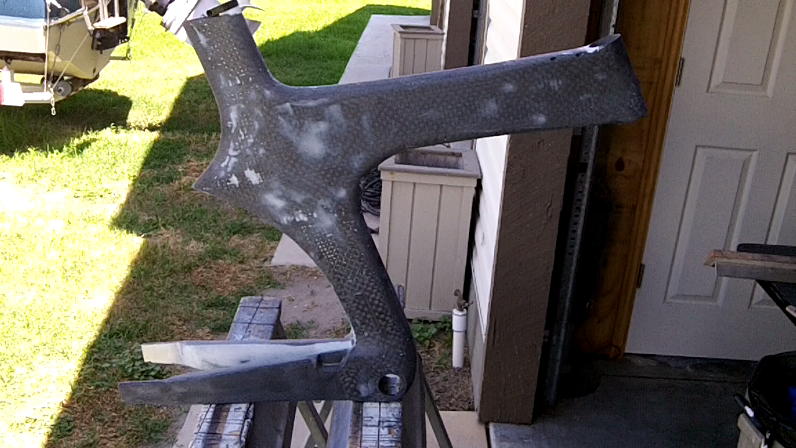
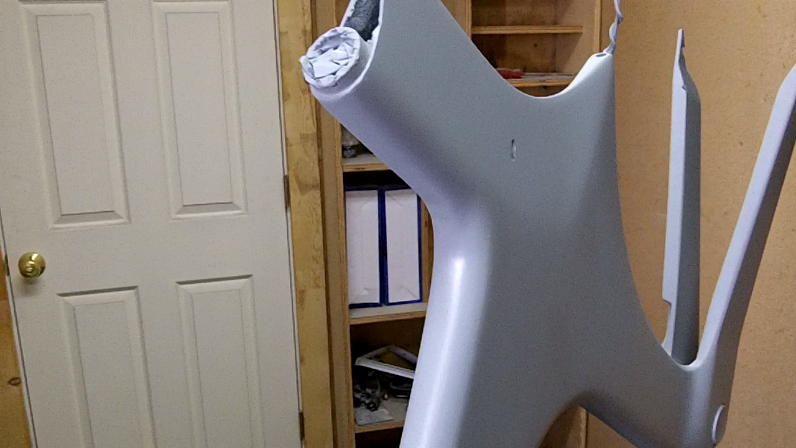
You'll notice that some of the carbon fiber started showing through from sanding. If you were to leave the frame like this, the contrast in colors (from the light and dark spots) would show in the final paint job- Especially when in the sun. So I just used some fast drying automotive primer to make the frame a uniform color. The Gray matches the Duratec pretty good.
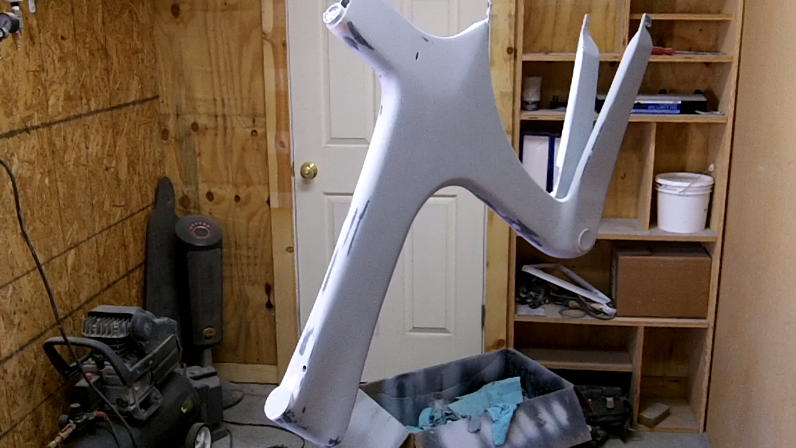
After the automotive primer dryied I did a real quick sanding with 320 grit and was ready for the base/final coat of paint.
Painting
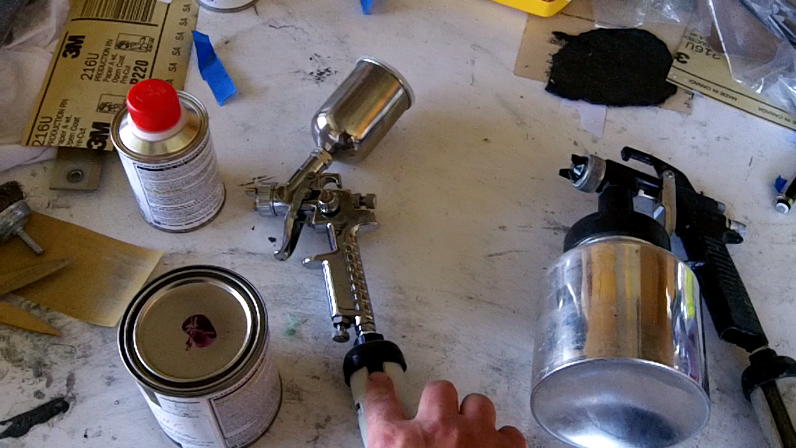
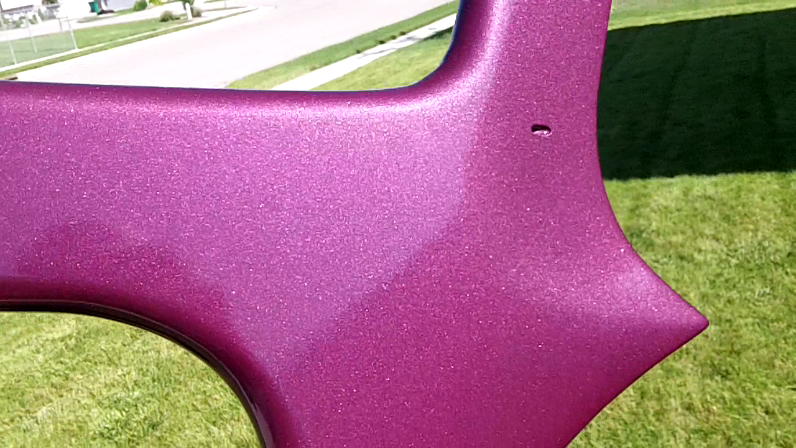
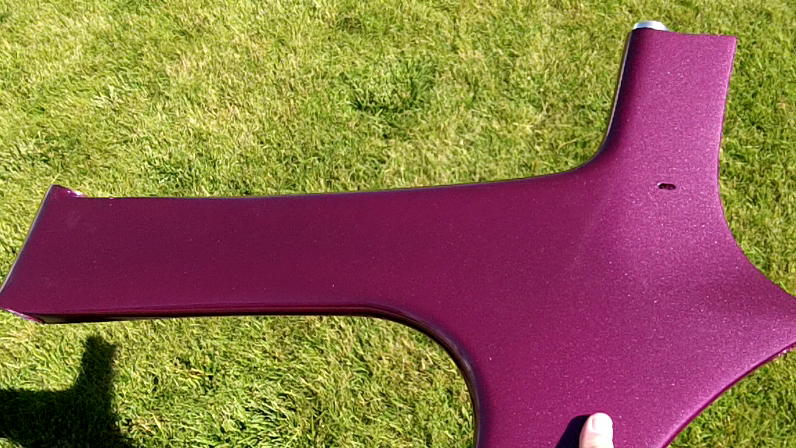
I have this little HVLP sprayer that works great on small projects like this frame. It has a 1mm tip which helps with controlling over-spray. I didn't want to spray clear on this frame so I got hooked up with some PPG single stage paint wich dries shinny. I gave the bike 2 heavy coats and called it good.
I told the lady helping me at the paint supply store that my wife wanted dark purple with metallic flake. She showed me some sub-par metallics and I said "no, there's not enough sparkle." The lady helping me said "Oh, you want something Gaudy?" And this is what she came up with. She did great, I think it looks beautiful.
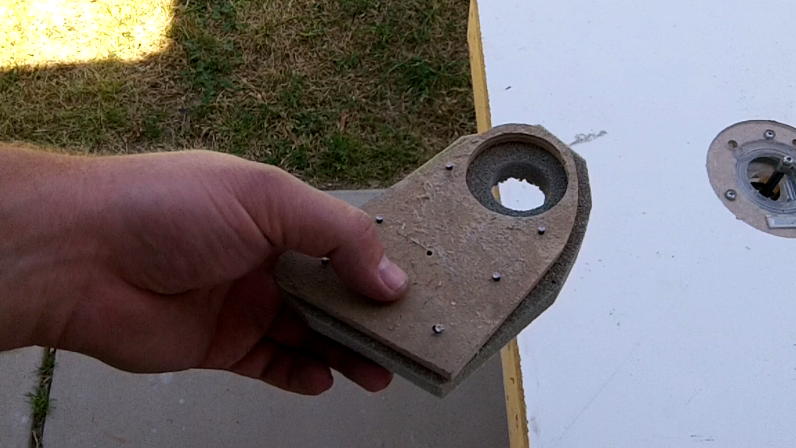
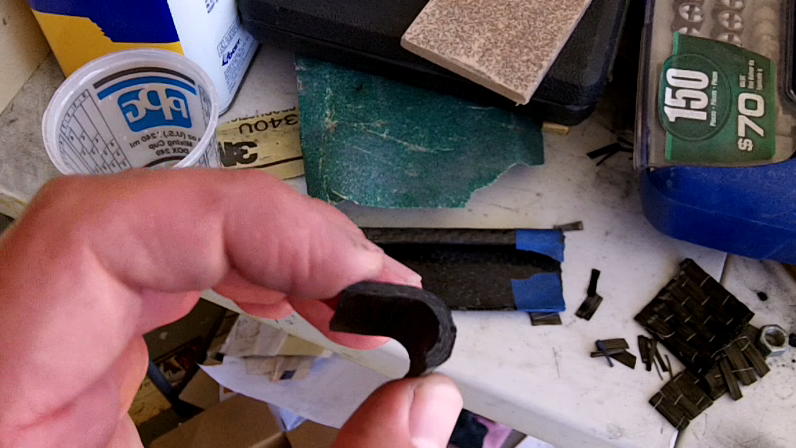
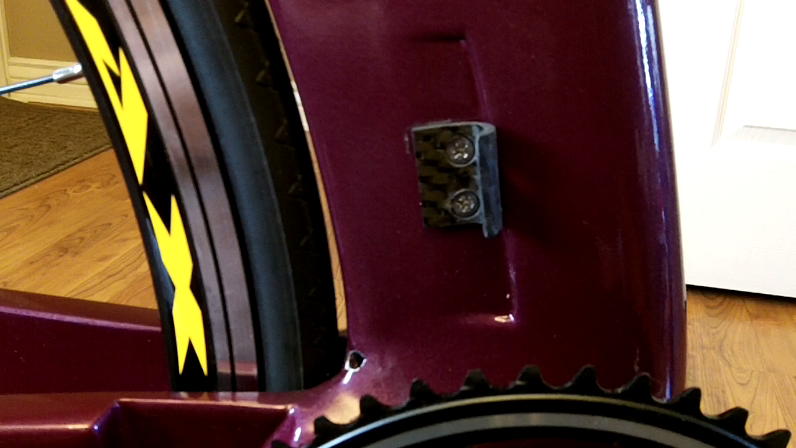
Making the Front Derailleur Boss.
I made the boss out of carbon fiber by using a 3/8" dowel glued to a 3/8" piece of wood lattice. I made a long piece because I wanted to make several derailleur hangers from it. I can't remember how many layers I used but I think it was around 6. The thickness is about 1/8" thick.
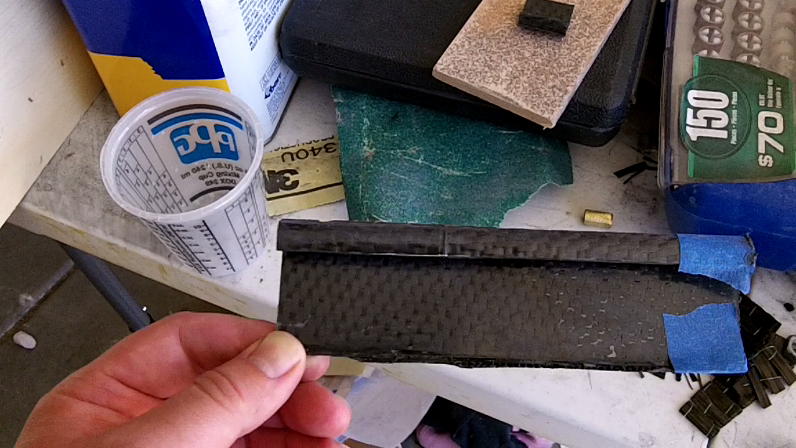
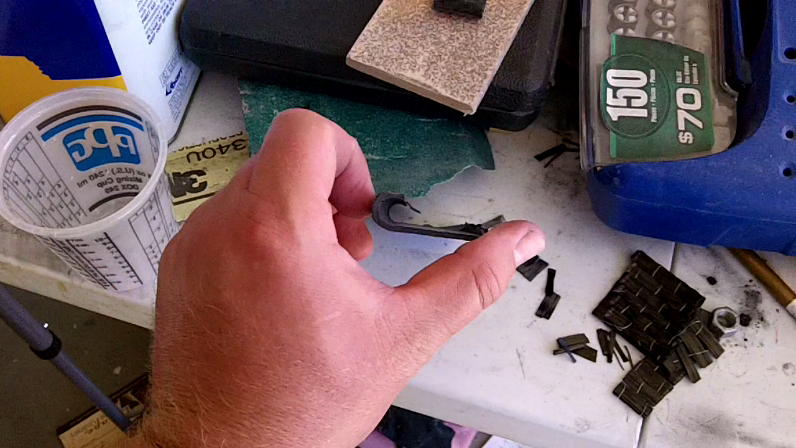
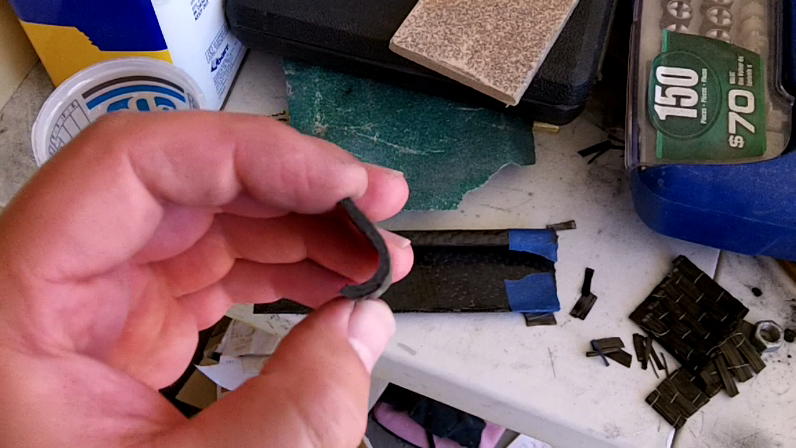
This is what the derailleur boss looks like after trimming.
First I used the derailleur to figure out where I needed to mount the boss. Then I drilled a couple of pilot holes through both the boss and the frame. There is actually a piece of 1/8" thick aluminum in the layup on the recess of the frame where the boss attaches to. I decided on the aluminum insert so that I could tap and thread the screws to it. Basically I just drilled a couple of pilot holes and tapped them for no. 6-32 screws.
Here is a picture of me doing the final assembling of the bike.
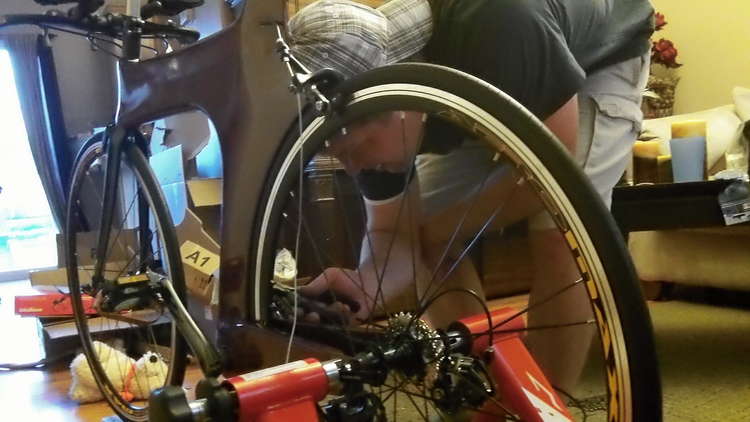
Now that the bike is assembled it was time to test the ride. I haven't taken any pictures of test rides yet so I'll need to do that.
Final Thoughts About the Z Frame
Frame Weight- about 5.25 lbs or 2400 grams- Heavy but I believe I can get the next one under 4 lbs.
Cost- this first frame, with molds and everything cost about $300.
Time Spent on Project- Plans, template, plug, female mold, and frame; around 300 hrs.
The Ride- The bike is a great ride but definitely needs some improvements. The back-end is not as stiff as it needs to be- The wheel rubs on the frame if you lean too far back on it. Also there is too much flexing on the chain stays when pedaling hard- Torsional twist, I believe from the seat tube just above the bb shell. I believe orienting the carbon fiber differently on these areas will fix the twisting and flexing problems.