{metacanonical:http://theprojectjunkie.com/bicycles-bike-components/vibram-five-finger-pedal-platforms.html}
Vibram Five Finger Pedal Platforms- Carbon Fiber Bike Platforms for Cycling
Summary
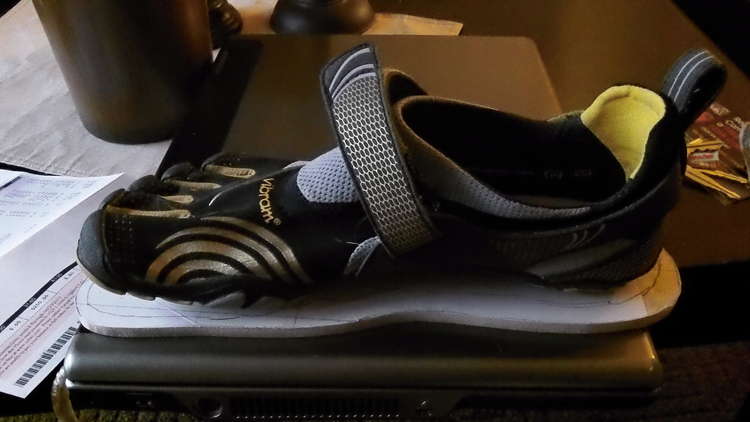
I've been wanting to make some pedal platforms for my Vibram Five Fingers for some time- But after a long bike ride I started getting Posterior Tibial Tendinitis in my right leg so it accelerated the project. Before making the platforms, I was just using standard bicycle pedals with a small leather strap on top. I believe the injury started because of the lack of support from my Five Fingers as well as my foot shifting all over the place as I road my bike.
Material Cost
- About $50 in materials
Total Working Time Spent on Project
- The design, plans, and template took about 1 hour
- The mold took about 3 hours
- Laying up the carbon fiber and vacuum bagging took about 1.5 hours
- Cutting out the platforms took about 1.5 hours
- Adding the hardware took about 3 hours
Note: the first prototype always takes the longest to make.
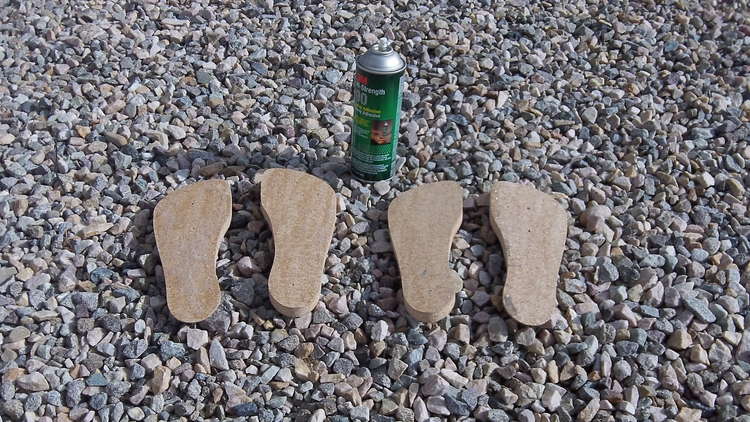
Template
- Paper glued to 1/4" hard or handy board
Plug or Male Mold
- 3/4" Particle Board
- 3M Super 90 spray adhesive
- Bondo
- Will apply Duratec Primer in the future
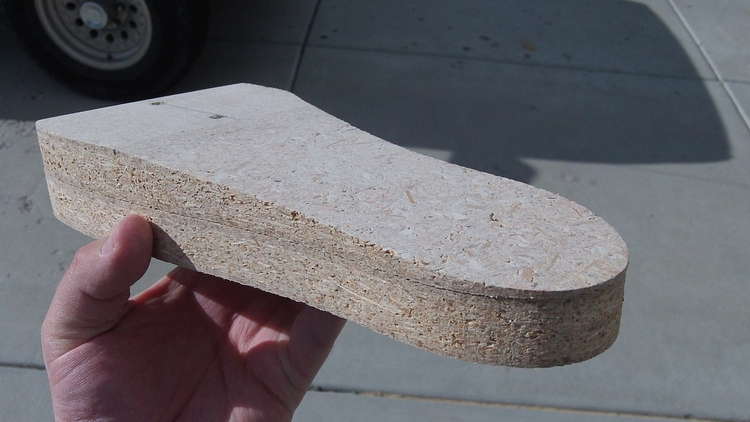
Pedal Platforms
- 6k, 11 oz 4 harness satin weave AS4 Carbon Fiber
- 3" wide 1/8 aluminum
- 2" cargo strap
- Velcro- sticky backed
- 3/16" thick leather
- 1/4" leather rivets
- Resin Research Epoxy 2100 system with fast hardener
Creating the Template
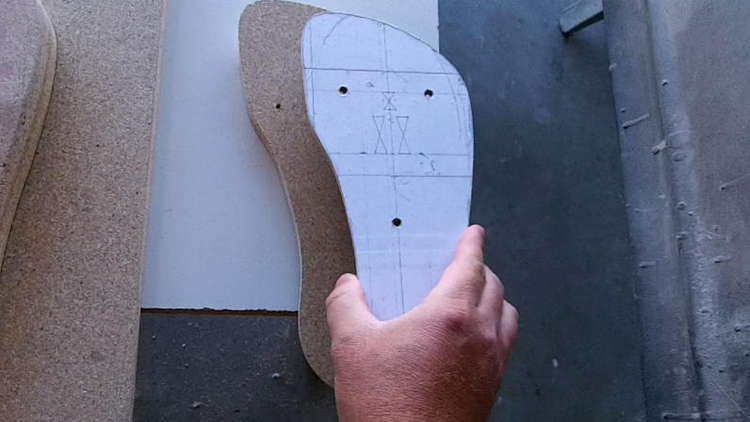
I took a friend's cycling shoe and traced it out on a piece of paper. I figured the shoe's company had done the research on the best possible foot position so I'd just follow their lead. I copied the top and side profiles as best I could. I then situated my Komodo Sport VFFs over the drawing and traced out the new pattern where I thought would be the best position over the pedal cleat. After a rough drawing I cleaned up my lines and made the changes that I wanted. The changes where minor and made the mold easier to make. For example the side profile of the shoe had a curved upward angle from the cleat (or ball of the foot) to the heal. The curve of the shoe looked to be more for the foot's arch support than anything else. Because the curve was fairly gentle, I figured that a straight line would be sufficient- So far it seems to be working fine.
Once I finished with the plans I glued them to a piece of 1/4" handy, or hard board, and cut the template out with a jigsaw. Then I cleaned them up with some 60 grit sandpaper and the template was finished.
Creating the Plug or Male Mold
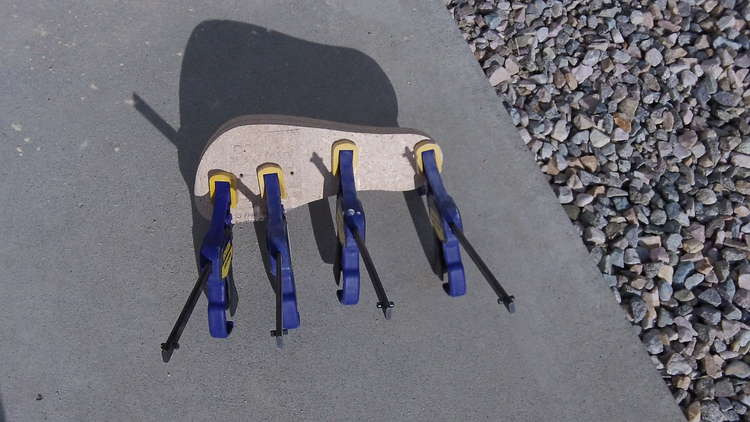
Creating the left and right Platforms
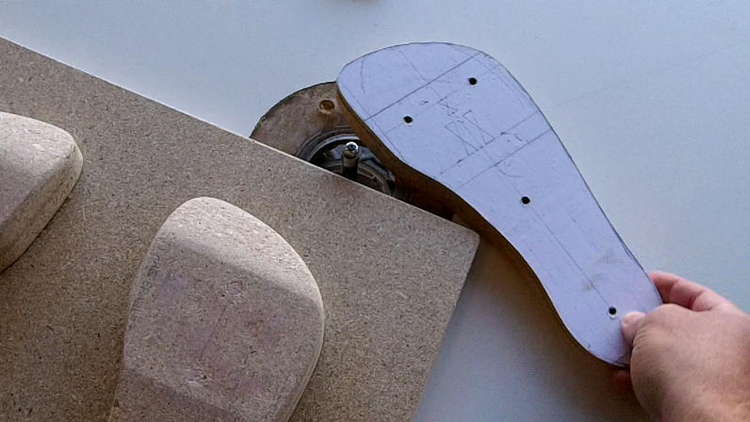
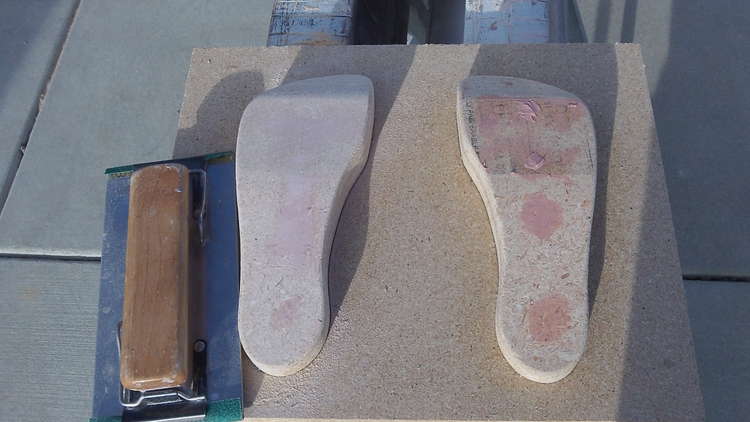
The template that I created was the shape I wanted for the platforms so All I needed to do was to match it with the 3/4" particle board I had for the mold. I screwed the template to the particle board and using it as a guide I created a replica of the temple with a flush cutting router bit on a router table. The particle board now matched the template's shape, the only difference being it was 3/4" instead of 1/4". I need 4 platform pieces, 2 for the right and 2 for the left sides, so I repeated the process 4 times. Hopefully the picture below will give you a better idea of the process.
I then took one platform from each side and drew lines on it to indicate the areas I need to sand. Basically it was just the lines where the 3" aluminum inserts would be located just under where the ball of the foot would be (the cleat attachment area).
Note: Make sure you shape each piece of particle board to mach a left and right foot. I screwed up on my first try and then accidentally created two pieces of the same foot when I tried to replace the screwed-up piece. It was a dumb mistake that set me back about an hour.
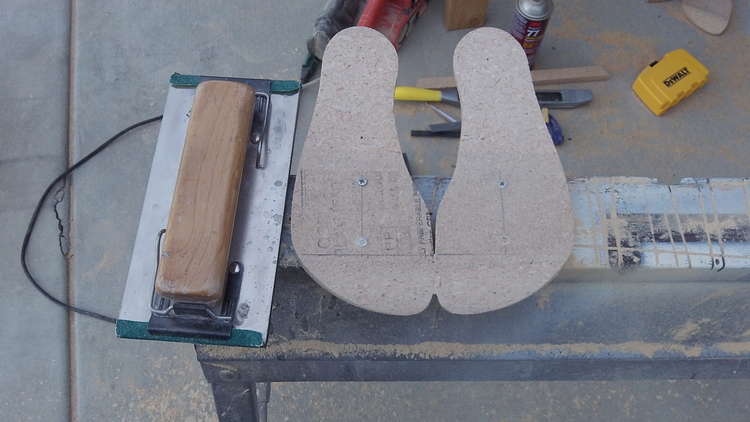
Once I had my platform parts sanded I glued them to their other matching 3/4" piece of particle board. I used 3M's Super 90 spray adhesive and then pressed them together with some clamps.
Here is are some pictures of the glued pieces. There is a slight amount of misalignment so they needed some sanding.
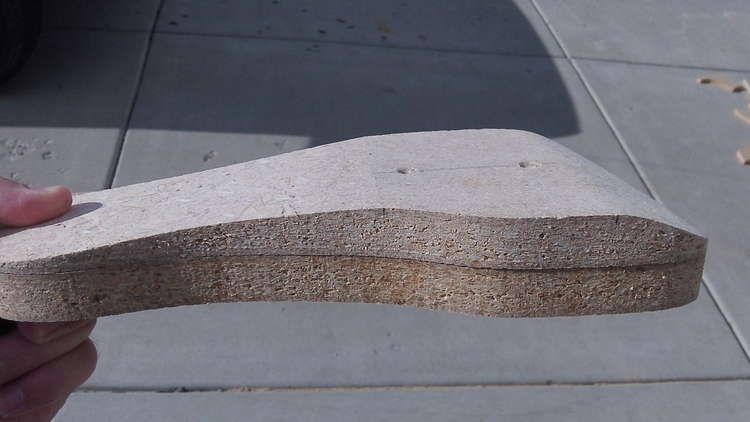
Once I felt the two parts were adequately secured to one another, I gave them a light sanding to eliminate any miss-alignment issues from joining the two pieces together.
Attaching the Platform Molds to the Base.
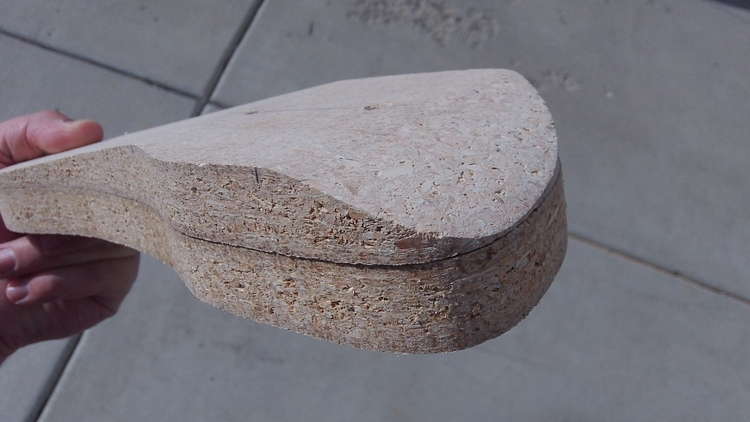
After completing the Platform molds I need a base to attach them to. I just cut out a square piece of particle board and glued the platform molds to it.
I used some Bondo to fill in any screw holes and once it cured I sanded it down smooth. The platform on the left has been sanded.
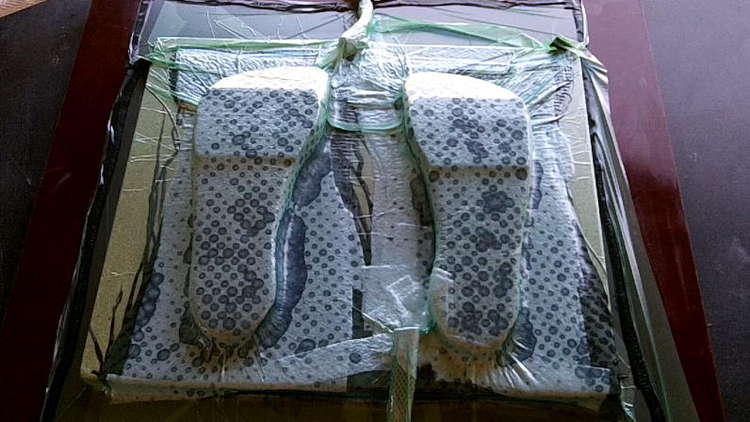
Normally, at this point I would apply Duratec Primer to the mold/plug and then finish it with various levels of sand paper and wax until it was a lustrous shiny gloss. But I didn't have time so I just used vacuum bagging plastic so the carbon fiber wouldn't stick to the mold. It worked fine with exception to a few wrinkles from the plastic.
Creating the Actual Platforms
Getting Everything Ready
I am using a faster curing epoxy so I made sure everything was ready to go before starting the layup.
The picture below shows the plastic release barrier that will be used between the mold and carbon fiber. The ruler was just to hold the plastic down since it was a little windy.

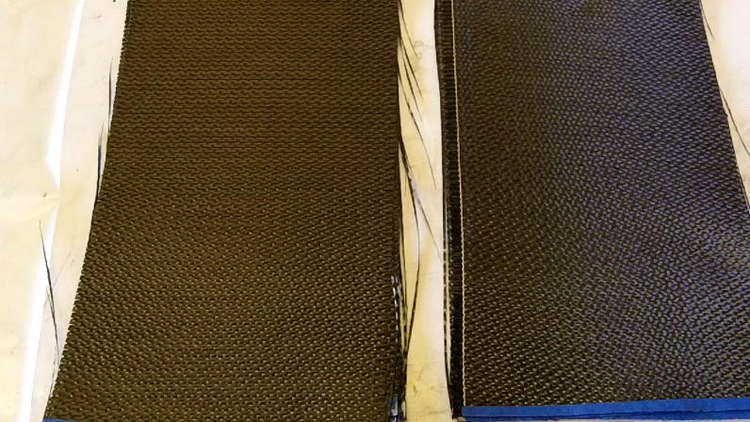
I am using 5 plys of 6k, 11 oz. AS4 carbon fiber in a 4 harness satin weave for each platform. I will be prewetting out the carbon fiber, or creating a prepreg for the layup. I like making prepregs because it creates a more accurate epoxy to carbon fiber ratio- And I think it is easier to work with.
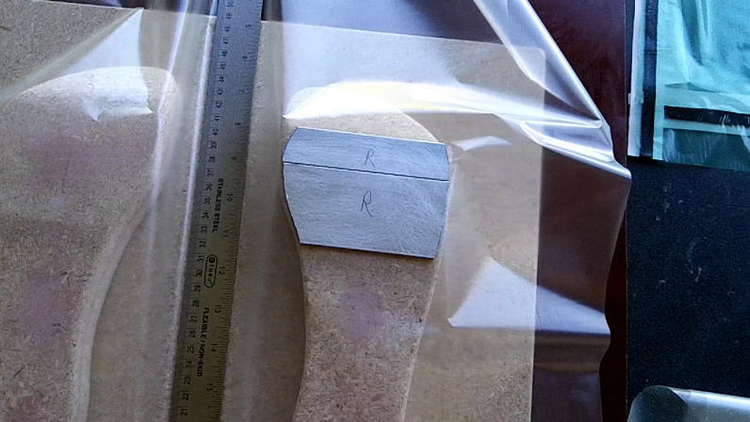
Here is what the Aluminum inserts look like, and where they will be positioned on the mold. However, they will be sandwiched between the layers of carbon fiber. I am using 1/8" aluminum, and since I couldn't find any 3" wide pieces on such a short notice I just used a 2" and 1" piece easily obtained from the local hardware store.
The Layup
The platforms have the following layup schedule over the mold as you see it in the picture below. This layup schedule is from bottom up- the mold being the bottom.
- Mold or plug
- Plastic for release barrier between mold and carbon fiber
- 3 layers of carbon fiber
- Aluminum inserts
- 2 layers of carbon fiber
- Perforated plastic release film
- 1 layer breather
- Stretchlon 200 vacuum bag
- Miscellaneous items included Resin Research epoxy 2100 system with fast hardener and butyl tape for the vacuum bag seal.
If you would like to learn more about carbon fiber, check out the article I wrote on Carbon Fiber Basics.
Note that the carbon fiber orientation wasn't a concern for me therefore it was layed up with just a 0 and 90 deg orientation. I also used a large piece of 3/4" Phenolic to vacuum bag to (it is the dark brown sheet you see underneath the mold in the picture below). The Phenolic keeps the mold from warping if there is a lot of exotherm (heat from the curing epoxy) or if a post curing oven is used. There's not a lot of exotherm from this epoxy but I did use a post curing oven because it was 60 deg F outside and inside the shop. The lower temperature creates a slower cure time and I needed these done fast. Since extra heat causes a faster cure with Resin Research epoxy, I set the oven to about 100 deg F and the part was fully cured in about 2 hrs. However, I gave it about 4 hrs to cure before removing the part from the mold.
After the part was cured I pulled it from the mold.
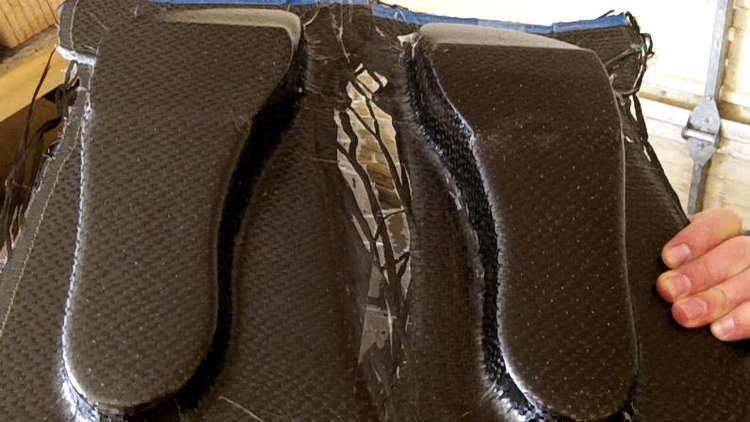
You can see why the plastic release barrier is not as good as a finished mold but it still worked out quite well. You can see in the picture below the white areas is where there is excess epoxy and where some of the plastic got stuck in the wrinkles. Not a problem though since most of the wrinkled areas will be cut or sanded away.
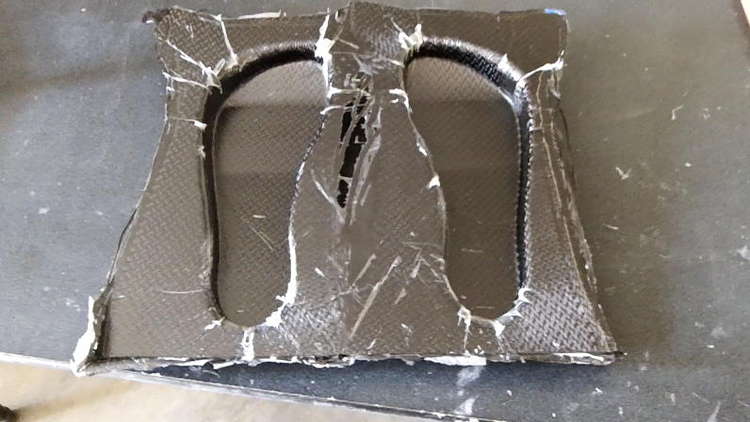
Cutting Out and Shaping the Carbon Fiber Platforms
After shaping and sanding the platforms to where I wanted them, they looked pretty good. You can see in the picture below, that I cut out a regression where the arch is on the platform. I then matched up both sides so they where the same for both feet.
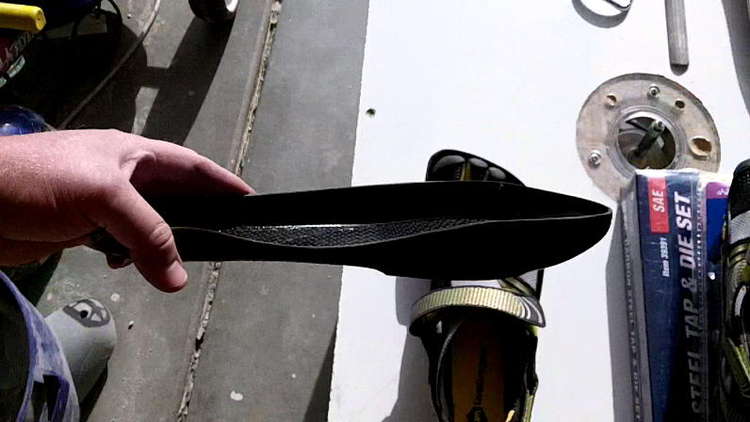
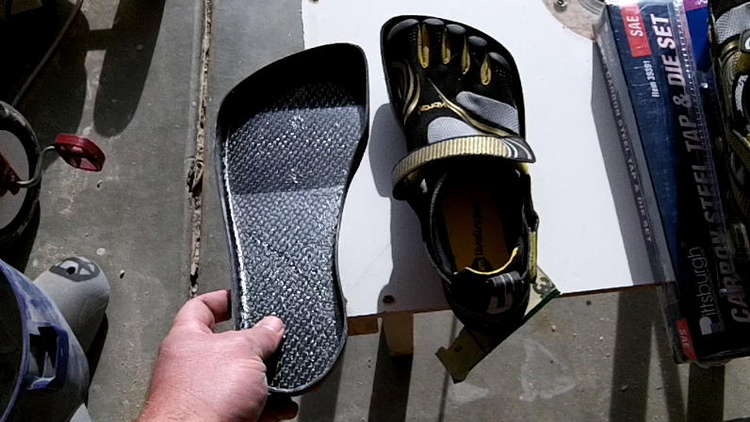
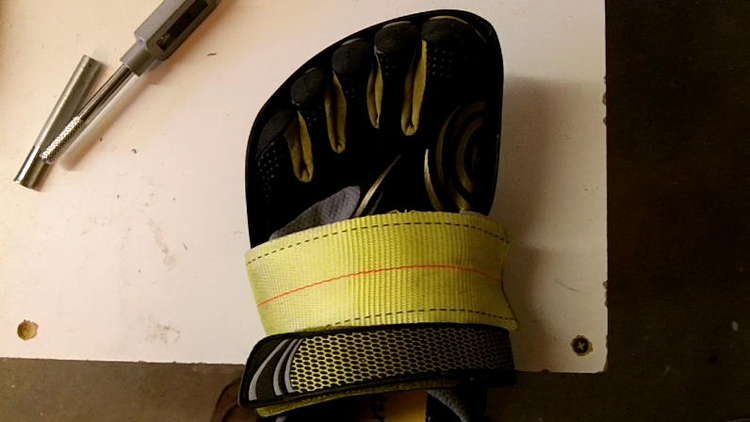
Here is a top view of the platforms. On the right you can see I have trial fit the Vibram Five Fingers in the platforms. It is a snug fit and at this point everything is going well.
Mounting the Platform's Hardware
Attaching the Leather Heal Support
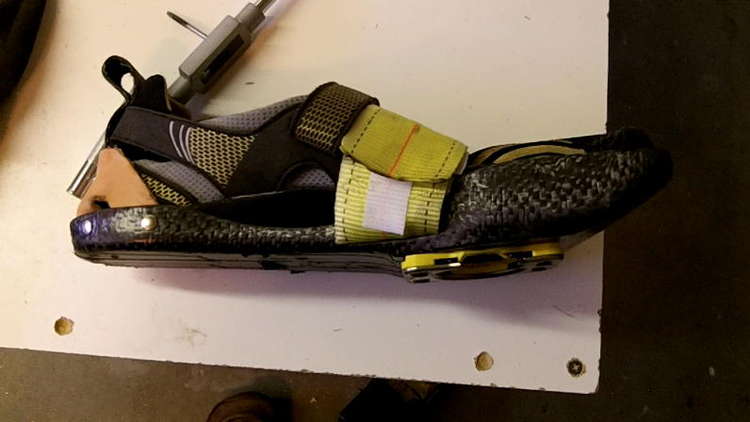
I was afraid that my heal would come up out of the platform while I was riding so I decided to add a piece of leather to hold it in. I just used some 1/4" leather rivets to hold the leather onto the platform. The tricky part was getting the leather to be on an angle so the heal would stay down and in the platform. So, I cut out the leather with some arms on it to pull the top of the leather heal strap forward and down- It worked out wonderfully.
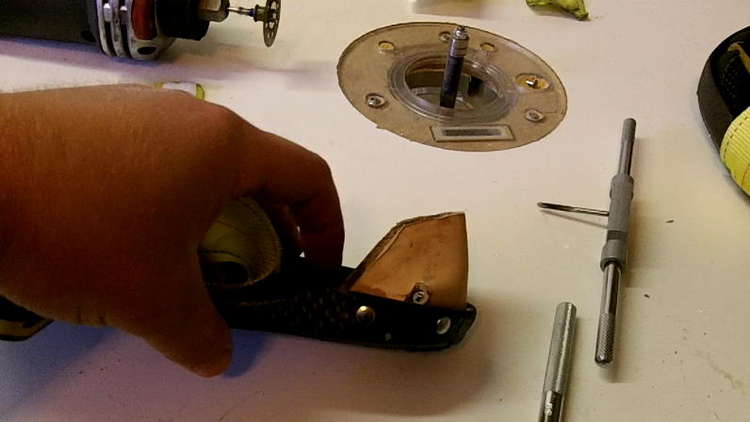
In the picture below, you can see my finger pointing to the leathers arm, which pulls the top of the heal strap forward and down.
Attaching the Platform Shoe Straps
Next, I used cargo tie-down straps as my platform shoe straps. I originally wanted to use seat-belt material but couldn't find anyone selling it locally for a decent price. This worked out good and it was only $8 for 20ft.
I was planing on using a D-ring to mount the strap to the platform but decided that cutting a skinny slot in the carbon fiber would work better- and I think it did. The skinny slot help prevent the strap from bunching up. I fastened the strap to itself by sewing it with a box and X pattern.
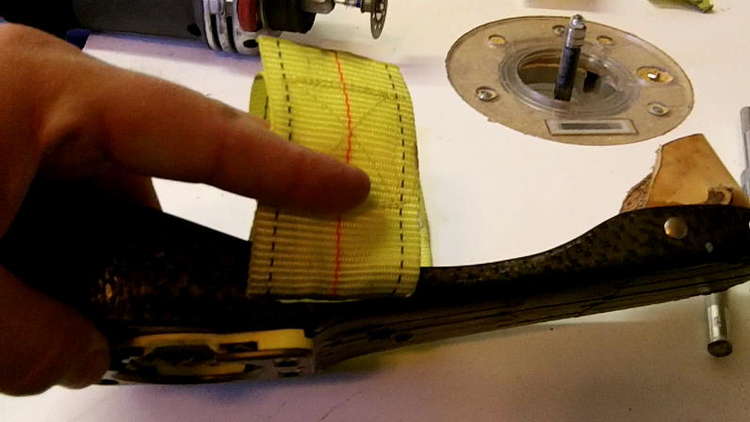
I then positioned the strap over the shoe, where I wanted it to lay over my foot, and market where the other strap slot would be cut out on the opposite side.
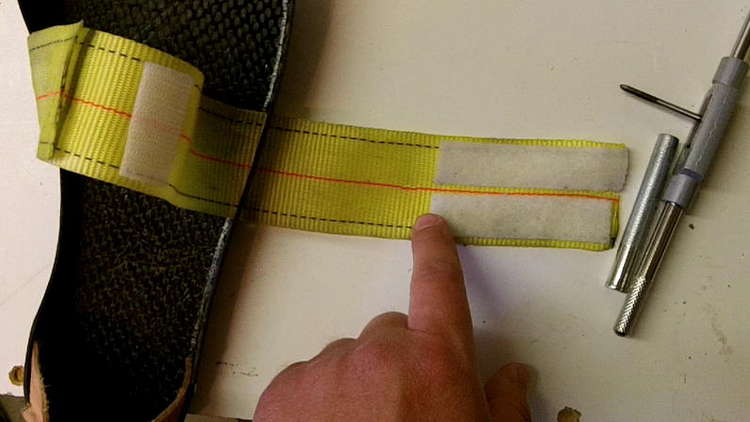
I decided on Velcro for fastening the strap over the shoe. I just used sticky backed Velcro and decided not to sew it because I was running out of time. I didn't realize that my feet were going to be wet when coming out of the water during the swim portion of the triathlon. Luckily the Velcro held up fine during the ride but when I was unstrapping at the bike to run transition the Velcro came right off the strap. In the future I will use water proof sticky backed Velcro and sew it on. In the picture below, you'll notice that there is only one piece of Velcro on the left or inside of the platform. There was more there but it came off during the tri. You should also note that the strap opens to the outside of the pedal. This is so that it won't get caught in the chain-ring if it happened to come loose or if I needed to tighten it during the race.
Attaching the Cleat
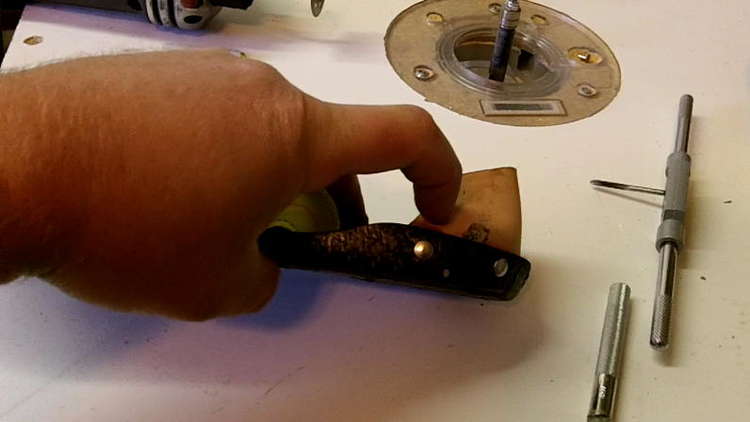
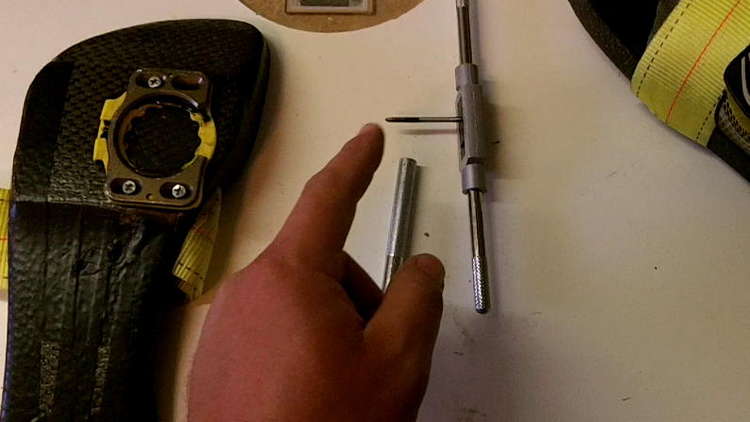
After finding the ideal position for my foot over the pedal, I positioned the cleat appropriately. Then I market out the screw holes and dilled a pilot hole with a drill bit. Once the pilot hole was drilled I used a tap to create a threaded hole for the cleats screws. I am pointing to the thread tap in the picture below. Carbon Fiber doesn't tap well and that is the reason for the aluminum plate sandwiched between the carbon fiber layers.
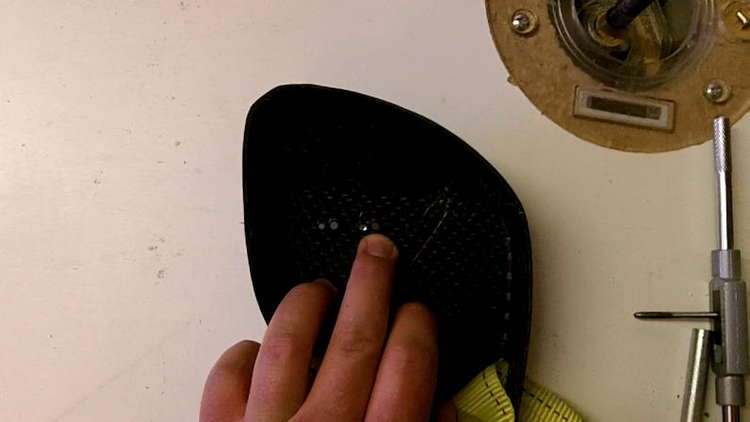
I originally just planned on using the screws that came with the cleats which were No. 8-32 but they weren't long enough. Luckily I had 6 No. 6-32 screws that were long enough on hand- it was around 1 am when I got to this point so I couldn't make a trip to the hardware store. Therefore, I had to create new holes and tap them for the No. 6-32 screws. You can see the No. 8-32 screw holes next to the No. 6-32 screw holes in the picture below.
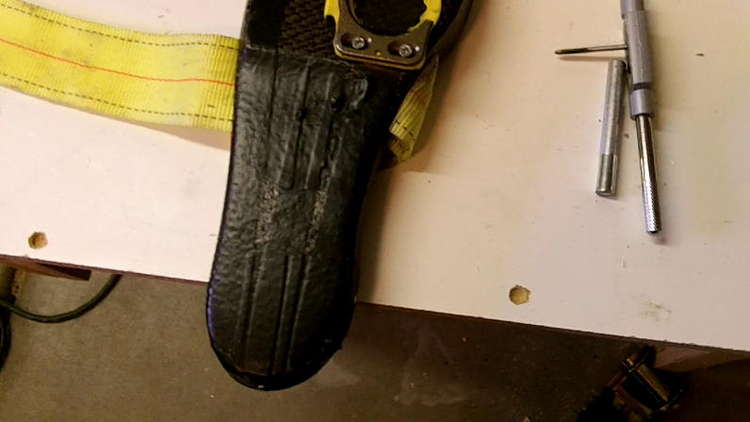
I'm not great at clipping in first thing on the bike so I need to pedal a couple of times before I clip in. The first time I tried it with these platforms I couldn't get a down stroke because they were too slick and slipped right of the pedal. I decided to add electrical tape to the bottom of the platform which gave me plenty of grip on the pedal. I will eventually strip the tape off and add a coating of Rhino Lining, or something similar, to the bottom of the platforms.
Finally Finished!
After a crazy night I finished the pedals and was able to use them in the triathlon. They worked like I wanted them too and was grateful to have them. I didn't experience any pain in my leg while riding which was a good sign, although my leg was still sore the next few days after. It could have been from all the Advil I took before the race, but I think these are helping out.
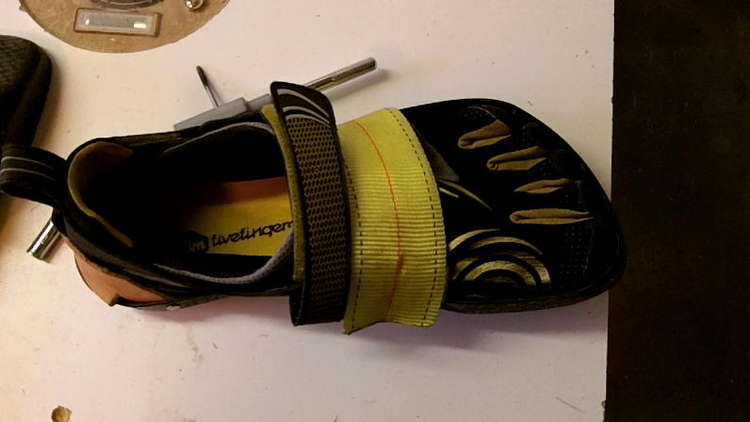
You can see how snug these shoe fit into the platform- Exactly what I was aiming at.
Final Thoughts About the Platforms
So was this project worth the time and effort?
Well it's hard to say there are definitely some benefits and dis-benefits so I'll let you decide. Here are the pros and cons from my view.
Pros
- Allows you to wear "certain" Vibram Five Fingers with your bike- Like the Komodo Sport and Bikila however my sprints are too wide.
- Eliminates foot "squishing or scrunching" like you experience with normal cycling shoes, which are narrow.
- Great riding characteristics.
- Very comfortable.
- Not too hard to get in and out of.
Cons
- Heavier than most cycling shoes- because you are wearing another shoe with them.
- Cost to benefit ratio- because of the material cost and time spent on the build, the platforms may not have been worth it. It definitely would have been easier to buy a cycling shoe and it really wouldn't have cost much more.
In all, it was a quick and fun project. If you have any questions let me know.
And if you'd like, leave me a comment below.